Recipe: Turkish Poğaças, stuffed savory dinner pastries
Tyrant Farms' articles are created by real people with real experience. Our articles are free and supported by readers like you, which is why there are ads on our site. Please consider buying (or gifting) our books about raising ducks and raising geese. Also, when you buy through links on our site, we may earn an affiliate commission. Learn more
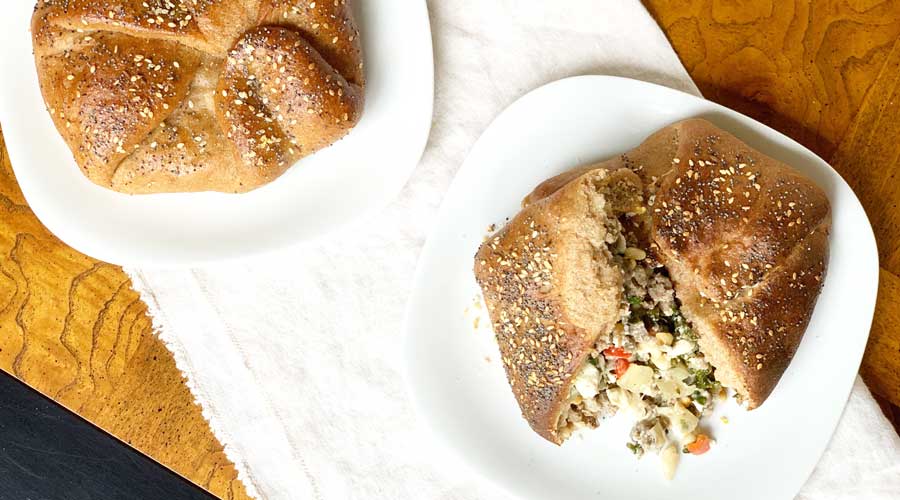
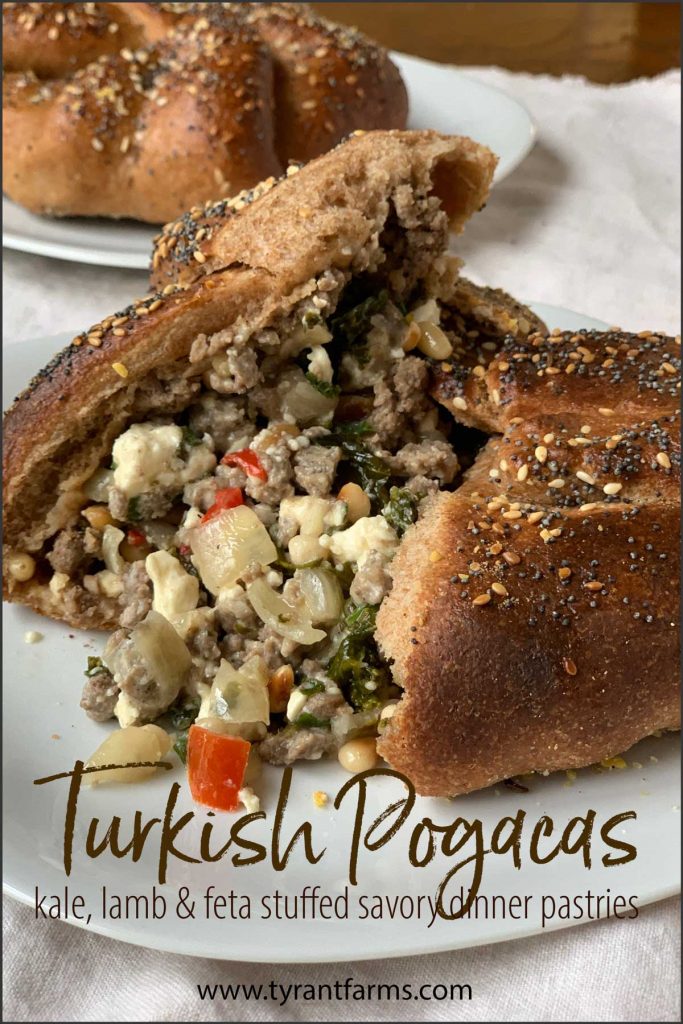
Poğaças are a delicious Turkish pastry stuffed with ground lamb, veggies, feta cheese, and fresh herbs. Here’s our spin on this classic recipe that you can make either in a wood-fired cob oven or an indoor conventional oven.
Years back, The Tyrant and I were shopping at Swamp Rabbit Cafe & Grocery here in Greenville. They’re a local grocery/cafe that sells lots of locally-sourced and organic produce and meats.
Mary, one of the co-owners, is a delightful young lady from Turkey. The influence of her Turkish heritage can be seen in little touches on the cafe’s menu.
On the chalkboard menu, one of the cafe’s items was meat or vegetarian poğaças. The Tyrant and I had never heard of such a thing, nor did we know how to pronounce this strange new word. We could see into the glass display and tell that they were some sort of savory baked pastry.
“What’s a poe-ga-kas?” I asked. The cafe waiter smiled and used his insider knowledge to inform us that the word was pronounced “pu-wa-cha” or, spoken quickly, “pwa-cha.”
“It’s a delicious savory pastry from Turkey that Mary wanted us to offer in the cafe.” Always interested to try a new food, the Tyrant and I were soon sitting at a table chowing down on our first-ever poğaças. We were hooked. Pastry on the outside, savory goodness on the inside.
“We should make these at home in our wood-fired cob oven,” The Tyrant exclaimed between bites. And now here we are…
No, you don’t have to have a wood-fired cob oven to make this recipe
While we made these poğaças in our wood-fired cob oven, you do NOT have to have a cob oven to make this recipe.
A conventional oven will work just fine. However, we won’t lie to you and tell you that anything you make in a gas or electric oven will come close to tasting as good as it would if you make it in a wood-fired oven. It won’t!

How to make poğaças: step-by-step
This is a relatively advanced recipe, so we want to make sure you have some step-by-step process photos to help you along the way, especially on the bread/pastry side of things…
First, a few differences between our recipe and more traditional poğaça recipes:
- We used a 50-50 mix of grass-fed beef and lamb, rather than 100% lamb. The Tyrant is pregnant and 100% lamb was too intense of a taste for her at the moment due to peculiar flavor aversions. You can use 100% lamb if you’d prefer.
- We used milk kefir rather than yogurt when making the dough. Milk kefir is a far better probiotic than yogurt and we always have a couple jars of it in our kitchen.
- We avoid highly processed/refined foods. Thus, we used 100% organic stone ground whole wheat flour for this recipe, rather than white flour or pastry flour. We do a lot of baking, so to save money on really high quality flour, we buy bulk 20 pound bags from Great River Organic Milling.
You’re basically making two recipes, then combining & baking them to perfection via four distinct steps:
- Making the poğaça filling.
- Making the poğaça pastry/bread dough.
- Stuffing the dough with the filling.
- Baking the poğaça in your cob or conventional oven.
Step 1: Make the poğaça filling.
If you have a garden, use it — and be creative! For instance, when making this round of poğaças, we used:
- sweet heirloom red peppers from our garden;
- soft green garlic chive seeds (these are a flavor-packed delicacy that are perfect about a week after the flowers have dropped but before the seed matures and hardens/dries);
- cured hardneck garlic;
- fresh rosemary rather than dried.
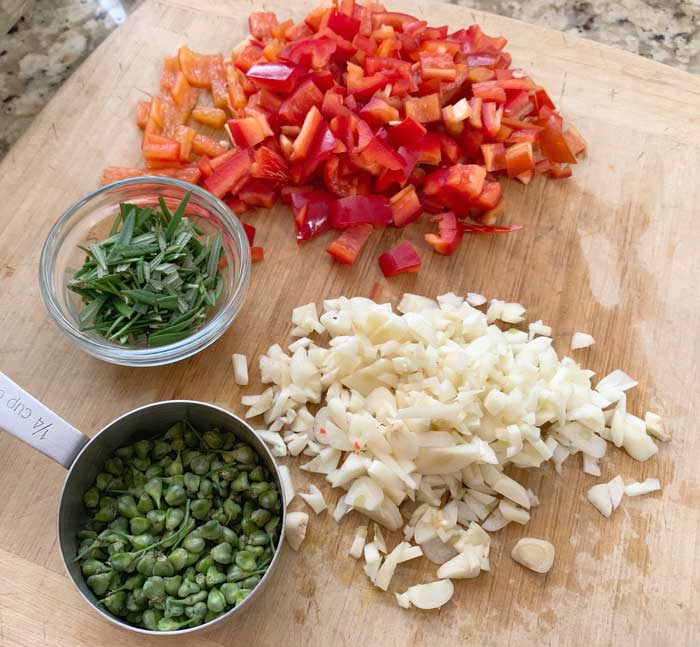
While you can certainly make excellent poğaças using dried herbs and store-bought ingredients, fresh herbs and unusual garden produce takes things up a notch or three.
Following the instructions in the recipe card at the bottom of this article, you’ll want to cook the filling first, then let it come together and cool down before stuffing the dough. If you want to, you can make the filling a day ahead and stick it in the fridge – or you can make it the same day as the dough, then let it come to room temperature like we did.

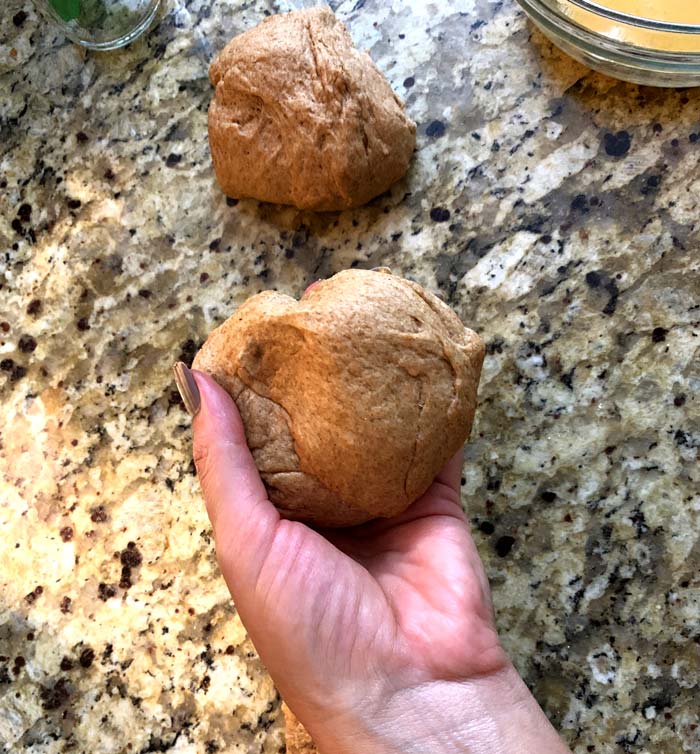
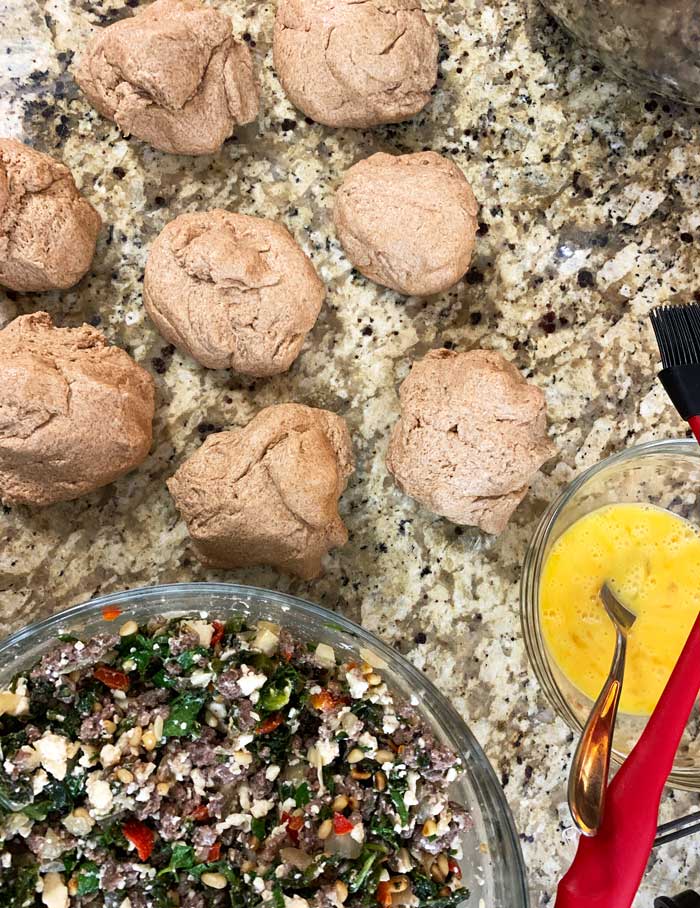
Step 2: Make the poğaça dough.
As mentioned previously, we used organic stone ground, whole wheat bread flour for this recipe. Every type of flour is a little different, so if you’re using white flour, pastry flour, or even a different brand of flour, you might need to do a bit of ingredient improvisation to get to the ideal final dough consistency.
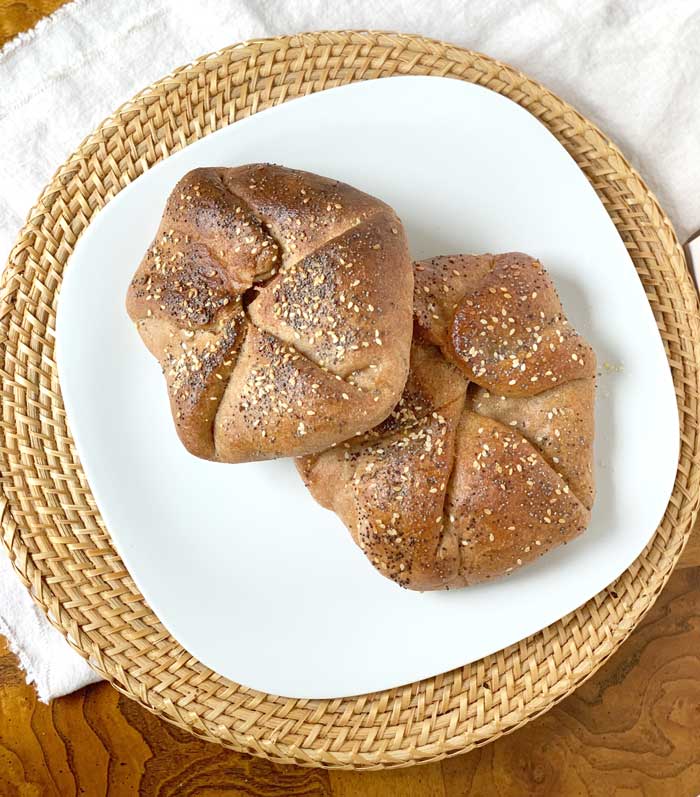
Our recipe produces a bread-like covering with a nice, crusty surface.
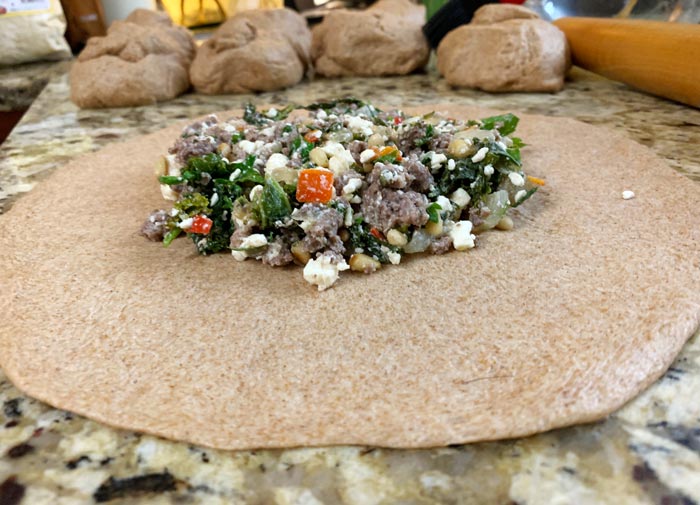
Step 3: Shape and stuff the dough with the filling.
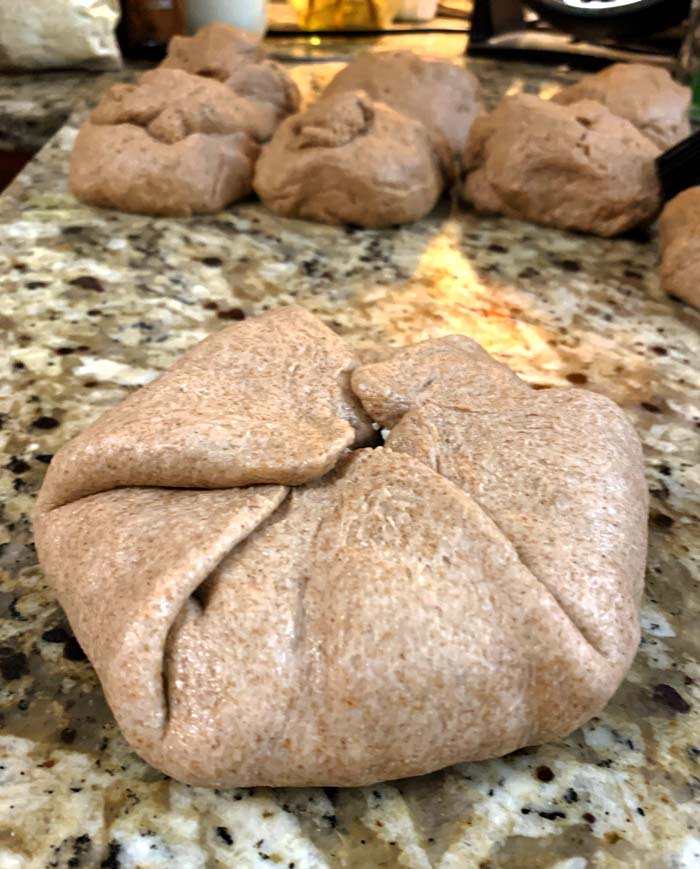
How do you fold a poğaça?
Here’s a quick video of The Tyrant doing it with one hand! (I was outside tending the cob oven.)
Step 4: Bake poğaças (in a conventional indoor oven or outdoor wood-fired cob oven).
If you’re using a conventional oven, just skip this section and go right to the recipe card. If you’re baking this recipe in a cob oven, read on!
We’ve done quite a bit of cooking in our wood-fired cob oven over the years, and have developed some of our own unique prep/cooking methods that we find to work better than what we’ve seen recommended elsewhere.
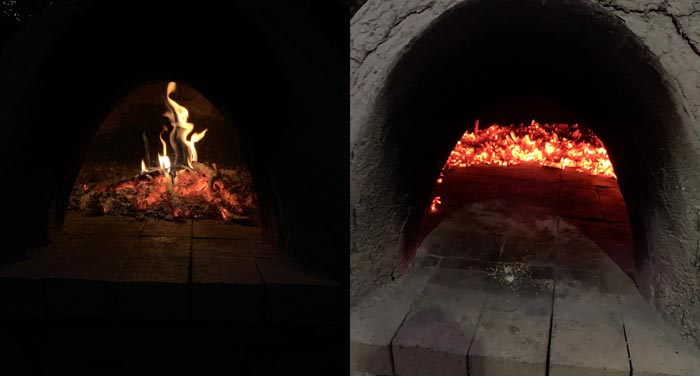
Warmup fire
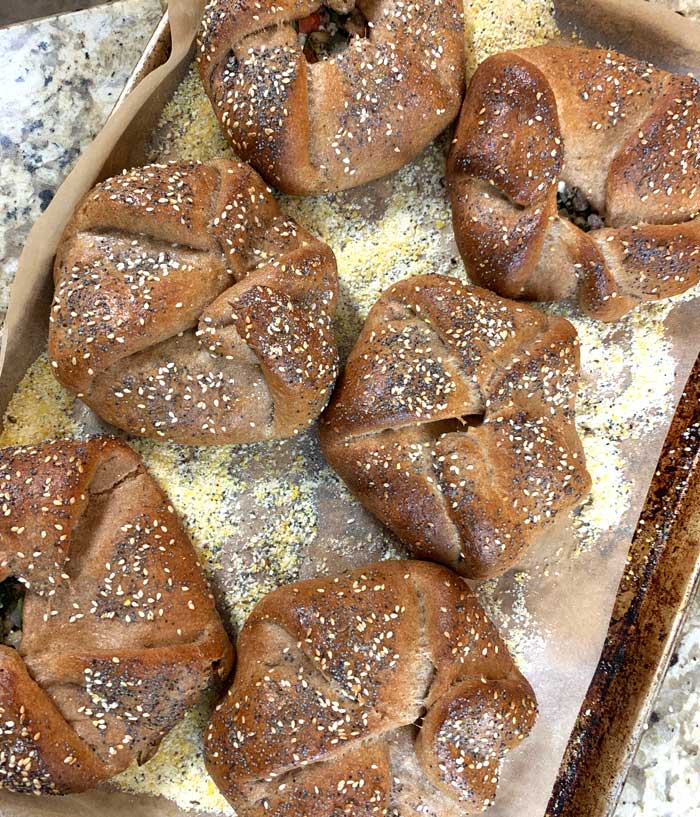
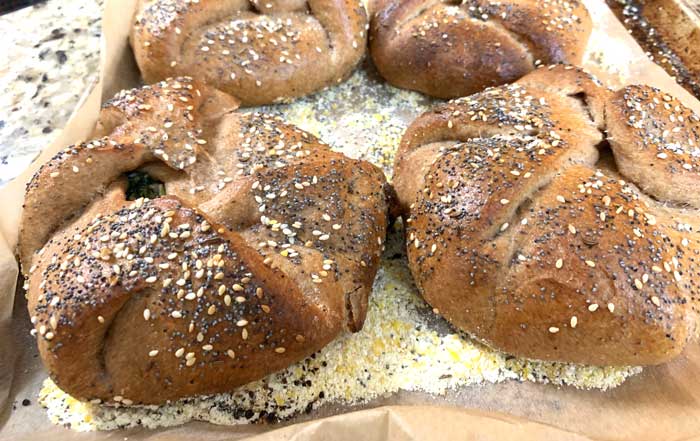
For instance, unless we’re doing a large bake with lots of different dishes being cooked over several hours, we don’t do a 3+ hour warmup that’s often recommended. For this recipe, we did a warmup with a small fire over 1.5 hours, which ultimately produced 4 large and 6 smaller poğaças.
Before cooking, we scraped the coals to the back and sides of the oven (see below), put the water-soaked door on the oven mouth with a slight crack to let smoke out, then gave the fire brick surface about 5 minutes to cool down before we started baking.
The total cook time for three rounds of poğaças was about 20 minutes – about 5 minutes for each round of poğaças with a ~2 minute transition between each round to remove and replace poğaças. Yes, this is WAY faster cook time than a conventional oven due to the cob oven’s extreme heat + the combination of convection, radiation, and conduction.
Using the coals
Rather than pulling all the coals and fire out of the cob oven before cooking (which is often recommended), we instead push the coals/fire to the back and outside walls of the oven using a metal hoe.
This does three things:
- helps better maintain internal heat;
- reduces wood needs (we use wood we trim from our fruit trees in late winter);
- allows us to quickly get a fire going again if needed.
This method does mean that you’ll need to periodically turn whatever items you place in the oven so as not to char one side of them, since more heat is coming from the direction of the coals than from the mouth of the oven. We do keep the water-soaked door on — and slightly cracked — while baking to trap heat but release any smoke.
I had an oven mitt over my hand and a large metal spatula in order to place each poğaças inside the 600+ degree oven without also cooking my hand!
Poğaças, Round 1:
We started with four large poğaças placed two-deep in the cob oven.
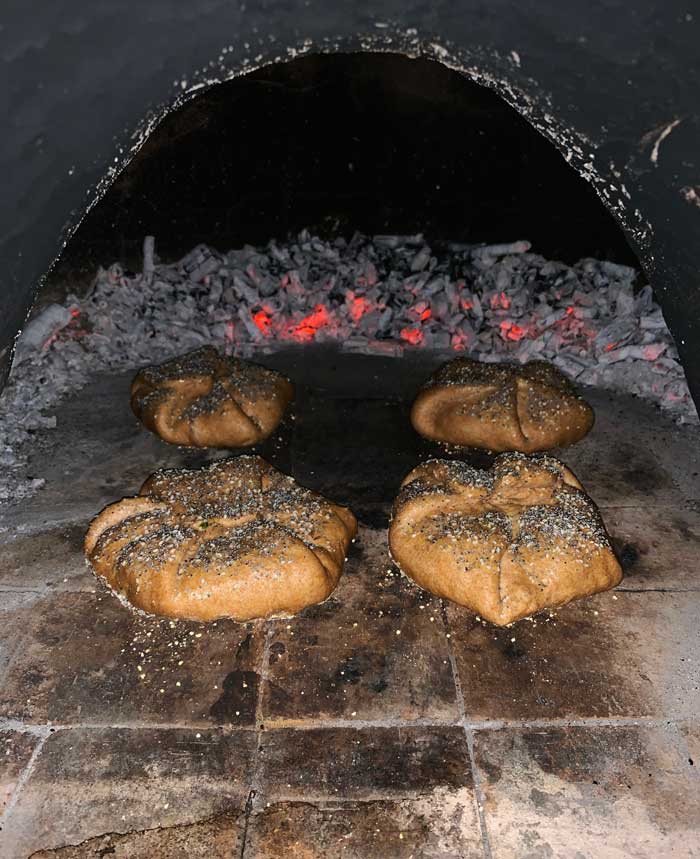
This didn’t work too well, since it made it hard to turn and move the back poğaças to the front and vice versa. The first round ended up with two of the four poğaças getting a bit charred on the side that started out facing the coals.
Lesson learned!
Poğaças, Rounds 2-3:
For the six smaller poğaças, we placed them three across, rather than two deep.
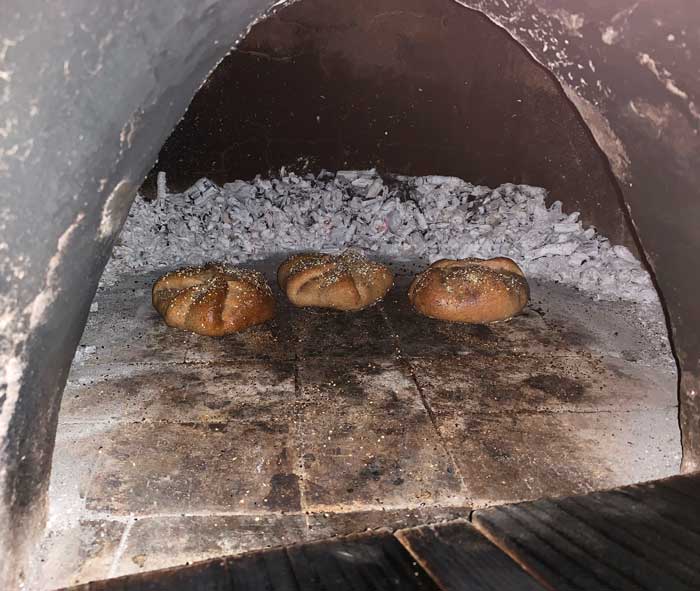
After a couple minutes, we’d open the door, and use my oven mitt + metal spatula to turn the outside of the poğaças towards the inside facing the coals.
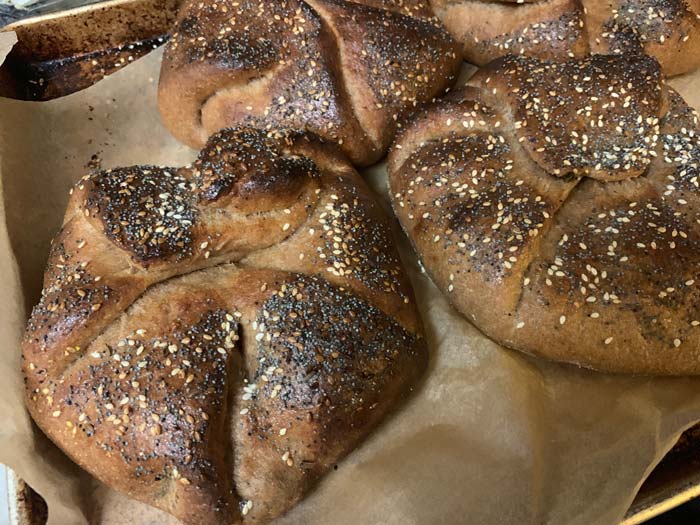
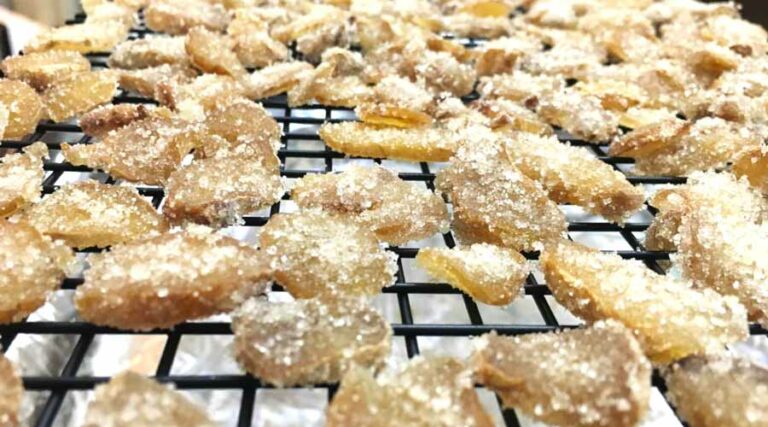
This worked perfectly, creating a nice even golden brown caramelized crust over the entire surface of the poğaças. Woohoo!
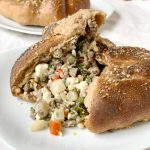
How did the poğaças turn out?
Some meals just don’t have adequate adjectives to describe how delicious and satisfying they are. These wood-fired poğaças fall into that category.

The only complaint we have is that we didn’t have family or friends over to enjoy them with us since we made them on a whim relatively late on a Sunday evening. Next time!
One large poğaças was slightly more than I could eat and one smaller one was slightly more than The Tyrant could eat. Granted, we had a heaping side of veggies, plus we were saving room for a guava ice cream we made using our homegrown Peruvian white guavas – ice cream recipe coming soon!
Poğaças (made in a wood-fired or conventional oven)
Ingredients
For the filling
- 1 lb grass-fed/finished ground lamb
- 1 lb grass-fed/finished ground beef
- 1 lb organic feta cheese, smashed into small bits
- 1 large yellow onion, diced (about 3 cups)
- 5 cups packed chopped kale
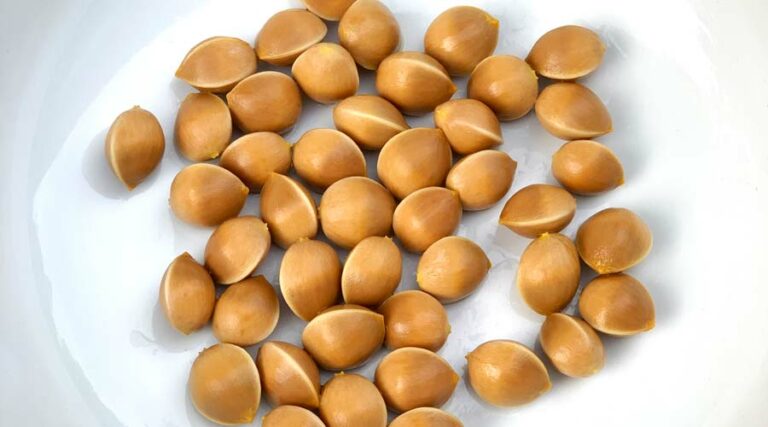
- 1 cup pine nuts toasted over medium-low heat in pan to toast before adding
- 1 cup diced sweet red pepper
- 1/4 cup fresh parsley, diced
- 2 Tbsp soft green chive seeds (optional)
- 1 clove garlic, diced
- 1.5 Tbsp fresh rosemary, diced
- 4 Tbsp extra virgin olive oil
- 1 tsp pink sea salt
- 1 tsp ground black pepper
For the dough
- 2 1/4 tsp salt
- 2 tsp baking powder
- 2 cups water
- 1 cup grapeseed oil
- 1 cup kefir or yogurt
- 6 cups organic stone ground whole wheat flour
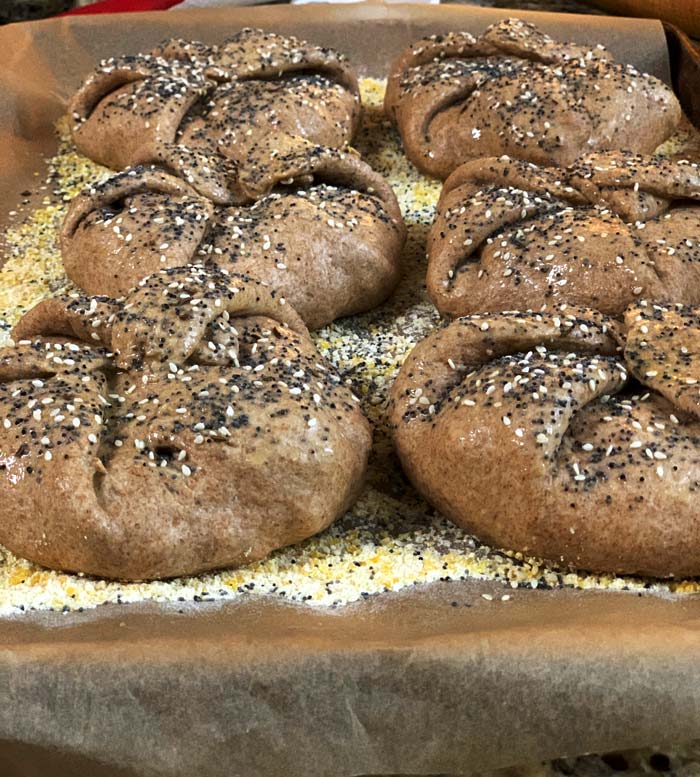
- 4 tbsp nigella, black sesame, poppy, caraway or sesame seeds for top
- 1 egg (beaten) for eggwash on top
- 2 1/4 tsp active dry yeast
Instructions
For the filling
- Prep and dice all veggies and herbs. Due to the volume of ingredients relative to the size of our cast iron pans, we cooked the veggies separately from the meat, then combined all ingredients in a bowl at the end.
- Put olive oil in pan over medium low heat (4 on our stovetop). Add onions, peppers and cook until onions are translucent, stirring occasionally.
- Add all other veggies and herbs + salt and pepper. Stir and cook for about 10 minutes until all ingredients are cooked and kale is wilted. Remove from heat and place in bowl.
- Cook meat over medium low heat until completely done. We removed 1/2 cup of liquified fat from the pan at the end to make sure the poğaças didn't get too soggy. Depending on the fat content of your meat and your taste preferences, you may not want to remove any fat.
- Add cooked meat to cooked veggies and stir together. Add crumbled feta cheese and stir together. Toast cup of pine nuts in sauce pan over medium low heat stirring constantly until slightly toasted on the outside (about five minutes). Add pine nuts to rest of stuffing and stir to incorporate. Taste the filling to make sure it's adequately salted to your liking.
For making the dough and stuffing poğaças:
- Proof the yeast in 2 cups warm water (about 100F).
- Combine all dry ingredients and mix together.
- Add all wet ingredients (oil, yeast + water, yogurt or kefir). Mix together.
- Let it rise for ~1hour. This is a good time to make the stuffing!
- Once bread has doubled in size, form into balls a little larger than the size of a baseball. This recipe should yield 10-12 balls.
- Roll out each ball and stuff with about 1 cup of filling each. Use egg wash to hold the flaps in place. You'll also want to brush some egg over the top of the Pogacas before putting in the oven. See photos, video, and instructions in article for more details and tips.
For baking:
- See instructions and tips in the article if cooking in a wood-fired cob oven.
- If cooking in a conventional gas or electric oven, preheat oven to 350F and cook poğaças until crust is golden brown on the outside, about 30 minutes.
Whether you make this delicious savory poğaça recipe in a wood-fired cob oven or a conventional oven, you’re going to LOVE it! Thanks to Mary at Swamp Rabbit Cafe for originally introducing us to poğaças years back.
They’ve now become a treasured part of our culinary repertoire as well.
KIGI,

I’m in the middle of making a half batch of pogacas for the first time (there are only two of us). I’m finding a couple of items lacking in the instructions:
1- the list of ingredients doesn’t include any yeast and yet the instructions say to “Proof the yeast in 2 cups warm water (about 100F). ” and do not mention the use of baking powder.
2- the instructions do not mention the egg wash (only in the video.
It would be helpful to make these corrections so that the ingredient list, the instructions and the video all say the same thing. Thank you for the recipe! I look forward to serving (and eating( them for dinner! I love Turkish food!
Oops! Sorry about those oversights, Kathleen! We’ll add those edits asap. Hope you enjoyed your pogacas!