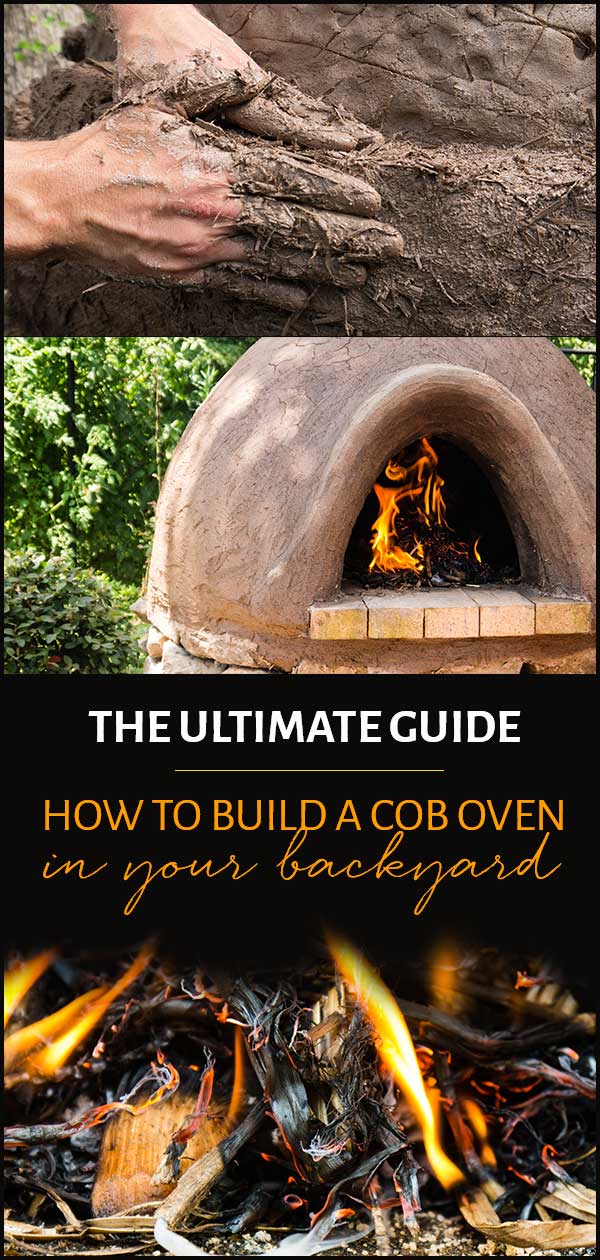
How To Build a Wood-Fired Oven with Cob

Tyrant Farms' articles are created by real people with real experience. Our articles are free and supported by readers like you, which is why there are ads on our site. Please consider buying (or gifting) our books about raising ducks and raising geese. Also, when you buy through links on our site, we may earn an affiliate commission. Learn more
Want to make your own wood-fired cob oven? Here’s a detailed step-by-step guide showing you how to make your own cob oven.
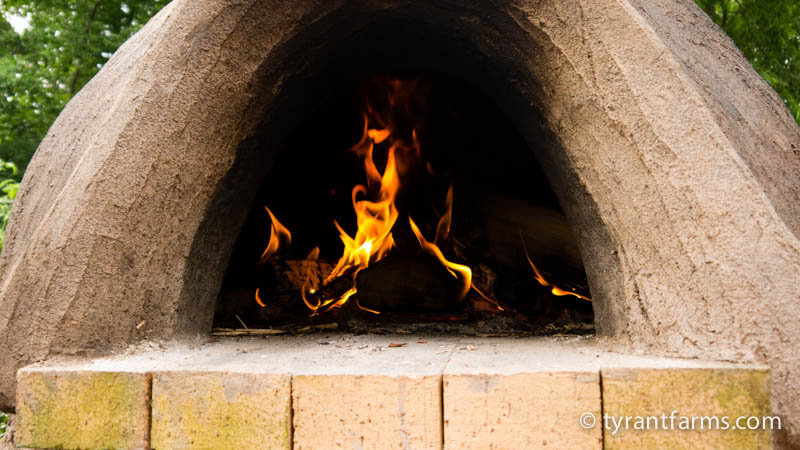
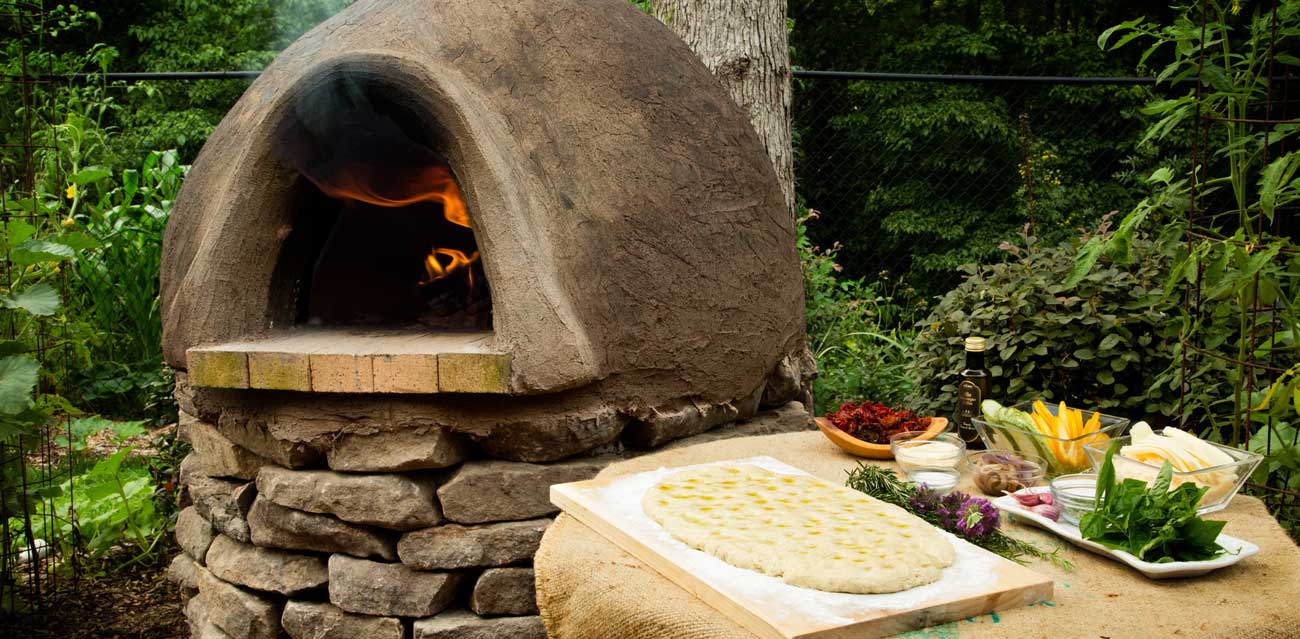
Newly risen loaves of bread dough, stuffed heirloom pumpkins, blueberry cobbler, uncooked homemade pizzas and a giant pot of venison stew are all lined up on an outdoor table, ready to enter the scorching hot, labyrinthine interior of the wood-fired oven. The baker removes a rounded, water-soaked wooden cooking door, and throws a pinch of flour on the fire brick floor of the oven to check the interior temperature. The flour quickly blackens, sending up a small puff of smoke.
“Still too hot, probably about 900 degrees,” she says.
No, this is not a first-hand account from a rustic French restaurant overlooking the Mediterranean Sea. It’s taking place in our back yard in Greenville, South Carolina.
Thanks to a strange mélange of friends, internet contacts, and experimentation, we managed to hand-build—or perhaps more accurately “foot-build”—the perfect wood-fired oven.
Ours is no ordinary wood-fired oven, mind you. It’s a “cob” oven made from natural materials that are ubiquitous virtually anywhere in the world: clay, stone, sand and straw.
And we want to teach you how to make a wood-fired oven so you can enjoy the best food and dining experience you’ve ever had without even having to leave home!
What the heck Is “cob”?
“Cob” is the English term for “mud building.” Cob was the primary method of home construction throughout England from the 13th Century until around 1800, when bricks became more economical.
Among its many attributes, cob provides excellent insulating properties and durability. In fact, many cob homes in England are still occupied and in perfect working order many hundreds of years after they were originally constructed.

The English didn’t invent cob, however. Like many other cultures around the world, they borrowed the technology. Earthen building construction using clay, straw and other natural materials was used as far back as 8,000 BCE, in what is now modern-day Jericho.
Over the millennia, cob construction has also been utilized by virtually every culture around the world for every construction need imaginable. Perhaps the best known of these cultures here in the US is the Native American Pueblo people who have inhabited the southwest for thousands of years. Their massive, complex “adobe” structures were built using mud, grass and wood. A single adobe building was large enough to provide homes for many hundreds of people who lived together as a village unit.

So you’ll be borrowing thousands of years of knowledge and building techniques when you build your cob oven.
Four tips BEFORE making your wood-fired cob oven…
1. Suggested cob oven/earthen oven reading:
In addition to this how to build a cob oven guide, we also suggest reading a really helpful book that goes into a lot more detail than we can manage in a single article: Build Your Own Earth Oven by Kiko Denzer and Hannah Field.
Throughout our cob oven construction, the majority of our conversations contained sentences prefaced with “Kiko said (fill in the blank).” In our opinion, the book could be better organized, but the information and photo inspiration is phenomenal.
2. No two cob ovens are the same.
There is not one single “right” way to build a cob oven, especially as it relates to the more artistic design aspects of the oven. There are certain fundamental features that you do want to be precise on, and we’ll make note of those in our how-to section.
But go wild and be creative on the artistic aspects of your cob oven!
3. Be thrifty… or not?
95% of the construction materials needed for a cob oven can be found for free if you’re willing to put in the time and effort to source them. Since we had limited time and no pickup truck, we decided to have our supplies dropped right in our driveway by our local Landscapers Supply.
Consider your resources and which approach you want to take before getting started.
4. What type of clay works on a cob oven?
There’s a pretty good chance you can find or dig up free clay in your area if you know where to look (maybe right under the topsoil in your yard). After all, Native Americans across the entire US made high quality clay pottery.
However, the absolute best clay for making cob is pure potters’ clay. Potters and potting studios make a handy resource for anyone interested in building a cob oven, since they may be willing to give you the leftover clay scraps for free or for a small tip. (If not, you can buy your own, just like they do.)
Step-by-step: How to make a wood-fired oven using cob
Step 1: Choose the location of your cob oven
Before starting construction on a cob oven, it’s important to figure out where you want your cob oven to be located.
Here are three things to consider when choosing the location of your cob oven:
a. Convenient & attractive
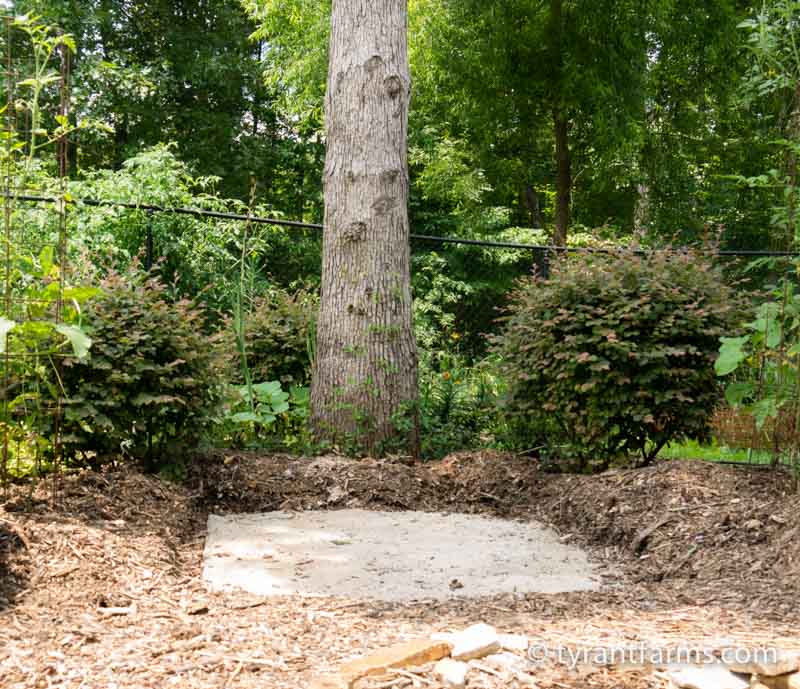
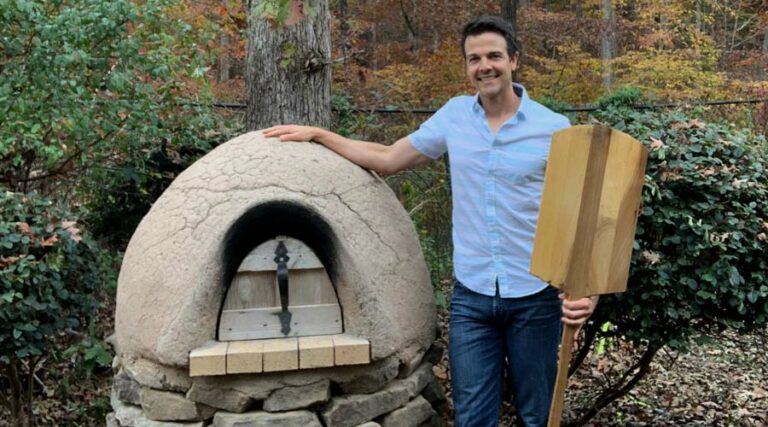
We picked a spot about 10′ from our back door underneath a big white oak tree and right near our back porch where we have an outdoor dining table. We didn’t want to have to walk too far from our house to our oven, and we wanted a spot where the oven would be visually attractive in our landscape.
b. Safety
It’s also really important to consider that smoke and air heated to close to 1000°F will be emitted out and up from the front lip of your oven. So do NOT position your cob oven under low-hanging branches, a back porch, or anything else that could be damaged or catch on fire while you’re cooking.
Do note that a well-built cob oven’s amazing insulating properties mean you can put your bare hands on the outside of the oven when it’s cranking at full blast – the only dangerous heat is emitted out of the top of the open door.
c. Buried plumbing or electrical wiring
When choosing your spot, also keep in mind that you’re going to be pouring a concrete pad there (although it won’t be visible after you’re all done). So don’t put your cob oven on top of spots where there’s underground plumbing or electrical wiring that you may need to get to.
Step 2: Decide on rough dimensions of your cob oven
We wanted a wood-fired cob oven that we didn’t have to stoop down to reach into while cooking. So we planned for the top of the fire brick-floor of the oven to be about waist-high.
While that meant more materials were needed relative to a lower stove, it’s so much easier to use our cob oven while cooking, which was a more important consideration for us.
According to cob oven experts, there are four key mathematical ratios involved in cob oven construction that help ensure that the fire burns well and heats the floor, walls, and ceiling efficiently and evenly:
1. The smallest cob oven interior size that we’ve heard of is 16” (floor diameter). Any smaller, and you won’t have good heating or a large enough cooking surface.
2. The interior ceiling height should be around 75% of the interior oven floor’s diameter, and the door height should be about 63% of the ceiling height. For example, a cob oven with a 42” finished interior floor diameter would ideally have a 32 ¼” ceiling height and a 20 ¼” tall door opening.
3. In the book Build Your Own Earth Oven by Kiko Denzer and Hannah Field, the authors mention that the interior ceiling height should not go over 16,” but we’ve seen and heard of other ovens that break this rule. That’s why we decided on a final ceiling height of 19 ¼” – and our cob oven has heated and worked perfectly well for many years.
4. The width across the base of our cob oven door opening is 15″. That’s a great width to allow a pizza peal or a baking sheet to slide in, while still leaving a bit of wiggle room.
Step 3: Source your materials
If you want to build a close replica of our cob oven, here are the materials you’ll need:
- 1 pallet of rocks or urbanite (go select attractive rocks that match your design aesthetic)
- concrete for footer (ask person at home improvement store to get you enough concrete + rebar for a 62″ x 62″ slab that is 6″ thick)
- 60 lb bag of mortar to hold the rocks in place (you’ll mix this and scrape it on the back inside of the rocks with a trowel as you build the foundation)
- 1 scoop or truck bed full of masonry or building sand to fill the interior of the oven, make your sand “dome,” and mix into your clay (do NOT use soil; sand has certain needed insulating properties)
- 1/2 scoop or half truck bed full of course gravel or limestone
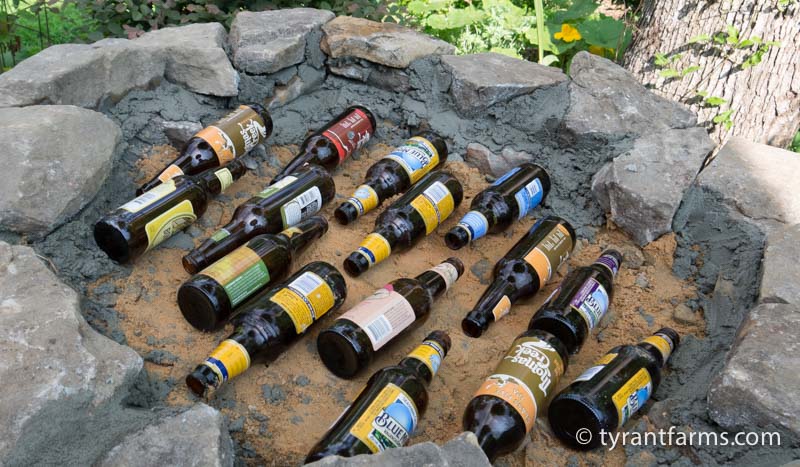
- ~50 empty beer bottles (for the insulating/heat storage layer beneath the oven floor)
- Clay – this is more difficult to tell you precisely how much to use. Dry powder clay and wet clay are different weights. We had two large tupperwares full of dried clay scraps from an old pottery studio that we had to reconstitute with water. Err on the side of getting more clay than you think you need, so you don’t run out mid-project.
- 3 bales of straw for stomping into cob
- fire bricks – for our sized oven (50″ exterior diameter), we used somewhere around 30 fire bricks – smaller ovens will need less bricks, larger ovens will need more (do not use regular bricks as they will not stand up to the intense heat of a cob oven)
- *optional – if you don’t want to have to keep your cob oven covered with plastic when you’re not using it, you’ll need to plan to apply a final lime/clay mixture coating on the outside of the oven to protect it from the elements.
If you don’t have a truck to find or transport rocks, sand, gravel, straw, etc on your own, a local landscape supply store can drop all the materials at your home.
Step 4: Dig & make the footing
You don’t want your cob oven to settle too much, which could cause it to become unstable. Dig about 8” inches *below ground and either: a) pour a 4-6” thick concrete footer, or b) put in 6” of packed sand and gravel. Don’t worry about your footing being “pretty” since it will be a few inches below ground when you’re all done.
*We live in Ag Zone 7b, which is moderate/warm – if you live in a colder region, you may want to bury your slab deeper to prevent the slab from cracking when the ground freezes.
We recommend pouring a concrete slab to provide the maximum stability. Our slab is 62″ x 62″ because we wanted it to extend out at least 6″ beyond our oven’s 50″ diameter foundation to provide adequate structural support.
Step 5: Build an Insulated Foundation
It’s crucial to build a solid, well-insulated foundation for your cob oven. As mentioned earlier, don’t build it too close to the ground or you’ll have to bend over to insert and remove food from the oven as you cook. Waist high for the fire brick oven floor is the perfect height, in our opinion.
Plus, if your oven is too short, you risk losing much of your oven’s heat into the ground through absorption. If anything, err on the side of building your foundation too tall and with too much insulating material. You can always add a step up to your oven, but not a step down. Likewise, you can’t add more insulation once your oven is built.
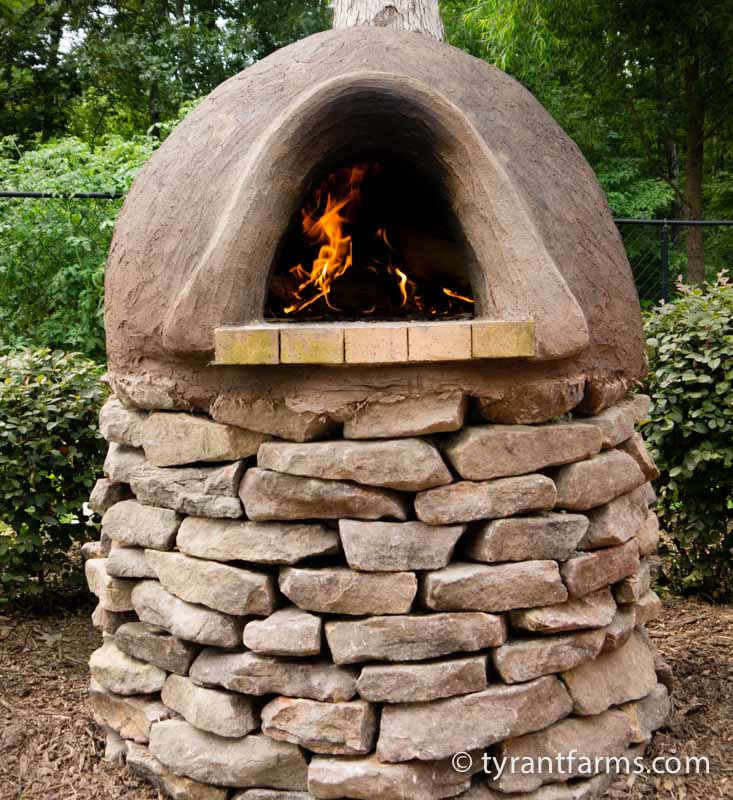
We used “fieldstones” on our cob oven’s outside foundation walls with a bit of mortar on the back helping to hold the stones together. The diameter of our oven’s foundation is 50″.
To add additional structural support, we filled the first 8″ of our foundation with concrete. From there up to the insulation/empty bottle layers, we filled the foundation with a combination of packed sand and crushed granite.
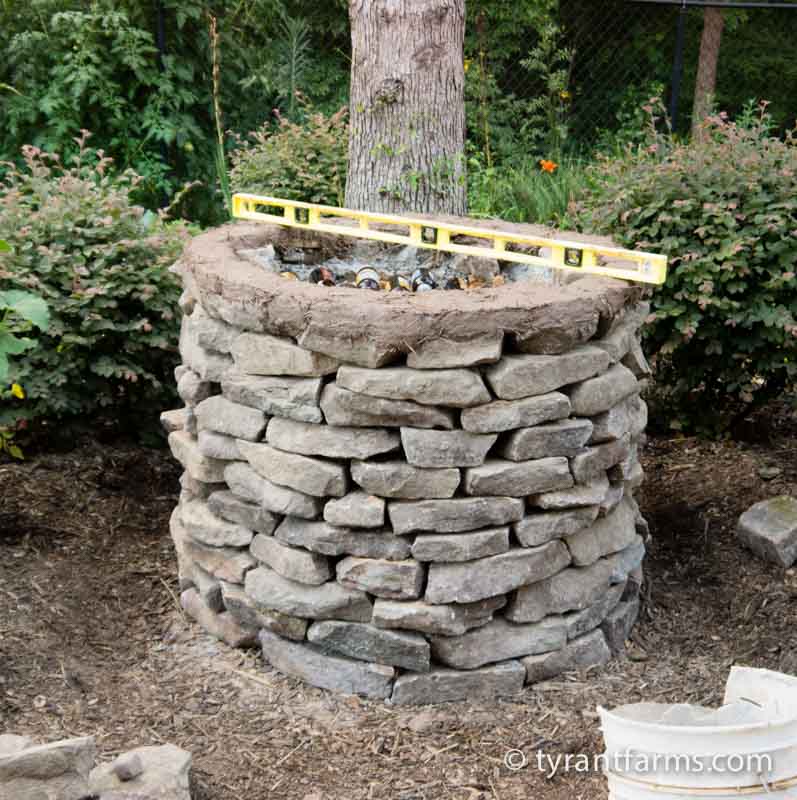
We finished out the top of our foundation with two insulating layers:
- The first insulating layer consisted of two concentric rings of empty beer bottles with sand packed around the bottles.
- The second (top) insulating layer consisted of more beer bottles filled in with a 3” layer of cob.
Step 6: Lay brick oven floor & make sand dome
Add a thin (1” or less) level layer of sand on top of your foundation’s top insulating cob layer. Use a level to make it perfectly flat. This helps ensure that your firebricks are placed on a level, uniform surface.
“Fire bricks” are not like regular bricks or stone. They have a range of heat conducting and moisture absorbing properties that make them the ideal wood-fired cooking surface.
We got our firebricks from a local brick company, but you might be able to find firebricks in a salvage yard or on craigslist. Considering how important fire bricks are to a well-functioning wood-fired oven, this is not something you want to be cheap on: make sure you get fire bricks, not regular bricks.
Start with the “lip” of the oven first, laying five bricks across that stick out over the edge of the foundation (center the third brick). Build back from there, but don’t let your other bricks jut out over the edge of the foundation (see photo below).
Once your fire bricks are laid, it’s time to build a sand dome. The sand dome is a large, half-egg shaped sand castle. It’s the exact dimensions of the interior of your oven and gives you a mold to shape your clay over. You’ll want to use masonry or building sand for this, wetting it as you go so that it sticks together (it helps to occasionally spray the sand pile with water using the “mist” setting on a garden hose sprayer).
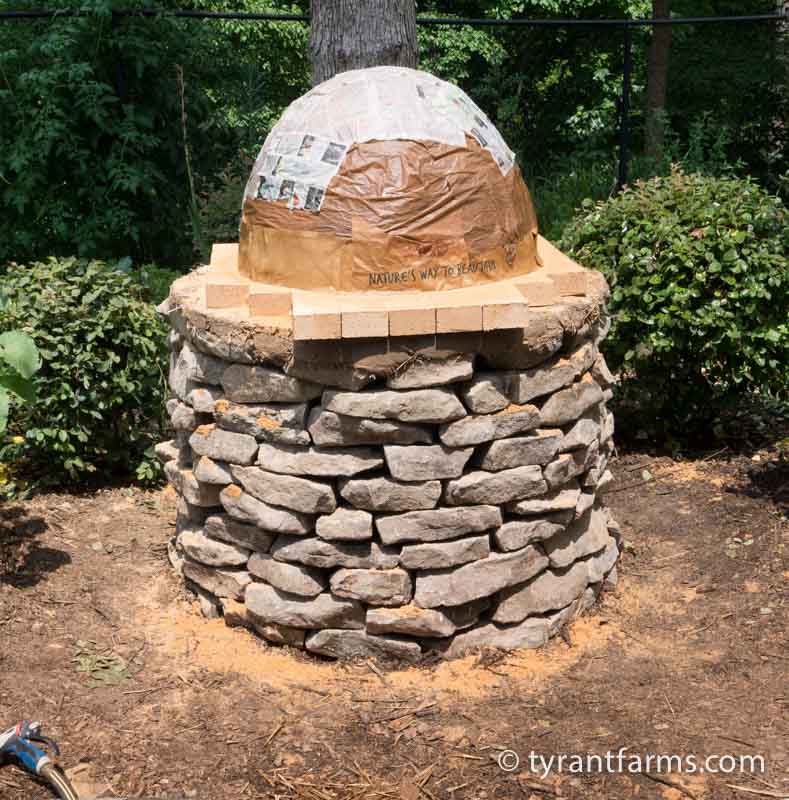
Once the sand dome is piled to the correct dimensions, put a couple layers of damp newspaper and/or paper grocery bags on top of it to keep the sand from sticking to the clay layer that is coming next…
Step 7: Construct oven walls
There are three layers in cob oven walls, from inside to outside:
- clay layer for thermal mass,
- cob layer for insulation, and
- “plaster” layer which beautifies the structure while providing a protective coating.
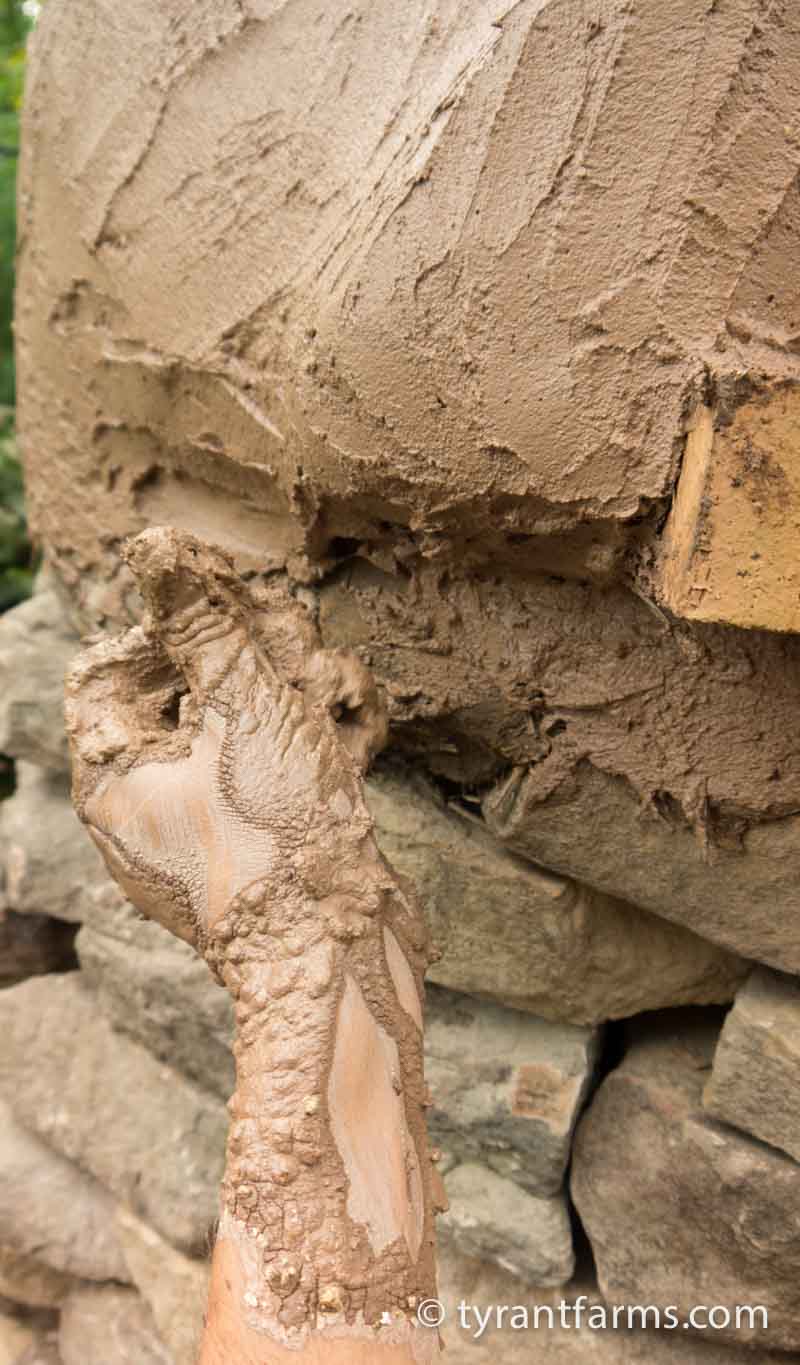
Our first thermal mass layer was a 50/50 clay sand mix (no straw), put on 3” thick over the sand “dome” from the previous step.
Then we added a 3” thick cob layer that started with the clay mixture from our thermal mass layer, but added a 4:1 ratio of straw to thermal mass. Add water and stomp in the straw with a “cob dance,” hopping up and down and squishing your feet back in forth to mix the straw into the mix.
(Side note: If you happen to live in our region at the base of the Appalachian mountains, you can use our local red clay, which we’ve heard has enough sand already in it so that all you have to do is add straw in a 4:1 ratio, with no additional sand needed.)

We didn’t put on our ½” plaster layer until after the next step.
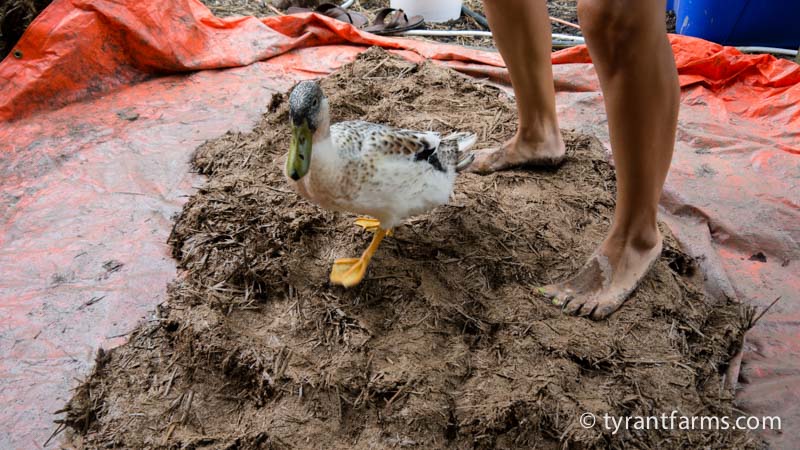
Having extra hands and feet to help you with this step will really help, and make things go faster! HUGE thanks to our friends Ryan Merck, Rachel Vann-King, and Nathaniel Lord for helping us out here!
*IMPORTANT*: When putting on your clay layer, you’ll need to push indentations in the clay walls with your fingers and score it slightly with a trowel or stick before you stop. Before putting on the cob layer, use a hose mister to wet down the clay – this ensures that the clay “accepts” additional layers. If you don’t do this before putting on your cob layer, the dry clay may not stick and will separate and fall off the oven later down the line.

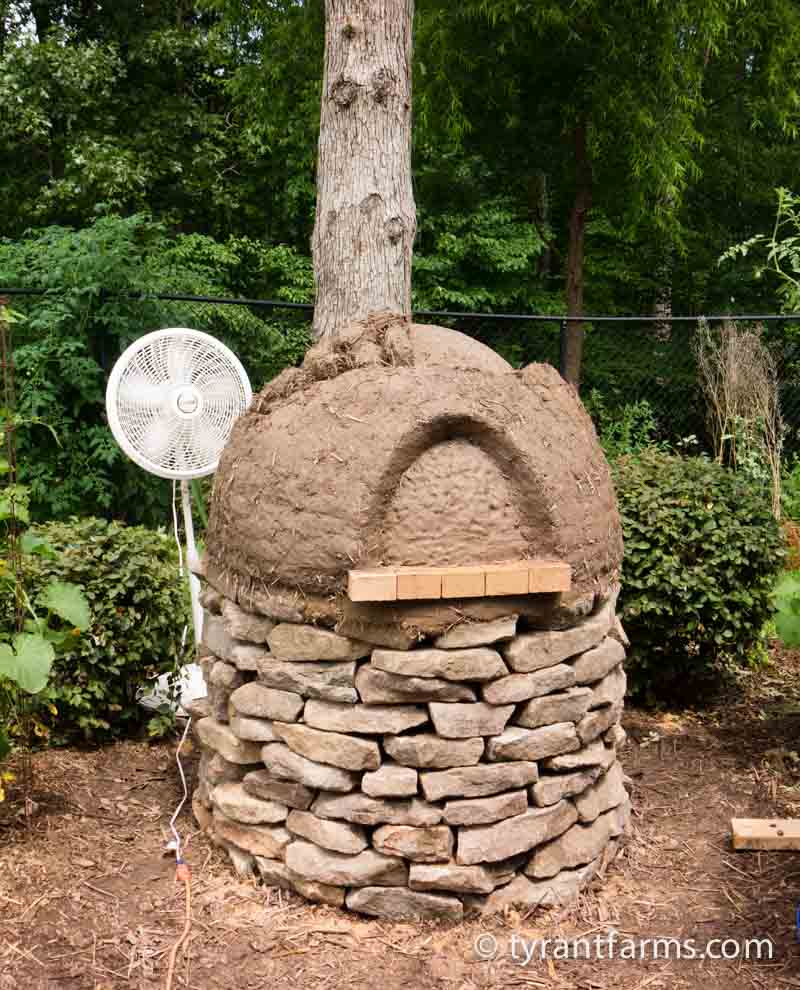
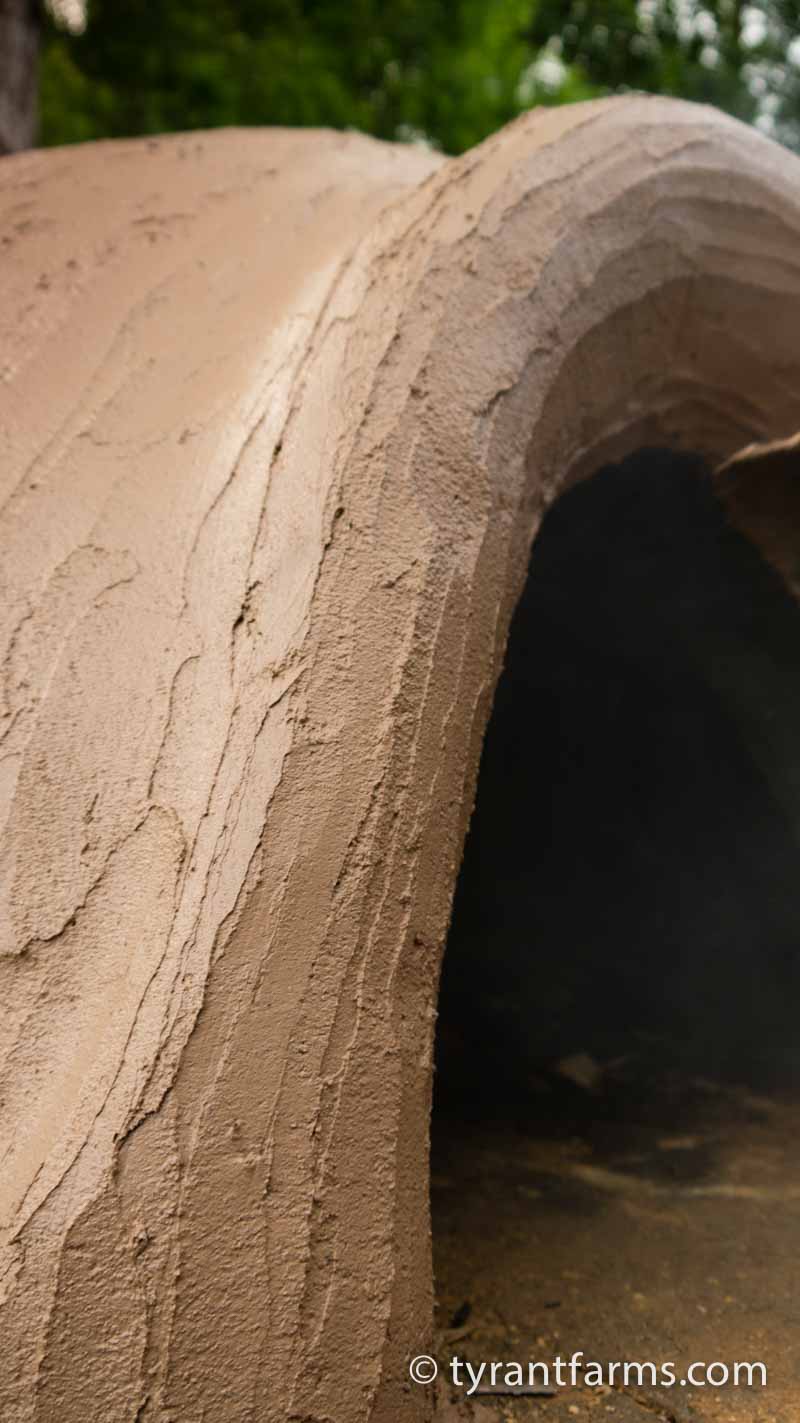
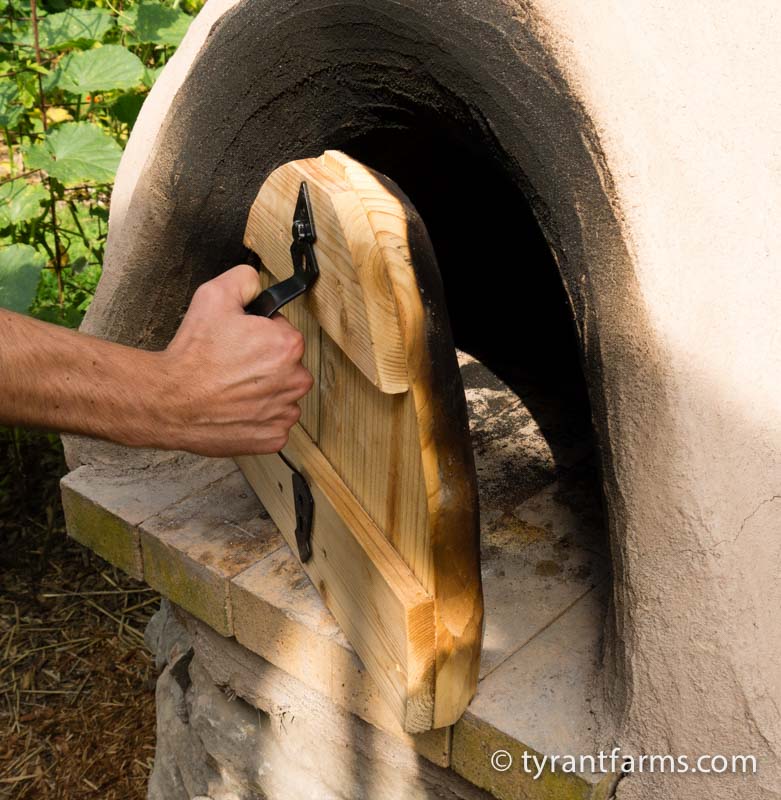
Step 8: Cut door, remove sand, and add plaster
Wait an absolute minimum of 24 hours (some people say wait a few days) after putting on your thermal mass and insulating wall layers before cutting out your door and removing the interior sand and newspaper. If you remove the sand too soon, there is a risk of wall or roof collapse.
Also, if you see cracks or holes in the roof, now is the time to patch it with clay!
Cut and trim your door to the size you want and then plaster the exterior surface of your oven. Some people put their door in first back during step 7 (wrapped in paper so it doesn’t get too muddy), then mold the clay around it. Frankly, this is a good idea, we just forgot to do it in that order!
Determine what you want to use for your plaster layer: earthen materials or lime-based plaster. We used an earthen mixture consisting of brewed coffee (for a darker color), clay & sand slip (for protective qualities) and “wheat paste” (to make the plaster sticky and smoother).
An earthen mixture is not waterproof, so you’ll need to keep your oven covered when it’s not in use. A lime-based plaster layer is waterproof, so you won’t need to keep the oven covered when it’s not in use unless it starts to form cracks (which cob ovens usually do over time due to extreme temps which cause expansion and contraction).
Also be sure to note that the earthen/plaster layer is only for the exterior of the oven, not the interior of the oven.
Step 9: Fire & dry the cob oven
You want to do a series of small test fires long before you do a larger cooking fire.
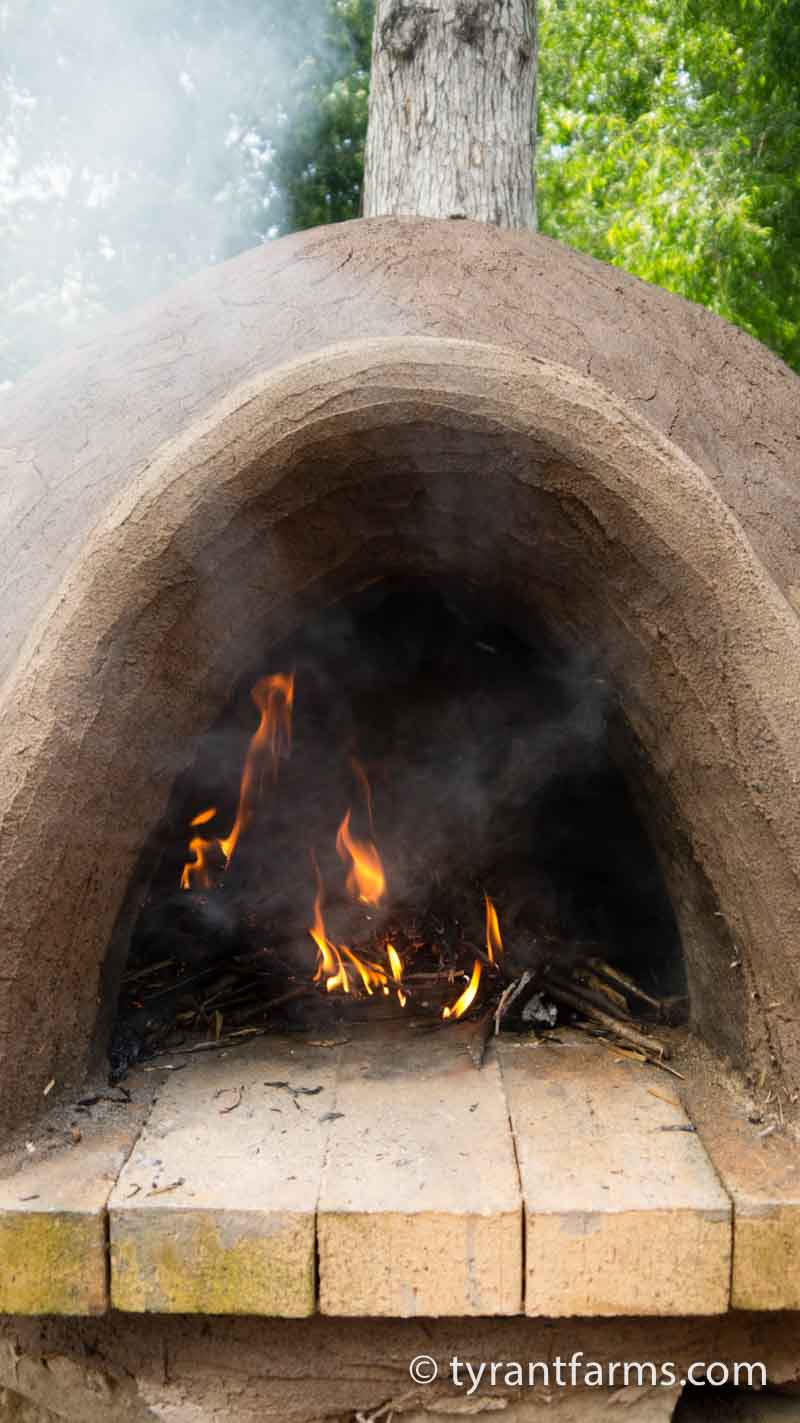
A “small fire” means twigs, small pieces of firewood. No big logs and no roaring fires.
Ideally, you could keep a small fire burning for 1-2 days (at least while you’re awake) when you’re initially drying your oven to ensure that it dries slowly and evenly. A large, hot fire could cause structural damage to your oven.
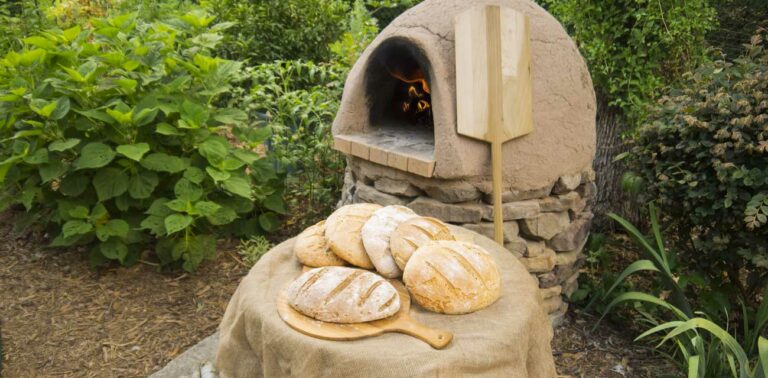
 Now you’re ready to start cooking wood-fired delights in your new cob oven!
A final note on your new wood-fired cob oven
Like a favorite bread recipe, a cob oven is never truly “finished.” Over time and with repeated use, a cob oven’s outer plaster layer will likely need to be touched up as cracks form on its surface. Such cracks are due to a combination of weather and the expansion and contraction that naturally occurs when a material heats from a low temperature to upwards of 1,000°F in just a few hours.
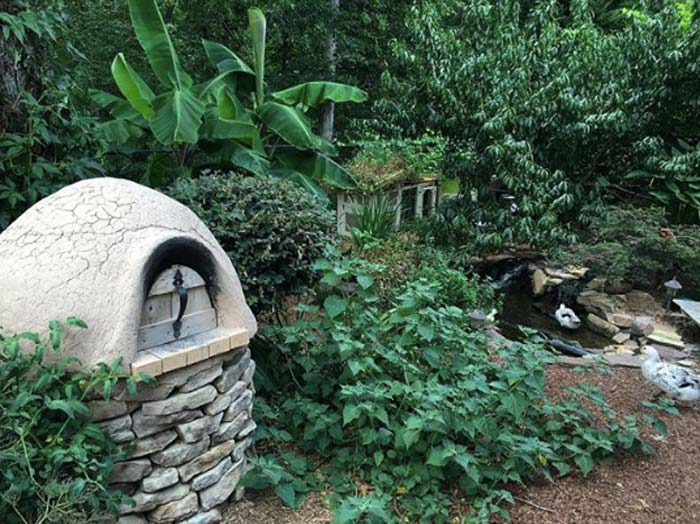
Many people also choose to periodically redesign the tops of their cob ovens, turning them into ornate sculptures that also happen to produce the world’s best wood-fired foods.
A cob oven becomes an important member of its human family. Growth, change, and a wealth of good memories are to be expected as the seasons of life come and go.
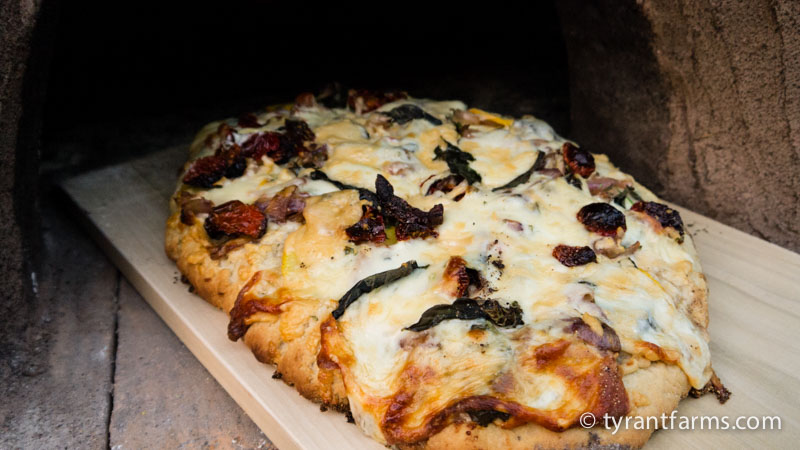
While building a cob oven was not a fast or easy process, as soon as we tasted our first homemade wood-fired focaccia bread topped with seasonal vegetables from our garden, we knew that it was worth every minute of hard labor and mud-dancing we’d invested into the process.
In the years since, we’ve enjoyed countless unforgettable meals with friends and family. Those wood-fired memories have bound us closer together: to each other, to our food, and to the earth. And that, ultimately, is what a meal should do.

We hope you’ll give cob oven construction a try, and add any questions or suggestions you have into the comments section below!
Continue your wood-fired adventures with these resources:
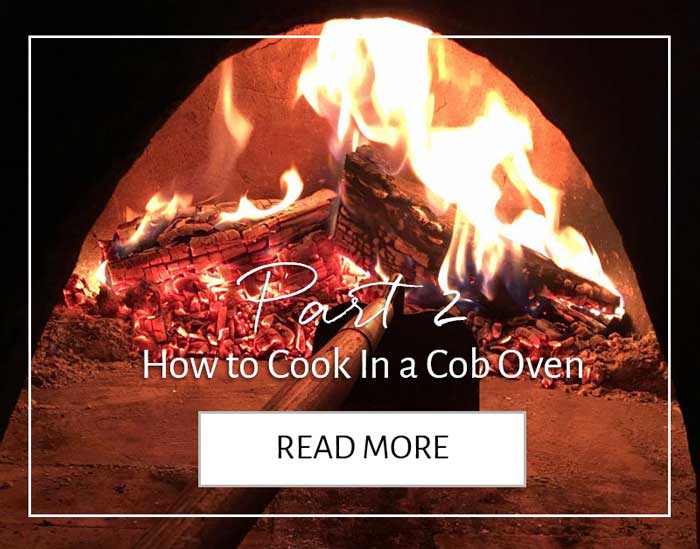
- Part 2: How to cook in your wood-fired cob oven
- Video tutorial: how to make pizzas and tri-tip steak in a wood-fired oven
- Cob oven recipe: Turkish poğaças, stuffed savory dinner pastries

Great post, we’re just finishing our base and nearly ready for the firebricks. Did you lay your bricks ‘loose’ on the fine layer of sand?
Hi Dave! Glad our DIY cob oven article was helpful for you. Just to make sure I answer your question accurately, I’m interpreting “loose” to mean that the fire bricks were not set or mortared in any way. If so, yes, that’s correct. We laid the bricks on top of the packed, leveled layer of top insulating sand on the oven’s base. Let me know if that clears things up or you have additional questions!
Thanks for a great post! So you recommended potters clay is the best clay if your soi has low content. Does this have to be powered or is this not necessary? Also how much would you recommend for a project like this?
Thank you so much!
Hi Alicia! I’ll start by copying and pasting what we say in the article first in case other readers missed it: “Clay – this is more difficult to tell you precisely how much to use. Dry powder clay and wet clay are different weights. We had two large tupperwares full of dried clay scraps from an old pottery studio that we had to reconstitute with water. Err on the side of getting more clay than you think you need, so you don’t run out mid-project.”
Also note that the size of the oven you plan to build is going to dictate the quantity of materials. In the book Build Your Own Earth Oven, which we recommend in the article, the author recommends the following quantities:
-22.5″ oven – (8) 5 gallon buckets of oven mud + (8) 5 gallon buckets of insulation mix/cob
-27″ oven – (12) 5 gallon buckets of oven mud + (10) 5 gallon buckets of insulation mix/cob
-36″ oven – (17) 5 gallon buckets of oven mud + (13) 5 gallon buckets of insulation mix/cob
Hope this info helps you make your cob oven! Please let us know if you have any additional questions as you go.
is it necessary to have gravel in the base under the bottle/sand layers or can we use a previously built grill base?
Hi Dave! The purpose of the gravel and sand in the base of the cob oven underneath the bottle/sand layer is: 1) to fill up the area and bring height to the final oven so you don’t have to squat down to use it, and 2) to provide a structurally sound foundation to the layers above it. You DON’T want the layers inside and underneath your oven to settle or you risk the whole thing cracking or the oven floor collapsing. With that in mind, I’m not quite sure about the specifics of your previously built grill base – perhaps you could provide more info? If your grill base addresses point #1 and #2 above, it should be fine, but I can’t really weigh in without more info.
What was the diameter of the sand castle?
If you make your cob oven to the same specifications as ours, the sand dome would be ~19” tall (from the top of the firebrick to the peak of the sand dome). The diameter of the sand dome will depend on the diameter of your oven foundation. You’ll want to make sure you have enough room to put on 6 1/2″ layer of clay, cob, and plaster. For instance, our oven foundation has a ~50″ diameter, so the sand dome had a 37″ diameter.
Wow you guys never cease to amaze.
I just keep running across you guys in my searches!
Start somewhere else but end up here.
Search for ducks, there you are.
Ponds, check.
Killer recipes, yep
Growing your own food, uh-huh.
Now cob ovens too?!
Though looking at dates this is I suppose the “prequel” lol.
Keep doing what you do, love you all!
Ha! Well, that’s good to hear. Google can be a little ornery from time to time and change our page ranking on certain topics – not always for the better. Hopefully, this is the most detailed and well-photographed “how to build a cob oven article” out there, so it will continue to show up high in search results. As always, reach out any time you have a question about a similar project you’re working on, whether that’s ducks, cob ovens, recipes, foraging, or growing food. 🙂
I just finished my own cob oven based on these directions. Sadly, I didn’t have any duck helpers, but it still seemed to come out well. The only major difference was that I did not use a concrete pad. For the heavy winters and freezing/thawing we get here in NH, I opted instead to dig an 18″ deep hole and fill it with crushed, packed gravel. I then built the stone foundation on top of that. So far, so good! Thanks so much for the really helpful directions.
Thanks for the input! Good idea on the base modifications in your climate region. We’re down in South Carolina, so our winters aren’t nearly as cold. So digging a deeper foundation or using materials less likely to crack under extreme freezing conditions makes a lot of sense. Hope you enjoy years of great meals in your cob oven!
Thanks for the input! Good idea on the base modifications in your climate region. We’re down in South Carolina, so our winters aren’t nearly as cold. So digging a deeper foundation or using materials less likely to crack under extreme freezing conditions makes a lot of sense. Hope you enjoy years of great meals in your cob oven!