Part 2: How to Cook In A Wood-Fired Oven (Cob Oven)

Tyrant Farms' articles are created by real people with real experience. Our articles are free and supported by readers like you, which is why there are ads on our site. Please consider buying (or gifting) our books about raising ducks and raising geese. Also, when you buy through links on our site, we may earn an affiliate commission. Learn more
Cooking in a wood-fired cob oven is equal parts art and science. In this article, we’ll cover the basics of wood-fired cob oven cooking.
If you’ve ever had wood-fired bread, pizza, meats, or baked-goods made in a cob oven, we don’t need to explain to you how amazing they are. If you haven’t, you need to find a restaurant near you where you can try some.
Once you do, you’ll have all the motivation you need to use our step-by-step guide to build your own wood-fired cob oven in your backyard, so you can start making the best food you’ve ever eaten.
Of course, once you have a wood-fired oven, you’ll need to learn how to cook in it! This article is intended to give you lots of tips & pointers to get you started cooking in a wood-fired oven.
In addition to reading books on the subject, we’ve been cooking in our cob oven for many years. Now we’d like to share what we’ve learned with you.

How wood-fired ovens work
The extremely high interior temperatures and near-magical cooking properties of a cob oven are due to the fact that cob ovens cook food using all three forms of heat transfer:
- radiation from the walls and roof;
- conduction from the surface of the fire bricks to the food;
- convection from the hot, steamy swirling interior air.
Conventional/electric ovens, at best, only use radiation and convection. Unlike wood-fired ovens, electric coils impart no additional flavors or nuance to the foods cooked inside of them.
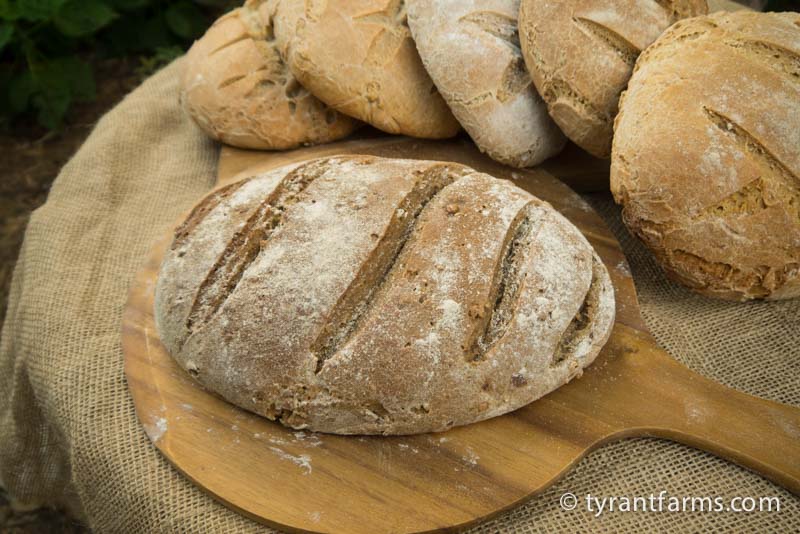
Combined, the technical attributes of a well-made cob oven translate into breads, pizzas and other baked goods that cook more quickly and evenly throughout, feature deliciously crunchy crusts (sugar molecules on the surface of wheat crusts caramelize under the extreme steamy heat) and have a distinctively earthy flavor that you just don’t find in baked goods made in an electric oven.
Beyond the science, many aficionados simply say that “wood fired ovens give food a soul.” We agree with this sentiment since we’ve never been able to fathom how any benevolent, omnipotent deity could possibly justify rewarding store-bought white bread or frozen pizza with immortality.
Preparing for cooking: the art of fire
Obviously, a wood-fired oven means you’re going to be using… (drum roll) a wood fire. However, this doesn’t mean you pile a bunch of charcoal or big logs in the oven, douse them with lighter fluid and start cooking.
There’s actually a bit of fire artistry involved from start to finish.

Let’s go over what tools you’ll need, what materials to burn, how to efficiently heat the oven, and our favorite part: how to cook in your wood-fired oven:
I. Tools you’ll need for cooking in your wood-fired oven
You’ll want to consider having or getting the following tools when doing a wood-fired/cob oven cook:
a. Long-Handled Metal Garden Hoe
This is essential for pushing the fire around in the stove, scraping off coals, etc. Make sure it has a really long handle so you don’t get burned.
b. Cotton String Mop
You’ll need to use a damp (not wet) cotton mop to quickly clean off the cooking surface before putting food in, otherwise you’ll end with a lot of ash, grit, and debris on the bottom of your food. It’s important that you don’t get a mop that’s made of something that will melt with heat (like polyester).
c. Metal Bucket or Wash Pan
You’ll want water in your bucket/pan as you use the hoe to scrape out the embers. It can get quite hot so a plastic bucket isn’t advised.
d. Oven Mitt
Since your oven is going to be 700+ degrees F, you’re going to want to have one or two of these on hand as you stick your hands in and out of the oven to add wood or food.
e. Metal Tongs
Given the extreme heat of the oven, these will come in handy for grabbing and turning wood pieces and also for grabbing and turning meat and other foods that are cooking in the oven.
f. Pizza/Bread Peel
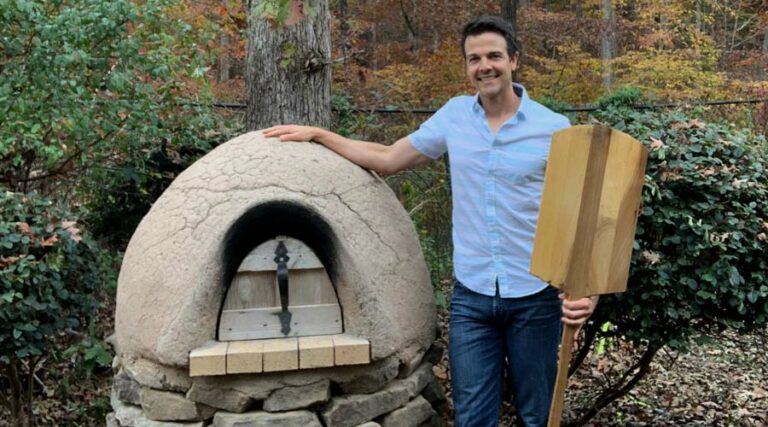
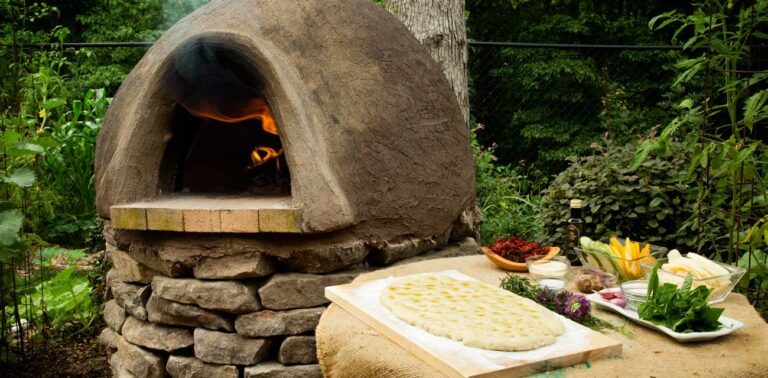
A good pizza peel is essential for sliding bread and pizza off on to the oven floor deep into the oven. Also, when the pizza/bread is ready to pull out, the thin lip of the peel will slide right under these foods without pushing them further back into your oven. (Thanks to our good friend, Evan Tishuk, for making us the amazing pizza peel in the featured image on this article.)
Here’s a link to a good wood pizza peel on Amazon, very similar to ours. After cooking with & entertaining guests while using our oven for a few years now, we’ve discovered that it really helpful to have multiple pizza peels – it makes the whole workflow of quickly taking finished pizzas out of the oven, having new ones on a peel ready to go, and serving guests much easier. We’ve since purchased this aluminum peel.
g. Laser thermometer (optional but helpful)
It’s not essential, but we love our laser thermometer. It’s very accurate and takes some of the guesswork out of determining the interior temperature of the cob oven. It’s especially helpful for nighttime cooks.
h. Metal cooling racks and/or wood cutting boards
When you’re doing a long cook, you want to be able to quickly take items out of the stove and let them start cooling, then quickly get the next items into the stove. So depending on what you’re cooking, you’ll want to have cooling racks and wooden cutting boards (good for pizza since you’ll want to slice them with a knife).
i. Long metal spatula (optional but helpful)
We have several of these on hand when cooking, just in case one walks off. This helps to quickly slide loaves of bread or pizza around after they’re in the oven a little more surgically than you can with the pizza peel.
II. What to burn in your wood-fired oven (and what not to burn)
On our property, we have quite a few hardwood trees, including fruit and nut trees. Throughout the year and during late winter pruning season, we gather all the cuttings and/or fallen branches, chop them into 12″ or shorter pieces, then stick them in tupperware containers in our garage to dry, separated by their size: twigs, kindling (1-2″ diameter), and “logs” (2″+ diameter).
We NEVER use treated wood/lumber, colored/coated paper with chemical dyes, lighter fluid, etc.. Will the intense heat of the oven burn off any potentially dangerous chemicals in these products? Maybe, but why risk it?
When we’re doing a longer cook where we keep a small fire going in the back of the oven while we cook, we’ll use our “best” wood. This means wood from pecan, peach, apple, hickory trees, etc., which offer up some amazing flavors to infuse your food with.

III. Firing it up: heating your wood-fired cob oven
Step 1: Pre-soak your oven door
Don’t forget this step or you’re not going to be able to cook! Always soak your wooden oven door in water for at least 6 hours before you plan to cook.
Put it in a sink, bathtub, tin, etc and place a rock or weight on top to make sure it’s fully submerged. The wood needs to be thoroughly saturated before using the door to prevent it from burning.
The other function of the soaked oven door is to add steam to the interior of the oven when cooking your baked goods, helping get that gorgeous, crunchy crust on your breads and pizzas. You can also throw a couple of cubes of ice into the oven once the dough/raw pizza is in to get even more steam.
(The ice cube trick works in a conventional oven as well, as we detail in our 5-minute no-kneed artisanal bread recipe made in an electric oven.)
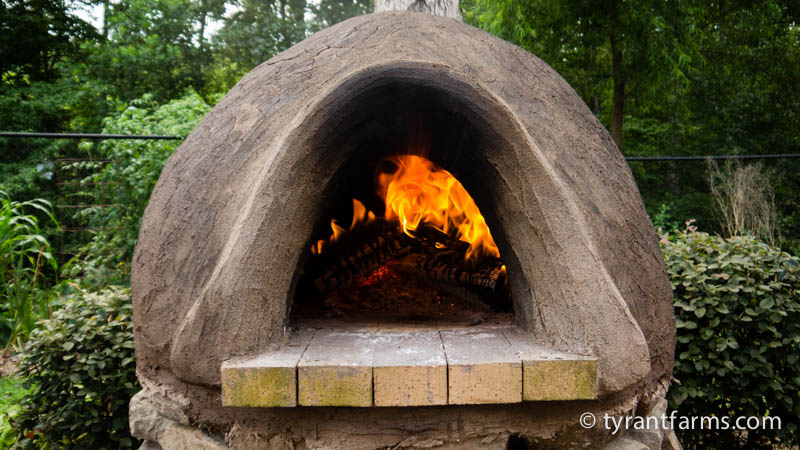
Step 2: Start the fire
To start your fire, create a little flammable teepee towards the front center of your oven. Use small pieces of paper, dried leaves or other similarly textured materials. Over this pile, place your smaller twigs. On top of the twigs, add a few 1-2″ thick sticks.
Ideally, all the wood pieces form a rough teepee shape to allow optimal air flow into the pile and prevent the pieces of wood from rolling away as the paper burns and collapses. Next, light the paper with a match. You might have to give the pile a few puffs of air. Add more twigs as the starter fire gets going.
Step 3: Grow the fire
Your goal is to maintain a steady, medium sized fire in the center of the oven for 2-3 hours before cooking. The longer you burn your fire, the more heat will be absorbed by your oven, and the longer your oven will stay heated while cooking.
Don’t use huge logs. The biggest pieces of wood we use are about 3-4″ in diameter. We keep the fire directly in the center of the oven as we’re warming the oven, not the front like our starter fire (push the fire to the center with your garden hoe after 15 minutes once or once it’s established).
Slowly, you’ll build up a nice base of coals so all you’ll need to do is add more 3-4″ wood logs every 20 minutes or so. Again, you do NOT want a huge roaring fire with flames shooting out of the mouth of the oven.
Step 4: Is it hot enough to start cooking?
Over time and with repeated uses, you’ll develop your own intuition about how hot the oven is, when it’s time to start cooking, and whether it’s time to put the next food item in.
As mentioned above, we also highly recommend that you use a laser thermometer, especially if you want to be more exact in your methods – here’s the one we use. A couple of other things you can see or do to help develop your wood-fired cook’s intuition:
- The black soot on the inside roof of the oven will completely burn off at around 600°F. If you’re doing a single bake or a quick single meal cook, this is as hot as you’ll need the oven to get. However, if you’re planning to do a longer, 1+ hour bake/cook, you’ll want to keep the fire going for another 45-60 minutes to get more heat in your oven.
- Feel the clay surface of your oven as you cook. You’ll be amazed that the internal temperatures can be over 800°F but the surface is only warm to the touch, not hot. In fact, on a cold fall or winter night cook, it’s wonderful to lean our backs against the oven like a heating pad! On our oven, the surface won’t feel warm until the internal temperature has reached 600°F (after the soot has burned off inside).

Step 5: Remove fire or push to back of oven
Once you’ve generated enough heat in your oven to cook, you don’t immediately put food inside. That’s a good way to make charcoal! Depending on how long you plan to cook, you’ll either pull out all your fire/embers or push them to the back as follows:
- Short Cooking Session (1 hour or less) – Using the garden hoe, scrape all the ashes and embers into your metal bucket/wash pan (there should be a few inches of water in the bucket to immediately extinguish the embers so as to reduce the likelihood of injury.
- Long Cooking Session (1+ hours) – Not everyone agrees on this, but for longer cooking sessions, rather than taking all the fire/embers out, we’ll use our metal hoe to scrape the embers/fire small fire into the back and sides of the oven so we can quickly fire things back up if we need more heat. We also leave a fire going in the back if we’re cooking meat.

Step 6: Clean the surface
Using a lightly damp cotton mop, clean the surface of the firebricks where the food items will be placed. This prevents, grit or coals from sticking to the surface of the food, which could otherwise make for an unpleasant eating experience.
Step 7: Put the door on for temperature leveling
The cob oven door holds in the heat, plus evens the heat out inside the oven and on the floor so you don’t have hotter and colder spots. If you still have a small fire pushed to the back of the oven for a longer cooking session, leave the door slightly cracked to allow oxygen in and smoke out.
IV. Cooking with fire
Now comes the fun part: food!

Cooking order – sequencing food types in a wood-fired cob oven
Here’s the order (based on the need for heat and/or open flame) that we cook specific types of food in in our wood-fired cob oben:
- *meat such as steaks, pork chops, etc. (not to get off subject, but if you can’t get grass-fed, grass-finished steak or pastured pork, please just stick to plant-based foods!)
- pizza, focaccia, flatbreads
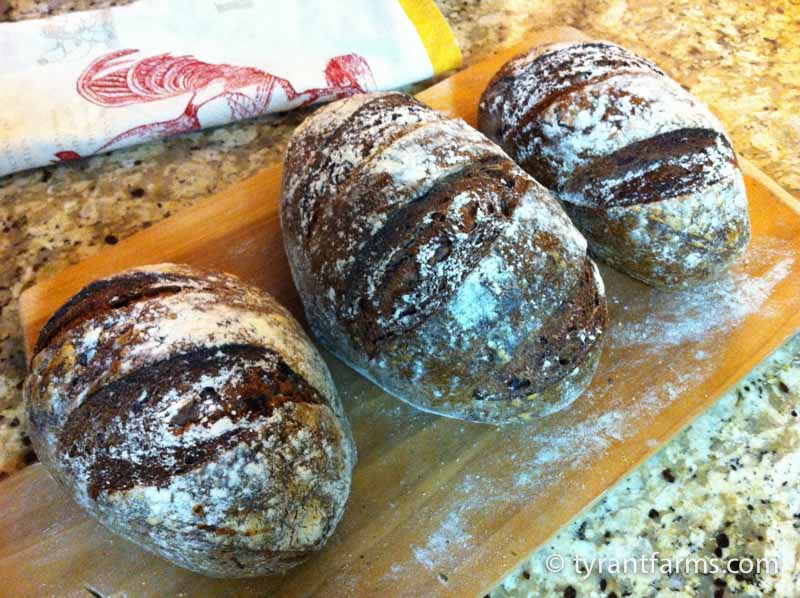
- sourdough bread
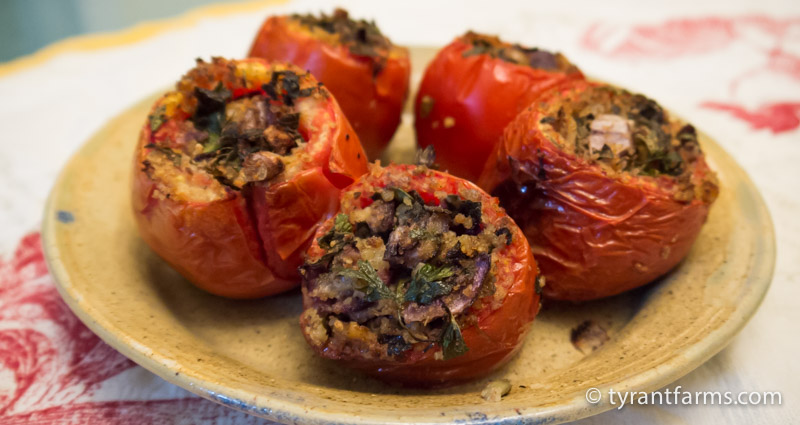
- stews, stuffed tomatoes & peppers, stuffed pumpkins, potatoes, pies
- cookies, crackers, granola
- with the residual heat (lower than 150 degrees) you can dry out wet firewood for a future cook
*We’ll put a stainless steel oven/cooking rack on the brick surface (see photo above) to keep the meat elevated while cooking – we don’t do this with other foods.

When to cook foods based on temperature
If you don’t have a laser thermometer and you’re trying to figure out when certain foods are ready to go in the oven, toss a few tablespoons of flour onto the oven floor and see how long it takes the flour to brown:
- Instant – If the flour immediately turns brown/black and smokes, you could cook a steak or pork chop, but you’re too hot for pizza. Put the door back on and wait another 5-10 minutes before testing again (if you’re not cooking meat).
- 5-10 Seconds – pizza time.
- 10-20 Seconds – bread time.
- 20+ seconds – the oven is too cool for bread, but may still be warm enough for other items further down the cooking list.

Again, if we plan to cook for longer than an hour and/or we’re cooking meat, we’ll maintain a small fire in the back/sides of the stove to help maintain heat, rather than removing all of the embers. Once all items have been cooked, we’ll set aside the items we plan to eat over the next few days, then store the rest in our freezer for later. Frozen bread tastes just as good after it’s thawed out as the day you made it.
Now, are you ready for the best food you’ll ever eat! Then go forth, fire up your cob oven, and get cooking!


A great introduction to the process! it seems very involved at first, but I am sure it gets easy with practice and the food probably all taste amazing and makes it worth the prep!
Thanks! Yes, cooking in a wood-fired cob oven might seem daunting at first, but after a few rounds of cooking, you’ll get the hang of it. Then intuition and habit kick in, giving you the benefits of experience.
Imagine reading about cooking on an electric or gas stovetop for the first time – yikes! Complicated. But it seems quite simple in hindsight. The hardest part of most new things worth doing is getting started in the first place.
Absolutely! My ultimate goal is to one day build a cob home, but first I want to build a small sauna. i figured a cob oven would be a good first project though 🙂 Your site is great, thanks for sharing your knowledge and experience.
We’d love to have a cob home, too!