5 Minute Artisanal Bread – Yes, Really
Tyrant Farms' articles are created by real people with real experience. Our articles are free and supported by readers like you, which is why there are ads on our site. Please consider buying (or gifting) our books about raising ducks and raising geese. Also, when you buy through links on our site, we may earn an affiliate commission. Learn more
In this article (and quick instructional video) you’ll learn how to make your own 5 minute artisanal bread using whole wheat, stone-ground organic flour. Say hello to crunchy, delicious homemade bread and goodbye to squishy grocery store bread!
Updated February 2019
We admit it: we’re bread snobs. That soft squishy stuff at the grocery store? Not bread. That baguette made only with refined white flour? Nope, not bread either.
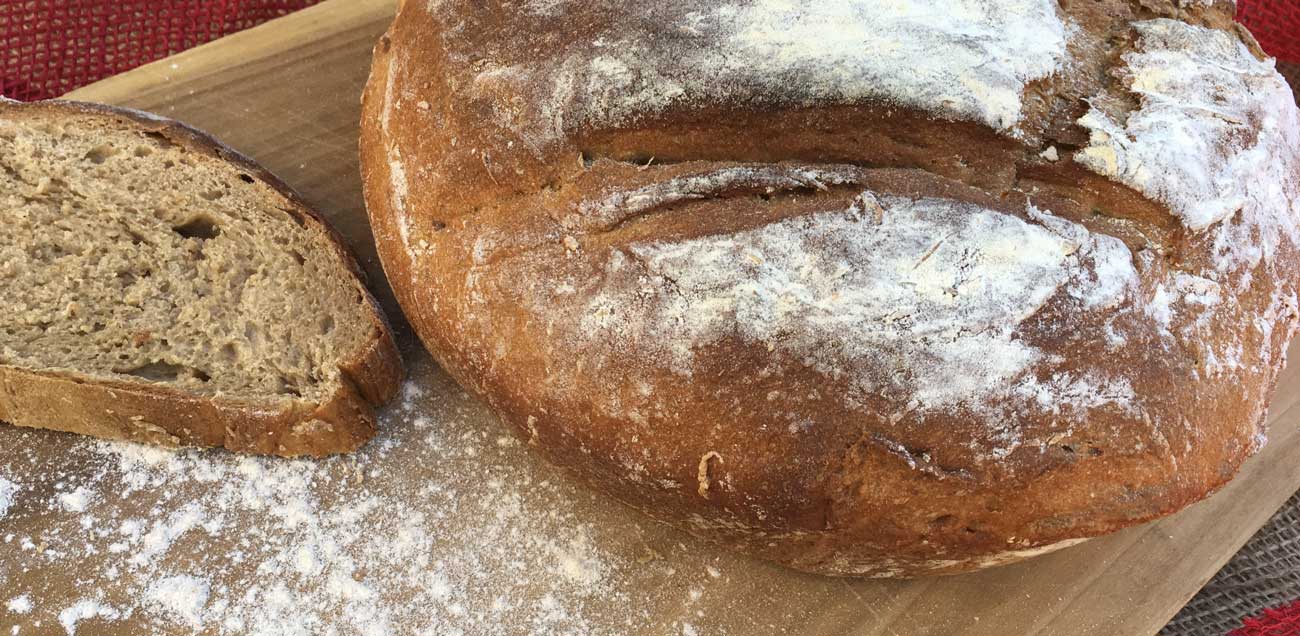
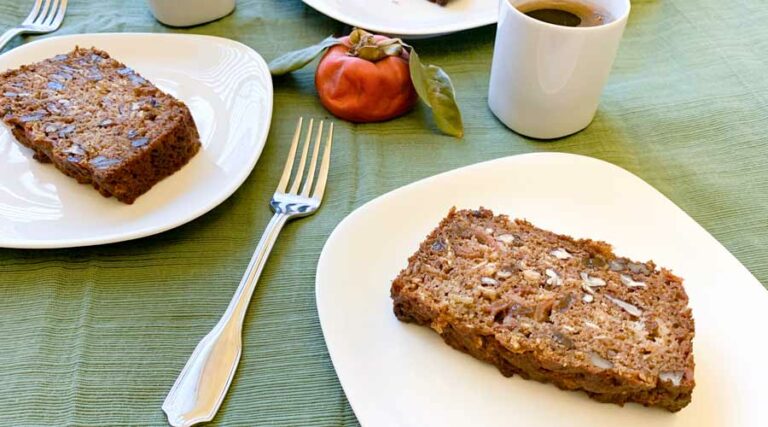
To us, you know real bread when you interact with it. Its caramelized crust crunches when you bite into it, revealing a perfect spongey crumb on the inside that releases complex flavor notes from the high quality, stone ground wheat it was made from.
Real, homemade artisanal bread: the hard way

When we first built our wood-fired cob oven, we took our bread making and baking skills to a whole new level. (Read our articles How to make a wood-fired cob oven and How to cook in a wood-fired cob oven if you’re interested.)
We love spending hours preparing sourdough loaves and then another few hours cooking them to wood-fired perfection in our cob oven.
We usually make 1-2 months worth of bread and other baked goods each time we do a cob oven cook. Then we put the bread loaves and other goodies we’re not going to eat immediately into the freezer.

Busy lives shouldn’t mean crumby bread (pun intended)
We’re often too busy to spend hours making & baking bread. Plus, when it’s freezing cold outside, it’s hard to get inspired to do an outdoor cob oven cook.
You’re probably in this same boat, telling yourself: “I don’t have time to spend making bread.” Or maybe you’ve told yourself: “I don’t even know how to make or bake bread — it just seems too hard.”
What to do? Should we all just learn to suffer through mediocre bread with low nutritional quality?
NO! Stand up for your right to good bread by learning how to make Tyrant Farms’ 5 Minute Artisanal Bread recipe!

Good Bread Made Easy
We’re going to show you a stupid-simple way to make a delicious loaf of artisanal bread.
Nope, you don’t need a wood-fired oven. You can make this artisanal no-knead bread recipe at home in your electric oven.
No, it won’t take you hours of prep time. It will literally take you 5 minutes to prepare this bread.
And when you’re done, your bread will be virtually indistinguishable from the fancy loaves of bread we make in our cob oven that take many hours to prepare and bake.
Once you know how to make this 5 minute no-knead bread recipe, you’ll never have to suffer through another loaf of squishy grocery store bread again!
Recipe: How to Make 5 Minute Artisanal Bread
If you’re like us, seeing how something is made is as helpful as reading about how it’s made. So, we’ve got a quick video plus a written recipe below.
Before making this recipe for the first time, we’d recommend that you:
- watch the video,
- carefully read the recipe,
- read through the FAQs below the recipe.
That way, you can mix together all the visual and written instructions in your mind. (*Note: If the video below this sentence does not show up or play, it’s probably because you have an ad-blocker enabled — you can watch it here on YouTube instead.)

5 Minute Artisanal Bread - Yes, Really
Ingredients
- 3 cups 24 ounces or 680 grams warm water - about 100°F (this is for the bread dough)
- 3 cups ice water this goes into the oven to create a "steam oven"
- 1 tablespoon granulated yeast
- 1 tablespoon kosher or sea salt
- 3 tablespoons organic coconut sugar substitute 3 tablespoons brown sugar if you don't have coconut sugar
- 6 1/2 cups 2 pounds or 910 grams stone ground WHITE wheat flour
- 1/2 cup flour same kind to dust your loaf in the bowl and to dust your board/pan/working surface before you put the loaf in the oven
Instructions
- Put yeast, salt, and sugar together in a large mixing bowl. Add in 3 cups of warm water (100 degrees is perfect - warm but not hot). Mix ingredients together with a fork.
- Add 6 1/2 cups flour all at once. Mix with a spoon until no clumps of flour remain. The dough should be very sticky and moist.
- Cover the bowl of dough with a tea towel or linen cloth - a thin fabric that allows the bread to breathe. Let sit for 2 hours in a warm spot. Or, if you're not going to be baking that day, you can put the covered bowl in your fridge for 24 hours.
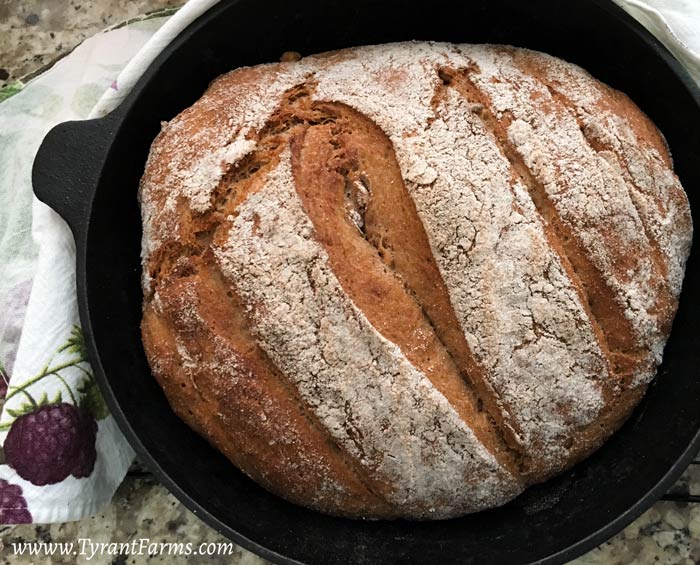
- Preheat oven to 450°F bake (not convect), in order to make sure the oven is fully heated before the bread goes in. Put your bread baking pan on the middle rack - we like to use a 3 quart cast iron "deep skillet" with handle or a cast iron dutch oven to make a boule (round loaf). On the bottom rack, put in another cast iron skillet (this is where your ice water will go to produce the steam).
- Dust the surface of the risen dough with flour, and pull the dough away from the sides of the pan, dusting the surface with flour as you go. You do NOT want to knead the bread at any point, as this will take air out of the dough. You're simply trying to get it out of the bowl in one piece.
- Now, pour/transfer the dough onto the surface of a lipless baking sheet or pizza peel that has flour on the surface so the dough does not stick. A cookie sheet turned upside down will work as an alternative. It needs to be lipless because you want to be able to slide the dough off into the cooking pan.
- Once the dough has been transferred to the sheet/tray, let it rest for 5-10 minutes.
- Open the oven, and place the dough into your baking pan. Next, pour your ice water mixture into the "steam oven" pan on the lower level of the oven. Close the oven as quickly as possible, then bake for 25-35 minutes (depending on your oven - each one bakes a little differently). Since the dough is so moist, it's hard to overcook this bread so err on the 35 minute side your first time making the bread.
- Once the bread is done, remove it from the oven, being CAREFUL when you open the oven door since steam will come blasting out. Dry the bread on a cooling rack for 30 minutes, then slice and enjoy your homemade, wholegrain, artisanal goodness!
[row]
[column size=”1/5″]
[/column]
[column size=”1/5″]
[/column]
[column size=”1/5″]
[/column]
[column size=”1/5″]
[/column]
[column size=”1/5″]
[/column]
[column size=”1/5″]
[/column]
[/row]
Frequently Asked Question About No-Knead Artisanal Bread
What is no knead method of bread making?
No-knead bread making is exactly what it sounds like: you (the baker) don’t knead the bread.
Some types of bread and bread making recipes require kneading. Only use the no-knead bread making method on bread recipes (like this one) that are specifically intended for no-knead bread.
What are the benefits of no-knead bread?
You don’t have to spend a single minute kneading the dough. This saves you a LOT of time. No-knead bread making is also a huge benefit if you have hand and wrist pain, arthritis, etc. Instead of you doing the hard work, the yeast and other microbes do the hard work for you!
How long can you let no-knead bread rise?
Each recipe is different, so there’s not a single answer to this question. When making this no-knead bread recipe, we’ve forgotten about our dough rising and found it four hours later, instead of the recommended ~2 hour rise time.
The dough had risen to about twice the normal size, which made it more difficult to pour onto a flour-coated cutting board, but the loaf turned out great. The additional rise time does give the microbes more time to break down sugar molecules, gluten, antinutrients, and other compounds in the flour, thus making the final loaf more easily digestible for you.
People who experience gluten sensitivity might benefit from a slightly longer rise time, just as they’ll likely benefit from the multi-day fermentation process necessary to make real sourdough bread.
Keep in mind two things here:
- The activity of the yeast can be influenced by the temperature and humidity in your home. The warmer it is, the more active the yeast cultures will be, and the faster your bread will rise. So time isn’t the only factor to consider.
- You can let dough rise TOO long, at which point it will eventually collapse. A four hour rise at about ~73°F is as far as we’ve ever accidentally pushed the rise time on this no-knead bread recipe, and we wouldn’t recommend going any longer.
Can you freeze no knead bread dough?
Yes, you can freeze no-knead bread dough, but we don’t recommend doing so unless you don’t have any other option.
The reason: during the freezing process, the microbes that make your final loaf of bread light, fluffy, and full of air pockets go dormant or die. The “survivors” aren’t nearly as active when you thaw the dough out, so you’ll end up with a much denser, heavier final loaf than you would if you didn’t freeze your dough.
If you have an emergency that requires you to leave in the middle of making this recipe, we recommend that you put your bowl of dough in the fridge instead, covered with wrap to prevent it from drying out. Within 24-48 hours, bring the dough back to room temp then bake it for best results.
What can I use if I don’t have a Dutch oven?
We highly recommend buying and using a 3-quart cast iron “deep skillet” pan with handle for this recipe (here’s the one we use). A dutch oven works great too, but we prefer the longer handle on the skillet.
If you don’t have cast iron skillets or dutch ovens, keep in mind that this recipe requires the oven be set to a very high temp (450°F) and then a room temperature lump of dough goes into the pan. That temperature differential may be enough to crack a glass pan, so we wouldn’t recommend that option. (Note: The temperature would have to be many hundreds of degree higher to potentially crack cast iron.)
We also don’t recommend using teflon-coated cookware for this recipe (or any other recipe for that matter). Here’s why.
Enameled bakeware or other high-heat bakeware is your next best option if you don’t have cast iron.
Is active dry yeast the same as instant yeast?
Active dry yeast and instant yeast are different types of yeast cultures, but they can be used interchangeably 1:1 in recipes. Both active dry yeast and instant yeast will work for this recipe.
Active dry yeast is intended to be dissolved in water with sugar before using (“proofing”), whereas instant yeast can be mixed directly into the dough.
For a deeper dive into this topic, we recommend reading this article by King Arthur flour company.
[divider top=”no”]
Questions? Fire away in the comments below!
KIGI,


So, curious if you grease/oil your cast iron before heating and inserting the risen loaf? Not mentioned, at least I didn’t catch it while we
watching the vid or reading the recipe… so I’m assuming the baked loaf doesn’t stick as it’s removed for cooling. I usually have to prep thoroughly with oil prior to using my big cast iron pans for cornbread.
I’ve been searching for a simplified artisan loaf… thanks!
Hi Miki! We do not add grease/oil to our cast iron pan before adding the dough. You get the pan very hot before adding the dough so the oil would burn out and create quite a bit of smoke in the process. However, do note that you’ll want your cast iron pan to be well-seasoned when making this no-knead bread. For reference, you can read more about seasoning and maintaining cast iron pans here: https://www.tyrantfarms.com/antique-cast-iron-pans-how-to-get-best-cookware/. Hope this helps and let us know how your bread turns out!
HI, have you ever experimented this 5 min. no knead recipe with spelt flour?
Hi Anne! Unfortunately, we haven’t experimented with spelt or other “ancient” grains with this recipe. However, given the baking properties of spelt, you certainly could use it and get great results. Maybe your first time trying, do 50/50 spelt & white whole wheat flour, then ramp up the spelt ratios if you like the way things turn out and feel it can handle more spelt. If you don’t mind, would you check back in and let us (and other readers) know how your spelt variations turn out?
Instead of the extra hands to get the dough into the baking pan, I use parchment paper and simply lift the dough in and leave the paper in place. Any comments on this method?
thanks for the recipe. it’s great for me but my husband, who has colitis, can’t eat whole grains. do you have any recipes for a non whole grain bread like this one? thanks.
Dawn: You should be fine just substituting white flour in place of whole wheat. This will likely make for a wetter dough, since the white wheat won’t have the fiber to absorb the water. However, we’ve found that with this recipe you can have a really wet dough and the bread still does great and has a nice spring/rise once you get it into the cast iron. We experimented with this the other day, adding a really wet whole wheat dough that we could almost pour out of the bowl like batter. It came out of the oven beautifully, with perfect texture, crumb, and air pockets. So, have a try with white flour and don’t be afraid to do a bit of experimenting on the dough moisture levels.
thanks aaron. i’m looking forward to making the bread. it’ll be my first ever attempt at bread making. 🙂
Good for you! Let us know how it turns out. It helps to have a second set of hands when you’re putting it into the cast iron: one person to hold the bread board and the other to put it into the cast iron, score the top, and add ice water. Like anything else, it make take more than once for you to get things just right, but it’s so worth it once you do. 🙂
2 more questions. 🙂 what size is the cast iron skillet you used for the bread? and, can i add raisins or nuts to the dough?
Sorry for the delayed response! Just measured our cast iron dutch oven w/ handle and 3 quarts of water fills it about an inch from the top, so I’m assuming it’s a 3 quart (it doesn’t say). This looks like the one we have: http://amzn.to/2udYvSv. Yes, you could modify this recipe with raisins and nuts. The bread isn’t sweet at all by itself though, despite the sugar added in the beginning.
Couldn’t be easier. Great crust, must be the pan of ice water. I did however cut the recipe into a third because I only had a small cast iron pan. Plus I was a little skeptical about a no knead bread recipe. I usually make bread with a Kitchen Aid mixer and a dough hook. The other substitution was I used K.A. bread flour instead of whole wheat.
Glad I found this site, definitely my new go-to bread recipe. Just have to get a 3 quart cast iron pan.
Glad your no-knead bread turned out great, James! This continues to be our go-to recipe when we need a good homemade loaf but are limited on time. And, yes, the ice water steam bath really helps with the crust.