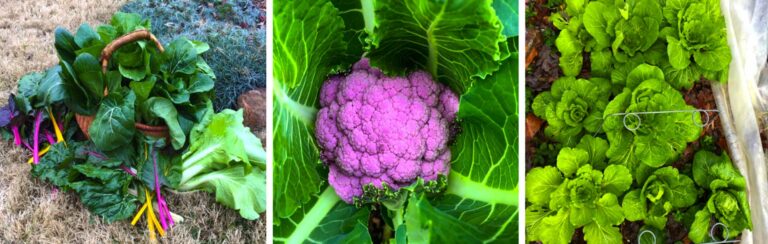
Why and how to grow hardneck garlic
Tyrant Farms' articles are created by real people with real experience. Our articles are free and supported by readers like you, which is why there are ads on our site. Please consider buying (or gifting) our books about raising ducks and raising geese. Also, when you buy through links on our site, we may earn an affiliate commission. Learn more
We originally wrote a version of this article for Edible Upcountry Magazine, and have recently updated it to make it even better for anyone interested in growing hardneck garlic.
Garlic: a white edible bulb commonly used to repel vampires or terminate a bad first date. What else is there to know about the stuff? A lot, actually.
Before my wife and I started turning our suburban yard into an edible food forest, we knew that we liked garlic, but our sentiments towards Allium sativum would be more aptly described as a modest crush than a mature romance — it certainly wasn’t love.
Our feelings changed rather dramatically once we tasted fresh heirloom garlic that a friend brought us from his brother’s organic farm in Virginia. At that moment, we realized that we’d never actually had “real” garlic before.
The flavor was intense and complex, yet not overwhelming to the palate.

Softneck vs. Hardneck Garlic
We learned that these flavor differences were due to the fact that most garlic we’d ever tasted was probably from a less complex “softneck” garlic variety. Softneck garlic is less acclaimed for its flavor, than its ability to store well during its multi-month transport from China to a nearby grocery store.

Depending on the varieties, softneck garlic will last anywhere from 6-12 months when properly stored. Hardneck garlic will last between 4-10 months, depending on the variety.
At some point, it apparently became settled fact that American grocery shoppers:
- Preferred mono-flavored, white-skinned garlic to the more colorful and flavorful heirloom hardneck varieties; and
- Would rather save a penny by purchasing foreign-grown garlic from thousands of miles away than support local organic farmers living in their communities.
We never received that survey.

Hardneck Garlic: Variety Is the Spice of Life
Our initial nirvanic garlic experience led us to further distrust the axiom “ignorance is bliss.” When it comes to food, we’ve found that our ignorance usually means that there is a lot of undiscovered bliss out there waiting to be tasted.
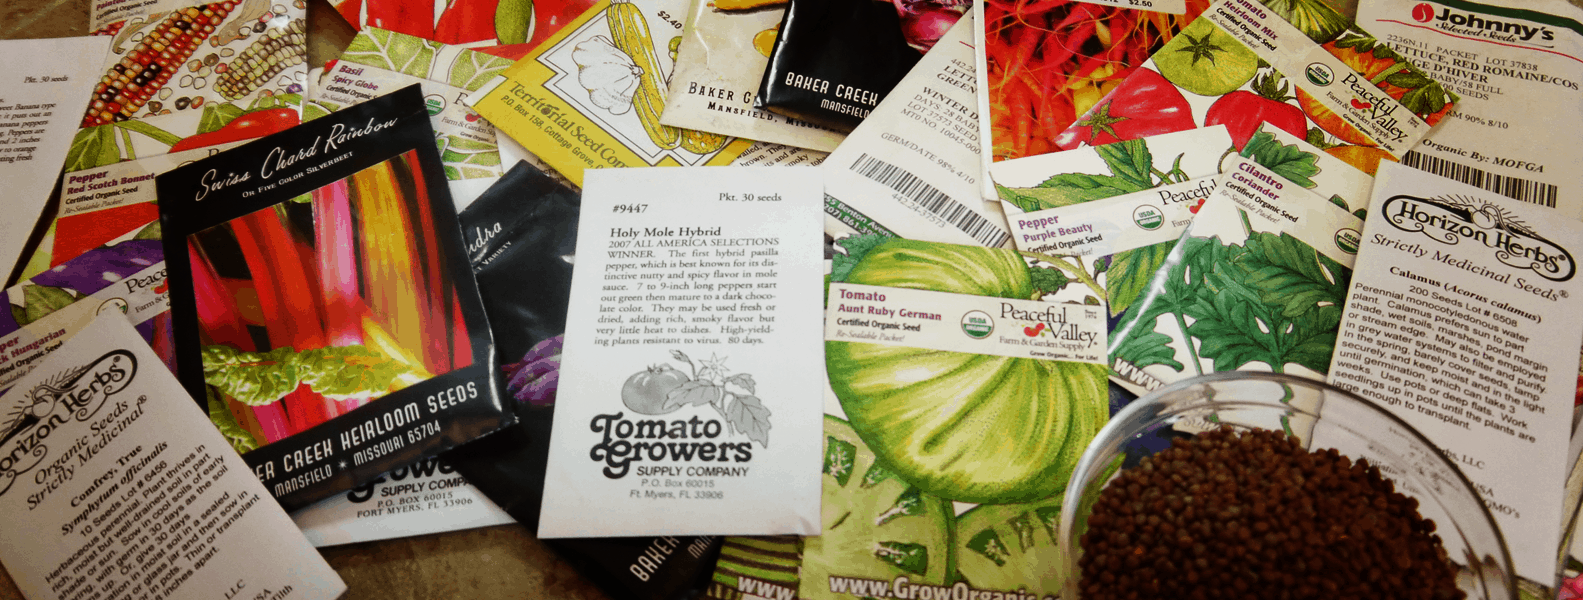
To assuage our newly-realized ignorance, we began researching how to find and plant hardneck garlic in our garden. Thankfully, there are plenty of easy-to-find sources on the internet for sourcing organic, heirloom hardneck garlic of various sizes, colors, shapes, and flavors.
We’ve also learned that there are roughly 300 currently known varieties of garlic sharing the planet with us. Many of these varieties are now available in the western hemisphere thanks to a handful of passionate USDA scientists who brought piles of previously unknown garlic varieties back to the US from the Caucasus region (domesticated garlic’s native soil) during the collapse of the Soviet Union in 1989.

My wife and I often fantasize about traveling the globe for a “meet and eat” to become acquainted with each of these 300 varieties of garlic.
Until we find a wealthy benefactor to fund this grand adventure, we’ve instead decided to naturalize multiple varieties of garlic around our yard and speak in the native language of its cultivators during planting and harvesting times.
Granted, this “language” is a unique combination of gibberish and broken English, spoken with a faux Russian accent. Susan The Tyrant is convinced our garlic understands us, although this behavior has earned a few wary glances from our neighbors.
We’ve now got many years of garlic-growing experience behind us. What we’ve learned is this: garlic is like life—the more you learn about it, the more you realize you don’t know, but the more you want to know, so you keep learning about it. Got it?
Yes, it’s a vicious cycle, but it beats the heck out of the alternative: eating generic garlic.
We’re uncertain as to whether any local ordinances exist that may prohibit you from allowing your garlic (or other plants) to asexually or sexually reproduce in your yard. However, we are certain of one thing: if you want to make a great first impression on a first date, consider sharing a meal that includes home-grown, organic heirloom garlic. It truly is love at first taste.
How To Grow Hardneck Garlic
For anyone interested in growing their own hardneck garlic using organic/permaculture methods, here are a few tips to help start you on your path to garlic addiction:
1. The basics of growing hardneck garlic:
We’ve grown garlic bulbs using both of the following:
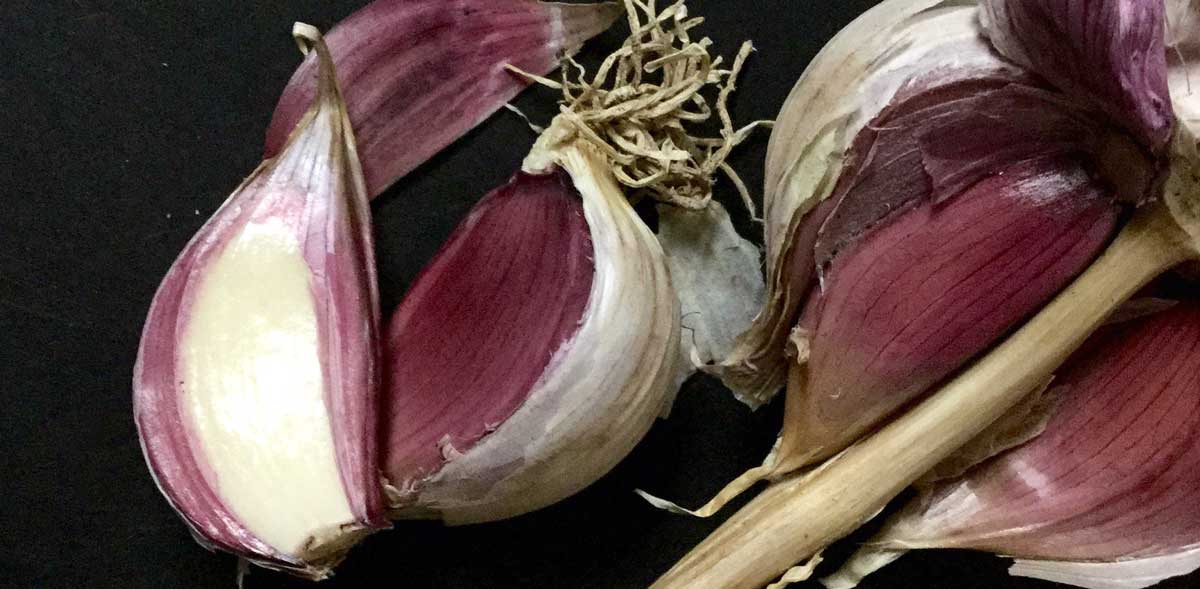
- Bulbils – “Bulbils” are the miniature cloves that develop from a mature garlic scape, which are actually different from garlic seeds.
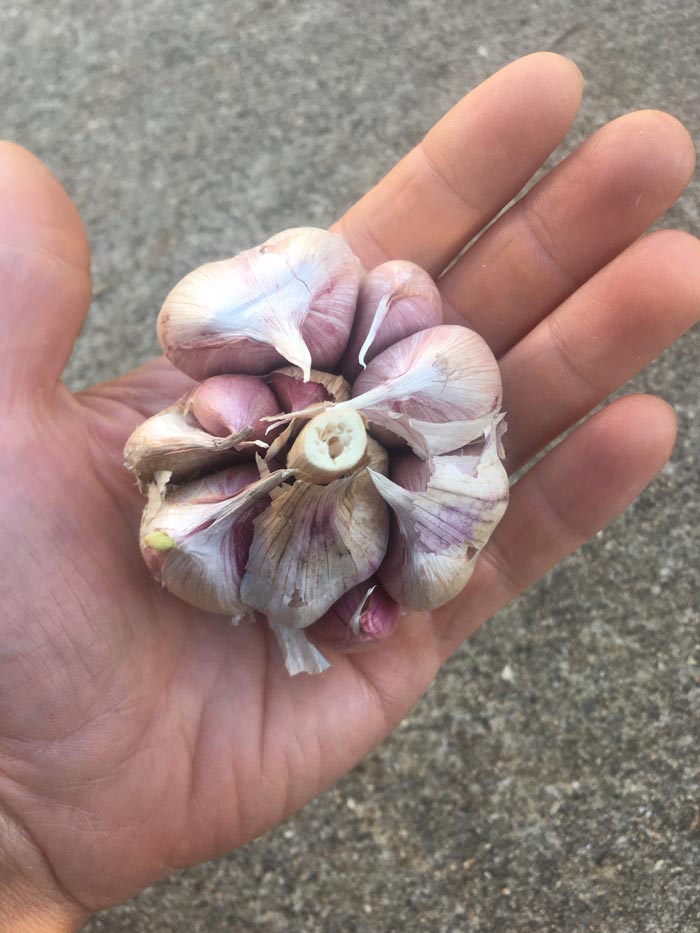
- Cloves – Cloves are the individual sections you break off from a mature garlic bulb.
The difference? How long each will take to become a mature garlic bulb. Bulbils take about two years to form a bulb and cloves take about 8 months to form a bulb.
If you’re new to garlic growing, getting faster gratification is important for gaining some green-thumbed confidence, so we recommend growing garlic by starting with cloves.

When to plant garlic cloves:
Get your garlic cloves in the ground in the early-mid fall and before the first hard freeze.
Make sure they’re in a spot that will get at least eight hours of direct sunlight during the spring and summer. Ideally, keep at least four inches of good leaf or wood chip mulch top-dressed on your garlic beds to help maintain optimal soil health, moisture and temperature levels.
If you’re planting in a spot that doesn’t have good soil, add good compost before you plant to help ensure your garlic cloves have the food they need to form large bulbs. Some organic growers also recommend adding a slow-release pelleted organic fertilizer once in the fall and again in the late winter to maximize bulb formation.
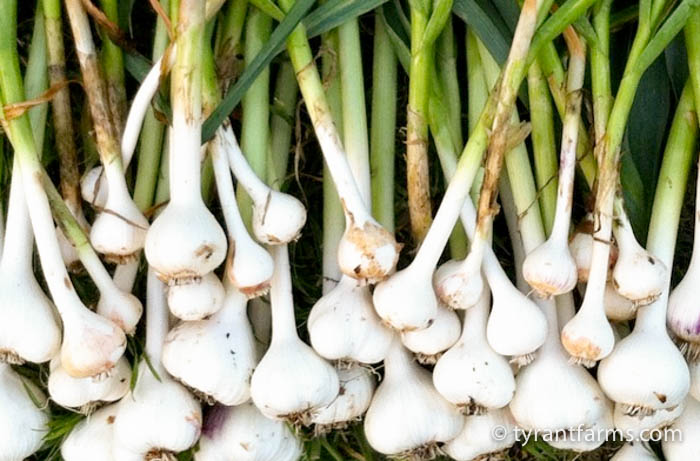
If all goes well and you following the additional growing tips below, each individual clove will become a large, harvest-ready bulb the following summer. You’ll know your garlic is ready to pull when the leaves begin to brown and flop over.
How to plant garlic cloves:
Do not break the bulb into individual cloves until you’re ready to plant them.
.JPG)
When it’s time, simply tear off the largest cloves from a healthy, garden-variety garlic bulb. Try to leave the papery husk on each clove since it serves as protection as the clove starts to grow.

We use the smaller garlic cloves either: a) in our kitchen, or b) to start patches of perennial “green garlic” in our yard that we use for the edible leaves in the late winter and spring.
- Depth – Plant each garlic clove about 2-3″ deep in rich, well-draining soil, root end down, pointy tip up.
- Spacing – Spacing should be about 6″ inches apart from each other within the row, with each row about 10″ apart from the next row. Our garden is planned in a less traditional polyculture system, so we also like to plant garlic throughout our beds with other plant species as well.

2. Choosing Hardneck Garlic Varieties
We grow hardneck garlic varieties rather than softneck varieties (the ones typically found in grocery stores).
No, hardneck is not a new derogatory term for southerners. Hardneck varieties are genetically closest to the original cultivated garlic, and they typically produce bigger cloves that are easier to open. They also tend to grow well in our hot, humid climate, and have superior flavors to softneck varieties.

Some of our favorite hardneck varieties have very exotic-sounding names like Music, Purple Glazer, Georgian Fire and Early Red Italian—all of which will impress even the most debonair hipster neighbor. If storage duration is important to you, read the descriptions of each variety and choose longer-lasting hardneck garlic varieties.
3. Enjoy All Three Edible Parts: Greens, Scapes, and Bulbs
1. Hardneck Garlic Scapes
All parts of a hardneck or softneck garlic plant are edible, from the bulbs to the greens.
However, perhaps the best reason to choose hardneck over softneck garlic varieties is that only hardneck varieties produce a third edible part: the highly-coveted delicacy known as garlic “scapes.”

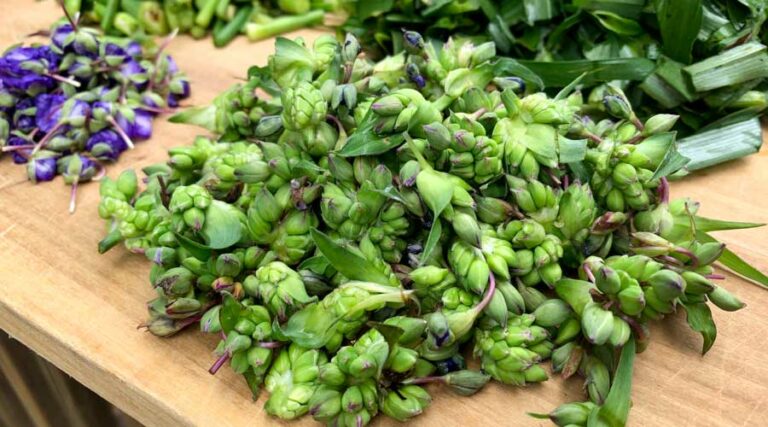
Garlic scapes are curly, green garlic stalks that sprout from the center of the plant in mid-spring. They have the tender consistency of asparagus, but all the unique deliciousness of a garlic clove.
If left untouched, each scape forms dozens of garlic bulbils and possibly seeds (depending on whether your garlic was purchased from a breeder who allowed the predecessors to reproduce sexually or not).

As mentioned earlier, garlic bulbils can be planted in the late fall to produce harvest-ready garlic cloves in two to three years. A single garlic clove is capable of producing an entirely new bulb in its first year.
However, rather than letting garlic scapes grow to full maturity, most growers choose to harvest—or more accurately “neuter”—their garlic plants in late spring.

Garlic scapes are a true delicacy that we use in an assortment of culinary delights ranging from green garlic pesto to Asian-inspired stir-fries. Another reason you should remove and eat your garlic scapes: once robbed of its ability to sexually reproduce, the neutered garlic plant is forced to put more of its energy into asexual reproduction, thereby producing larger underground bulbs.
2. Garlic Greens
We don’t like being without garlic.
Therefore, in the early spring before we have garlic bulbs or scapes, we’ll pull some of our smaller garlic plants. The immature bulbs are still small but incredibly tasty, and the young greens are tender and delicious.
Garlic greens are wonderful chopped and added to a stir fry or other dishes. Our personal favorite is making green garlic pesto (see our recipe here).
We’ve come to like garlic greens so much that we’ve established perennial patches of garlic around our yard that we never pull. The bulbs divide each year making more garlic cloves, and we just trim garlic greens for our kitchen in the winter and spring.
3. Garlic Cloves
Most people know what to do with garlic cloves, so we won’t go into detail here. However, if you’ve never grown your own garlic before, it’s important to note that you’ll want to “cure” your garlic for long-term storage.

You don’t have to wash your garlic before curing (unless you want a pretty picture).
Once removed from the ground, simply store the entire plant in a dry spot out of the sun. We put ours on a shelf in the garage for at least two weeks.
The leaves should be dry and crunchy when curing is finished. Once cured, we’ll cut off the dried leaves, brush the dirt off the cloves, and store them indoors.
We hope this article has you ready to start your own hardneck garlic! Fire away with any questions or let us know your favorite recipes for garlic greens, scapes, or cloves.
KIGI,

I’m in the same area as you and because of your articles I’m trying to grow alliums for the first time: potato onions and garlic. Do you use row covers to prevent pest damage on these alliums?
Hi Betty! We don’t use row cover when growing garlic or onions, and we (mostly) haven’t had pest problems with our alliums. Oe exception is black aphids that can build up on onion greens (and sometimes garlic greens) in the winter, but those can be blasted off with a water hose or killed with organic products like neem oil. Just because WE don’t use row cover for our alliums doesn’t mean that you shouldn’t. We’ve just taken a lazier approach with them because they’re quite cold-hardy and easy to grow here.
I missed harvesting the scapes at the right time. They’re now uncurled and sticking straight up and forming seedheads. I’m not interested in the seed. Just the bulbs underground. Should I cut off the seedheads now? Will my garlic be delayed in maturing, or decrease in quality since I left the scapes on?
Thanks
It sounds like your garlic plants are far enough along that it might not make much of a difference in bulb size whether you do or don’t remove your maturing scapes. If you’re not going to use them, it certainly can’t hurt to go ahead and remove them. One thing to note is that garlic bulbils are actually a really good edible part. At a certain point in development, you can pop/rub the individual bulbils off by hand and use them just as you would regular garlic cloves – almost identical in flavor but very interesting/unique texture, size, and shape.
Hello Aaron. I really appreciate you sharing your knowledge and experience with organic farming. I grew up in the city all my life and now I want to try raising my own food. My wife and I agreed to get some raised beds for this purpose. The problem is that the soil in my backyard has high ratio of lead and arsenic (we got the soil tested in nearby universities). So, we want to buy organic soil (soil with little or no lead or arsenic).
Do you have any suggestions on where I can order this from? I looked at what Costco has but not sure about it.
Hi Cesar! Very sorry to hear about your contaminated soil. That’s tragic. Please don’t eat any plants whose roots may have made contact with the contaminated soil. In particular, plants like mustard greens can really pull a lot of lead into their cells (they’re actually used in bioremediation for that reason) and can then cause lead poisoning in people.
As far as soil for your raised beds, you basically just need good organic compost. Depending on how much you need, there’s probably a provider in your city that could drop a truck load off at your home much more affordably than you could buy it by the bag. However, if you’re only growing in a few small beds and/or you don’t have a local compost provider, it might make more sense to buy compost by the bag. A really good bag soil we’d recommend in that case is made by FoxFarm and can be purchased on Amazon here: https://amzn.to/2GLwsAe
Thanks for your reply, Aaron. Actually, we do have raised beds but we have 5 of them. We will need 5 cubic yards of earth.
Looking at the FoxFarm product that you recommend, it is for “12 Dry Quarts”. Being there are 25.7 in a cubic foot, and there are 27 cubic feet in one cubic yard, it will be out of our budget. But, I will try some of that FoxFarm soil for smaller pots. I will continue to search for a provider in my home town. Thanks again.
Hi Aaron. It is taking a long time but our planter beds are constructed and we are getting the soil delivered within the week. We are very excited. I have a question regarding a “food grade sealant”, that I was considering, to fill in the spaces between the cedar wood boards of my planter boxes. There is a 1/4 inch gap between the boards, this is how they were constructed by the manufacturer, and we want to avoid soil from escaping. So, I want to cover those gaps. Someone I know suggested cardboard or this food grade sealant: https://www.amazon.com/Clear-Food-Grade-Silicone-Sealant/dp/B005XP5HO6/ref=sr_1_1?ie=UTF8&qid=1525731937&sr=8-1&keywords=food+grade+caulking. I plan to grown food in these planter boxes. Do you think this is safe to use?
Silicone *should* be fine, but as this Scientific American article attests, there’s not a huge amount of research on it yet: https://www.scientificamerican.com/article/earth-talk-silicone-tally/. Cardboard also works, though some people warn about the glues used to hold the material together. (If you use cardboard, use brown, non-dyed cardboard.) Regardless, sounds like you’d be using so little of either material, that it’s not going to matter.