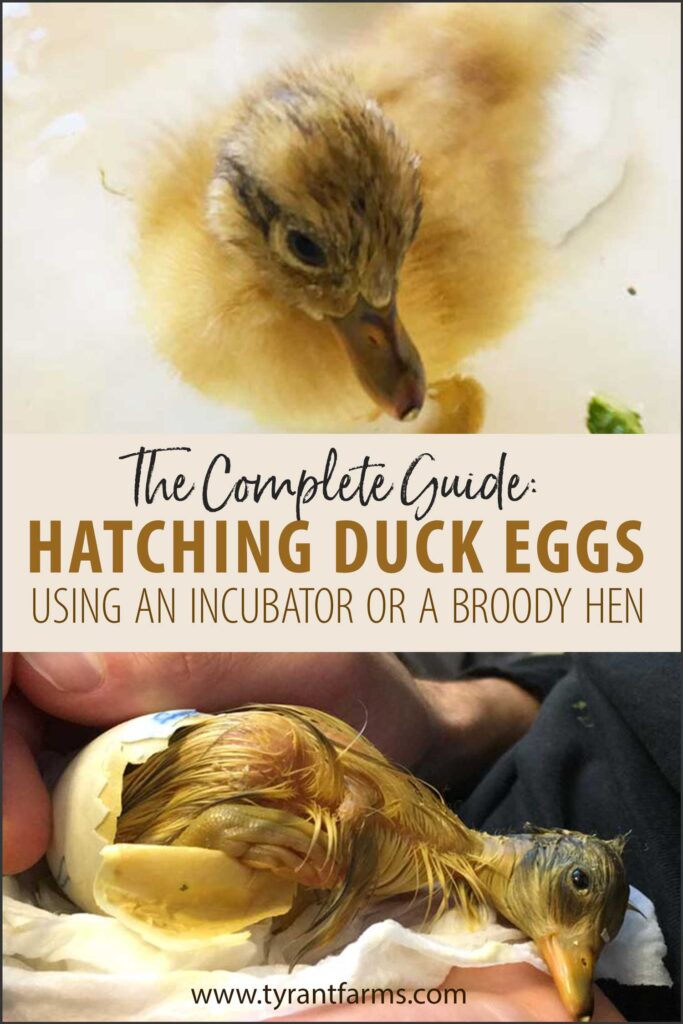
How to hatch duck eggs
Tyrant Farms' articles are created by real people with real experience. Our articles are free and supported by readers like you, which is why there are ads on our site. Please consider buying (or gifting) our books about raising ducks and raising geese. Also, when you buy through links on our site, we may earn an affiliate commission. Learn more
In this article, you’ll learn everything you need to know about how to successfully hatch duck eggs, from A to Z!
Table of contents:
1. Our duck egg hatching story
2. Incubating eggs: two methods
3. Method 1: Momma duck hatches + 6 tips for success
4. Method 2: Hatching duck eggs in incubator + 6 tips for success
5. Printable duck egg incubation checklist
I. Our duck egg hatching story
Before we dive into the how-to’s of hatching duck eggs, we’d like to share our own funny story, er nightmare, that helped us learn a lot of the information included in this article. One of the reasons for sharing our story is to help illustrate lots of important details you should know about hatching ducks eggs — including what can go wrong!
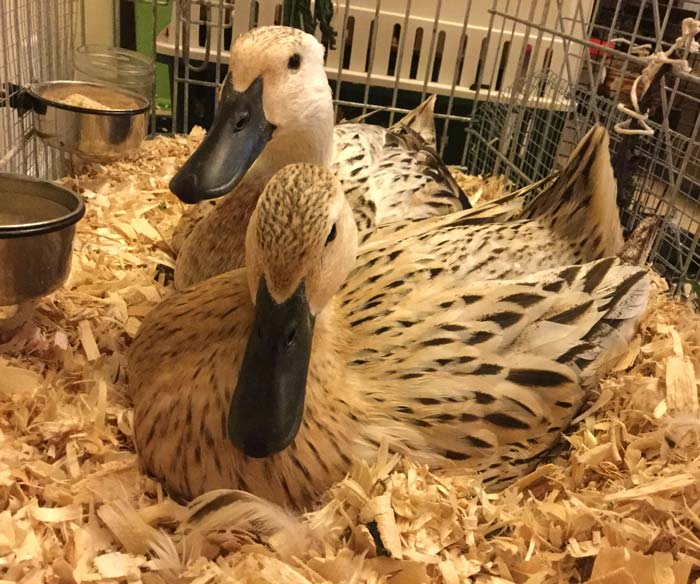
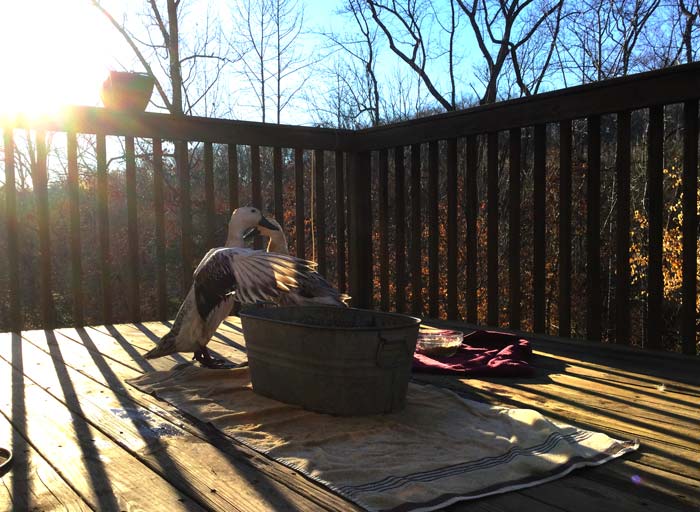
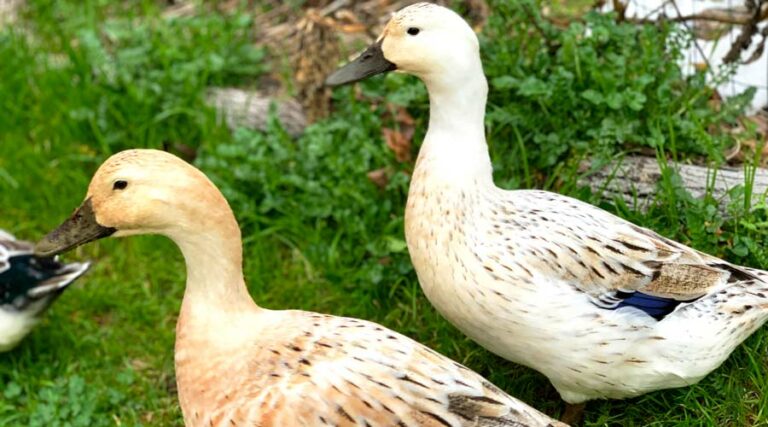
Years back, we had the tamest, smartest duck we’ve ever raised: Svetlana. She was inseparable from her best friend, Jackson, another Welsh Harlequin duck. She also adored Susan (the Tyrant,) who more than reciprocated her affections.
Svetlana was in the midst of battling an aspergillosis infection. She took a turn for the worse, and we brought her to the vet, who said her prognosis was not good. The thought of losing Svetlana was heart-wrenching and we didn’t know how much time she had left.
It was mid-January and she was still laying eggs, which we knew were fertilized via our drake, Sir Winston Duckbill, aka Winnie the Screw. (Things get a little weird around here at times, don’t judge.)
Solution: let’s hatch Svetlana the duck’s eggs
Thus, a decision was made to let Svetlana hatch eggs and experience being a mom before she left this mortal coil. That way, we’d also be able to make sure we’d at least have her offspring if she didn’t make it. Svetlana (who was already an indoor duck by night), her best friend Jackson, Sir Winston, and four of Svetlana’s fertilized eggs moved inside our house, since hatching eggs outdoors in winter would be impossible.
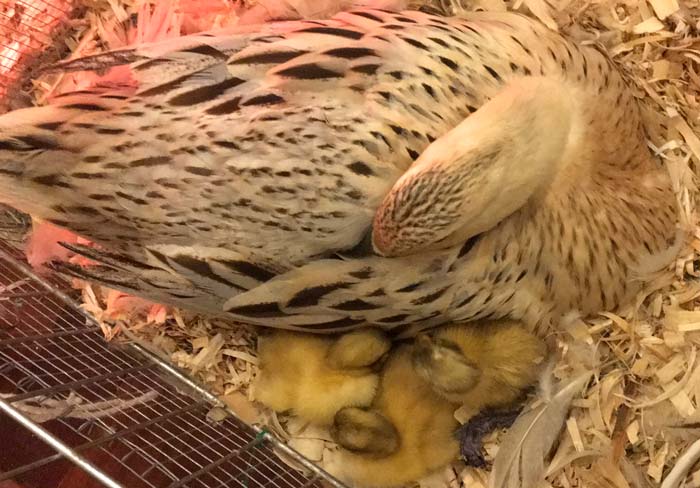
We set up a giant communal cage full of pine shavings and real eggs so both ducks would have eggs to sit and go broody on. Within days of sitting on a nest of eggs, Jackson went broody but Svetlana had no interest in sitting on eggs. Thus, Jackson became the surrogate mother of Svetlana’s eggs. Jackson was an excellent “egg mother” over the next few weeks, and we thought we were all on the path to victory.
Then things went sideways… As the first egg began to make chirping noises and the tiny duckling inside began to tap the inside of the shell to pip a hole, Jackson started to panic. (Pipping is the initial process of hatching when the duck breaks a hole in the egg.) We imagine Jackson’s brain frantically wondering: Was something attacking her egg? Was the crazy chirping egg going to eat her other eggs?
Momma duck’s mothering instincts go awry
That’s when the horror story started. Early in the morning, we found Jackson in the midst of attacking the hatching egg with her bill, which quickly led to the death of the emerging duckling inside.
The other eggs weren’t far behind in development, but at this advanced stage, they’d require extra humidity to hatch, something we hadn’t planned on providing artificially since our ducks were supposed to do the work for us. (Ducks instinctively maintain ideal humidity/moisture levels in their feathers while sitting on eggs so long as they have access to water.)
Simple solution: get an incubator fast. Problem: it was February and we were in the midst of a rare South Carolina snowstorm that made driving impossible.
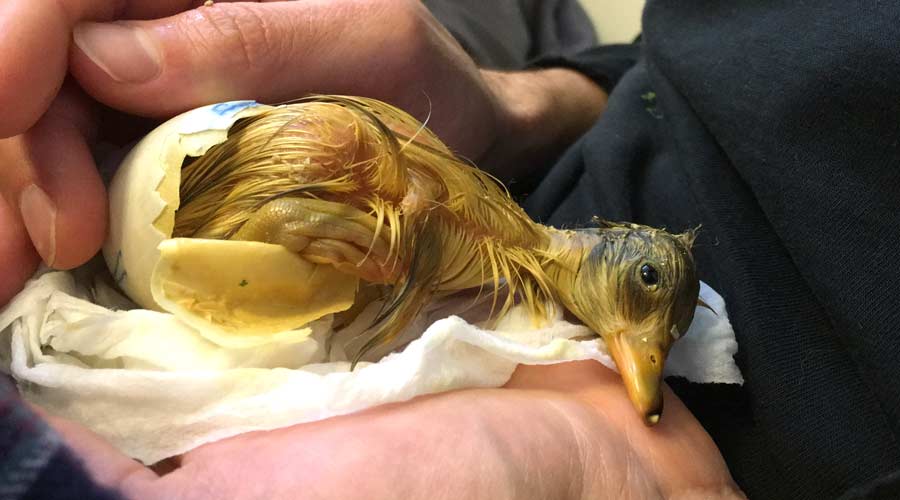
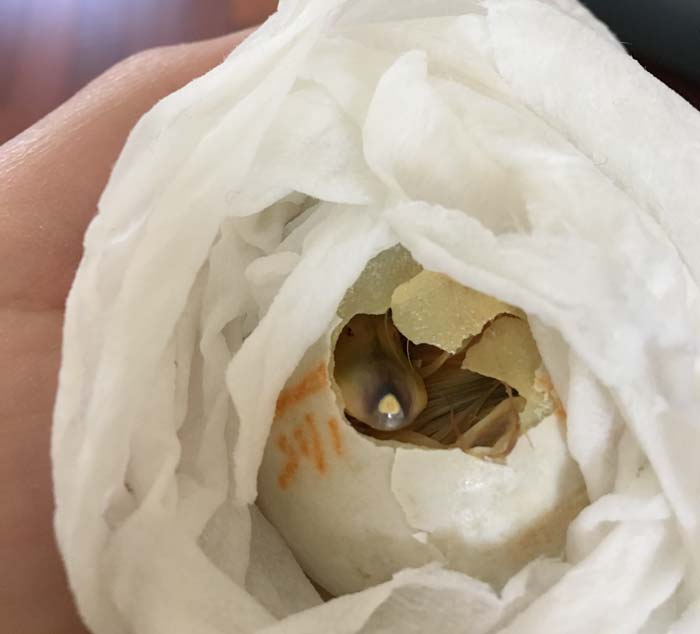
Nature finds a way: incubating duck eggs on human dad’s chest
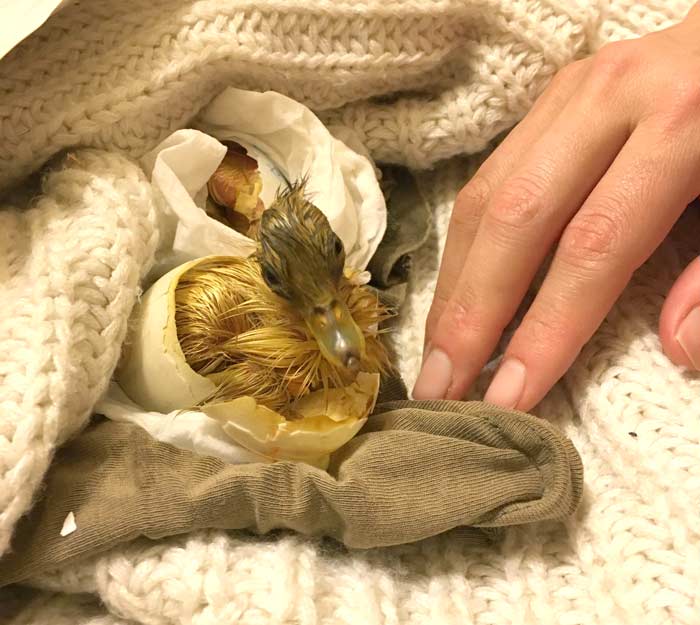
We decided that one of us would have to become momma duck for the final three eggs until they hatched. The Tyrant volunteered me for the job. In all seriousness, I’m a much lighter sleeper so it was logical for me to assume the task… At least that’s what I told myself to maintain my dignity.
Over the next two nights, I slept upright on the couch with duck eggs wrapped in lightly dampened towels underneath my shirt and blanket.
Needless to say, when delicate ducklings are chirping and punching through their shells (hatching takes about 2 days to complete) on your chest, it’s not terribly conducive to a restful night of sleep.
Duckling hatch day and return of good duck momma
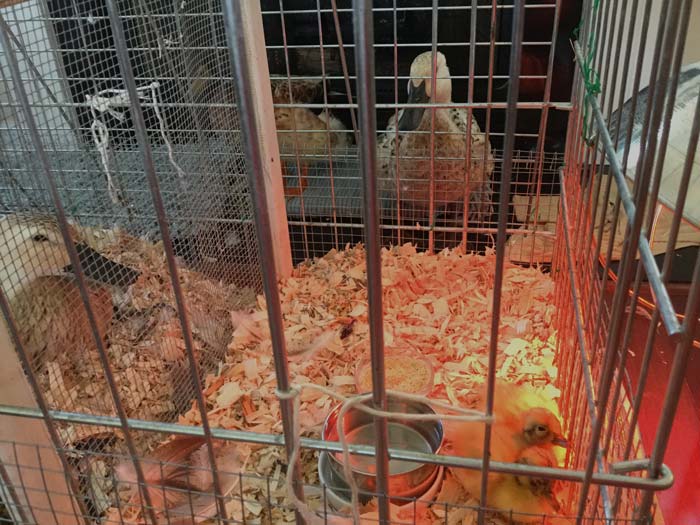
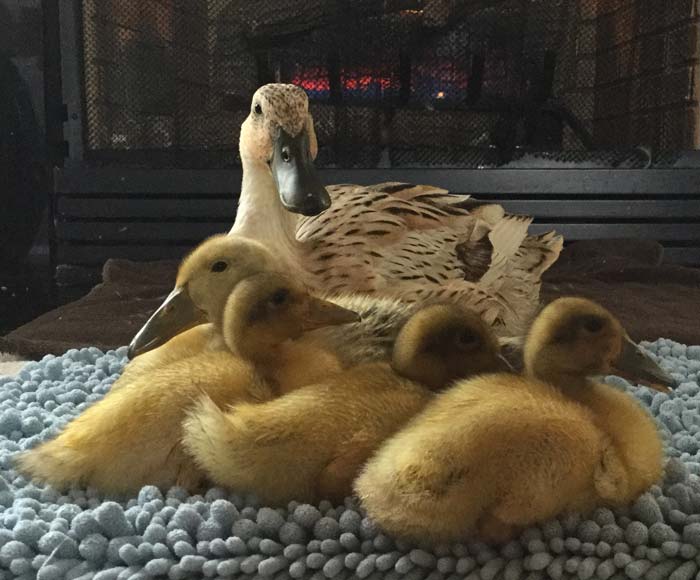
We soon had three happy, healthy ducklings chirping away in our home, which was now a duck sanctuary for all intents and purposes. We put the ducklings in a cage next to Jackson so she could see them and vice versa, without harming them. This allowed her brain to make the connection that she was now a mother to actual ducklings, not just eggs.
Soon, the hormones did their work on Jackson’s brain and she became smitten with Svetlana’s ducklings. Then things went sideways, again… We vent sexed the ducklings and realized that two of the three were males, ratios which would ultimately be problematic in a small flock.
A week later, we were able to get a sexed run of three new female Welsh Harlequin ducklings delivered from Metzer Farms, which Jackson happily took in as her own.
Ultimately, the ordeal helped us achieve our goal: Svetlana’s daughter, Pippa, is still with us today. Svetlana fought on and lived another two years after Pippa’s arrival before eventually passing. And we learned a heck of a lot about hatching duck eggs through our experience.
Don’t worry, hatching duck eggs isn’t nearly as difficult as our story might indicate — especially if you don’t incubate them on your own body in winter. In fact, hatching duck eggs can be downright easy, as you’ll come to find out next!
II. Incubating duck eggs: two methods
There are two general methods you can use to incubate duck eggs:
- Let your ducks hatch the eggs themselves;
- Use an incubator to hatch duck eggs yourself.
Both of these methods have their own pros and cons. It’s important to know what’s involved with both hatching methods BEFORE you decide which method you want to utilize.
Six duck egg hatching facts:
Regardless of which hatching method you ultimately decide to take, there are some universal duck eggs facts you should be aware of:
1. Egg viability
Under ideal conditions, a fertilized duck egg can remain viable for at least 14 days after laying and prior to being incubated (artificially or under momma duck). Beyond that point, fertility rates begin to decline precipitously. The general rates of viability decline are:
- 3% loss within one week of laying,
- 10% loss by two weeks.
However, as a general rule: the less time between laying and incubation the better.
If you need to store eggs prior to incubation, store them in a cool, slightly damp place (55°F and 75% humidity is ideal) with small end pointed down.
2. Days to hatch
How long does it take for duck eggs to hatch?
Once a fertilized duck egg begins incubation via momma duck or an incubator, it takes about *28 days to hatch. (*This is true of common Mallard-derived breeds, not Muscovies, a different species entirely, whose eggs take 35 days to hatch.)
Lower incubation temperatures and/or older eggs can cause longer hatching times.
3. Incubation temperature
Duck eggs incubate at 99.5°F. As the eggs begin to hatch, temperatures should be slightly decreased (more details below).
4. Humidity
During days 1-25, duck eggs require a humidity level of 55-58%; Days 26-28 require 65% + humidity levels.
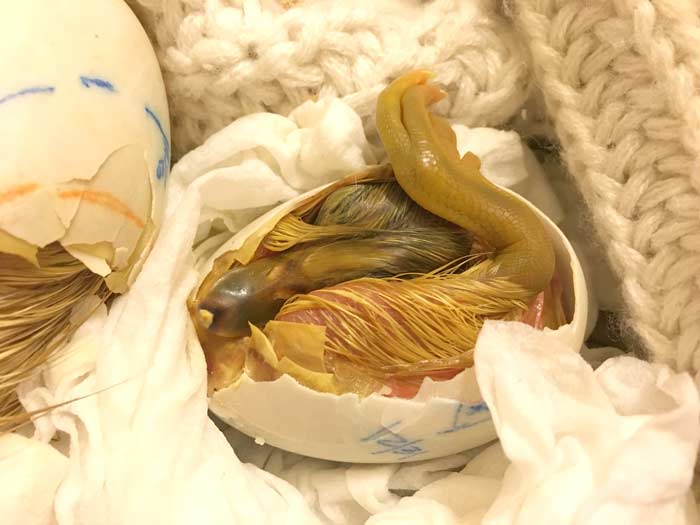
5. Hatching
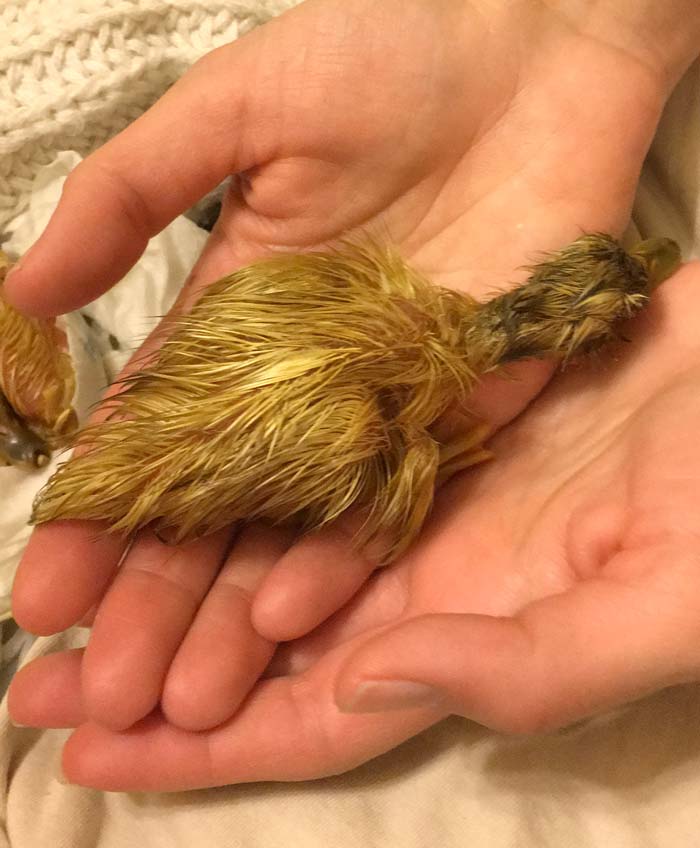
Once a duckling pips a hole in the egg to begin breathing external oxygen, it may take an additional 48 hours to finish “zipping” (cracking a line around the egg to emerge) and fully hatch.

Do NOT try to “help” the duckling remove its shell prematurely or you can very easily kill it by rupturing its the arteries where it is still attached to the inner membrane of the shell. For reference, this is what happened to the egg/duckling that Jackson killed.
An exception to this rule is if a duckling has been stuck in the same position during hatching for 12+ hours and is showing signs of distress. If so, mist the egg and the exposed parts of the duckling with fresh water and wait for 15-30 minutes to see if the additional moisture helps the duckling to begin moving again. If not, you may need to start very carefully removing small pieces of the shell to help the duckling free itself.
6. Food & water after hatching
A duckling doesn’t have to have food or water immediately after hatching since it can live on the nutrition it took in from the yolk for about 48 hours.
Will they do better if food and water are immediately available? Probably so. This information is provided just to let you know there’s no need to panic and plunk your just-hatched ducklings in front of a food or water bowl.
Pros and cons of different hatching methods:
Now, let’s take a deeper dive into the two different duck egg hatching methods you can use:
Method 1: Let your ducks hatch eggs themselves
Pros:
- Easy for humans — the ducks do all the work;
- Lowest cost — no incubator required.
Cons:
- Ducklings raised exclusively by ducks may be more fearful of humans throughout their lives;
- Many duck breeds have poor mothering instincts so success rates will vary by breed (*see breed analysis below).

Method 2: Use an incubator to hatch duck eggs yourself
Pros:
- Better hatch rates if you have ducks/duck breeds that don’t have good mothering instincts;
- More likely to result in tamer ducklings/adult ducks.
Cons:
- You have to have an incubator — and one with settings that can accommodate duck eggs, not just chicken eggs;
- Relatively labor and time-intensive even with automated incubator.
If you have children at home, both methods can provide an excellent educational opportunity. However, using an incubator will allow a more up close and personal understanding of the developmental changes going on inside the eggs and allow you to see your ducklings hatch, something that’s quite magical.
After considering the pros and cons (and details) of both duck egg hatching methods, choose the method that best suits you.
III. Six steps for success if you let your ducks hatch eggs (method 1)
If you decide to let your ducks hatch their own eggs, here are six steps that will help increase your (and your duck’s) likelihood of success:
1. Consider mothering instincts of your duck breed(s)
Some duck breeds are better than others when it comes to maternal instincts.
Domesticated duck breeds, to varying degrees, have lost their maternal/egg hatching instincts. They’ve been hatched via incubators for generations, so perhaps their epigenetic “how to hatch eggs” guidebook is being broken in the process.
Which duck breeds make the best mothers? According to Metzer Farms’ analysis, duck breeds can be broken down as follows based on their mothering instincts:
- Excellent: Muscovy (different species than common duck breeds)
- Very good: Mallard, Silver Appleyard
- Good: Khaki Campbell, Rouen, Welsh Harlequin
- Fair: White Layer, Golden 300 Hybrid Layer, Cayuga, Buff, Blue Swedish, Black Swedish
- Poor-Fair: Black Runner, Blue Runner, Chocolate Runner, Fawn and White Runner, White Crested
- Poor: Pekin, Grimaud Hybrid Pekin, Jumbo Pekin
There’s no hard-and-fast rule here, but if your ducks are a breed that fall below the “good” level on the scale above, you may want to opt to use an incubator (method 2) instead of letting them hatch their own eggs. As related in our opening story, our Welsh Harlequin’s mothering instincts were a little rusty even though the breed falls in the “good” range.
What’s the most eggs you should expect your duck to be able to hatch? Wild Mallards can hatch 13 eggs at once, so you probably don’t want to exceed that number.
2. Only allow your ducks to hatch in the warm months from spring through summer.
Domesticated ducks lay far more eggs for far longer than wild ducks. Just because your duck is laying eggs in fall or winter doesn’t mean that’s a good time of year for her to raise ducklings.
Even a duck with excellent mothering instincts isn’t likely to be able to successfully hatch eggs or keep her ducklings alive outdoors when temperatures are cold. So, only allow your ducks to hatch eggs in seasons that overlap with wild duck hatching season, from spring through summer.

3. Provide a safe, predator-proof environment.
A broody duck on a nest of eggs is, well, a “sitting duck” in the eyes of a predator. If your mother duck is outside on a nest, make certain she’s in a predator-proof coop and/or run.
Read our article: 17 tips to keep your ducks safe from predators.
4. Provide a clean water source for bathing (plus food and drinking water).
Duck eggs have to be kept at very specific humidity levels to hatch, and those levels vary depending on the stage of egg development. Momma duck instinctively knows this information, and her feathers are ideal for providing just the right levels of moisture — so long as she has access to swimming water.
A broody duck will come off the nest several times per day to stretch, eat, drink, take a [gigantic] poop, and swim/bathe. So make sure food and drinking water are available.
Also, make sure your momma duck has clean water to swim and preen in otherwise she may not be able to maintain adequate moisture levels on her feathers for her developing eggs.
5. Keep an eye out for bad eggs.
Momma duck may roll an egg out of her nest. If so, this likely means there’s something wrong with the egg, e.g. it’s not developing properly or at all.
By removing the bad egg, she’s protecting her other eggs from potential contamination. If the bad egg spoils the bacteria can contaminate her other eggs, potentially killing the developing ducklings inside.
If you find an egg that your duck has rolled out of the nest, resist the urge to put it back. There is a chance the egg was accidentally removed from the nest while momma duck was turning her eggs, but it’s more likely the egg is bad.
If you have any doubts, testing for viability involves: 1) smelling the egg to detect foul odors (you’ll know a really bad egg when you smell one), and b) using a flashlight in a dark room to “candle” the egg to detect normal development.
6. Keep a very close eye on momma duck & eggs from Days 24+.
Even if your duck has done an excellent job of tending her eggs for the first few weeks of incubation, that doesn’t mean you’re in the clear, as we related in our opening story. Be prepared to have to separate momma duck from her eggs if she begins to show aggression towards her soon-to-hatch eggs.
Unfortunately, if this happens, it likely means you’ll have to quickly find an incubator to finish out the hatching process. (Assuming you don’t want to spend a few sleepless nights on your couch with ducklings hatching on your chest.)
To get your timing right, set a calendar alert for 21 days after your duck first starts sitting on her eggs so you can start being more vigilant a bit in advance.
IV. Six steps for success if you use an incubator to hatch duck eggs (method 2)
If you decide to hatch your own duck eggs using an incubator, here are six tips to increase your odds of success (*and be sure to get our printable checklist at the bottom of the article!):
1. Get a good incubator and check it regularly.
There is a LOT that goes into maintaining ideal conditions for duck egg development and hatching.
Having a really good incubator that automates as many of these processes as possible will make your life a lot easier and your hatch rates a lot higher. Pick an incubator that matches your budget and the number of duck eggs you intend to hatch. If you’re shopping online, make sure you get an incubator with good customer reviews. Search the product reviews for mentions of duck eggs, in case you can glean any helpful tips.
Keep in mind that duck eggs are larger than chicken eggs, so just because an incubator says it will hold a certain number of chicken eggs, doesn’t mean it will hold the same number of duck eggs – try to find duck-specific specifications. Also, depending on your incubator’s features, you may need to get an extra gadget or two, such as a humidity reader.
Be sure to carefully read and follow the specific operating instructions that come with the model of incubator you choose. If your incubator has any official instructional videos on their website or YouTube, watch those as well. No matter how good your incubator is, glitches and accidents happen.
When the time comes, place your incubator in a low-traffic spot out of the sun. Also, try to select a spot in your home where kids and pets aren’t likely to knock into it and one that’s not too drafty or prone to temperature fluctuations. Even then, you’ll want to check your incubator at least a few times per day to make sure everything is working ok — especially temperature and humidity levels in addition to egg turning.
2. Don’t clean your eggs, but choose non-soiled eggs.
If you’re planning to incubate your own duck eggs, make sure you’re keeping the bedding topped up in your duck coop each night. That way, you’re more likely to get clean eggs that aren’t covered with poo.
Use the least soiled eggs possible for incubation. No matter what, do NOT wash your eggs prior to incubation. Eggs have a protective coating on them called a bloom which helps prevent bacteria from entering the egg, even if there’s a bit of poo on the shells. If you wash off the bloom, your eggs will lose their defensive coating and be more likely to get infected by pathogenic bacteria or other contaminants.
Also, be sure to:
- Thoroughly clean and disinfect your incubator before and after each use.
- Try to use fertilized eggs. You’ll want to make sure a drake has been mating with the female or females whose eggs you use.
3. Follow these general duck egg hatching guidelines:
Some general guidelines to have handy for your duck egg incubation:
a. Egg placement:
Place eggs on their sides in a pre-warmed and humidified incubator. If the eggs are slightly raised, the large end with the air sac should be facing upward.
b. Temperatures:
- Day 1-Day 25: Maintain temperature at 99.5°F;
- Day 26-28: Drop temperature to 98.5°F;
- ~Day 28: As ducklings begin to fully hatch, slowly drop temps to 97°F.
c. Humidity:
- Day 1-Day 25: Maintain humidity levels at 55-58%;
- Day 26: Increase humidity to 65%;
- ~Day 26-28: As duckling(s) begin to pip (punch hole in shell), increase humidity to between 70-80% while also increasing ventilation by 50%.
- Hatch: Once ducklings have fully hatched, humidity levels should be 70% with full ventilation so ducklings can easily breathe and dry themselves.
*If you’re measuring “wet bulb” humidity, it should be 86% from Days 1-25 and 94% from Days 26-28.
d. Cooling & Spraying
Momma duck does not stay on her nest every minute of the day for 28 days. As mentioned previously, they leave the nest to eat, drink, swim, poop, and take a break.
Thus, duck eggs are presumably adapted to deal with these breaks, wherein the eggs cool off prior to being re-warmed by a warm and newly-wet momma duck. That’s why many duck breeders recommend mimicking this cooling cycle, which can purportedly even increase hatching rates.
Here’s how to cool your duck eggs:
- Starting around Day 10 after “setting” (aka initiating incubation) your eggs, open the incubator and carefully remove the eggs, placing them on a towel or soft surface so they won’t roll. Keep the incubator on so it’s warm and humid when you put the eggs back.
- Let the eggs cool to around 86°F, which feels neutral to the human touch (not warm, not cool). You can use an infrared laser thermometer if you have one handy and want a precise temperature reading. Option B, is to just let the eggs cool about 10 minutes.
- Once the eggs have cooled down, spritz them with water and return them to the incubator.
- Repeat this cycle once per day up until around Day 25, after which you should no longer do it.
Do you have to cool and spray your duck eggs for success? No, but the technique has the potential to increase hatch rates, so we’d recommend it if you have a few extra minutes to spare
e. Turning:
Days 1- 25:
The eggs should be regularly (and precisely) turned for the first 25 days to aid in proper development. A good incubator should automatically do this for you, usually hourly.
If not, you’ll need to plan to turn your eggs at least four times at regular intervals over a 24 hour period. Turning is especially important during the first 1-2 weeks of development. Ideally, you can turn your eggs at least 7 times per day during this period. Turn the egg about 50% rotation in the same direction each time.
Days 26+:
During the final (about) three days as the hatching process initiates, the eggs should not be turned. This allows the duckling to settle in on a spot to pip. (This setting is also automated on some incubators or you can manually turn the mechanism off.)
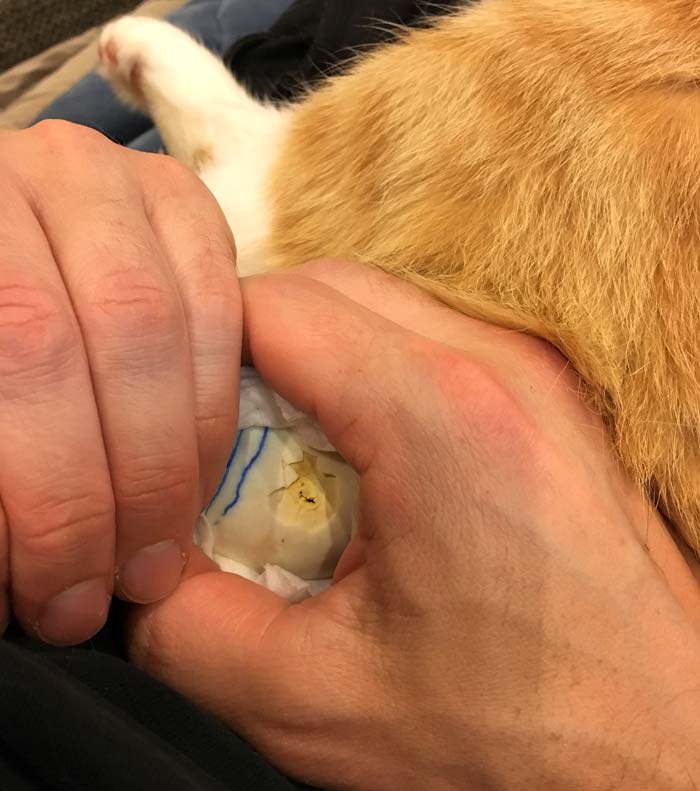
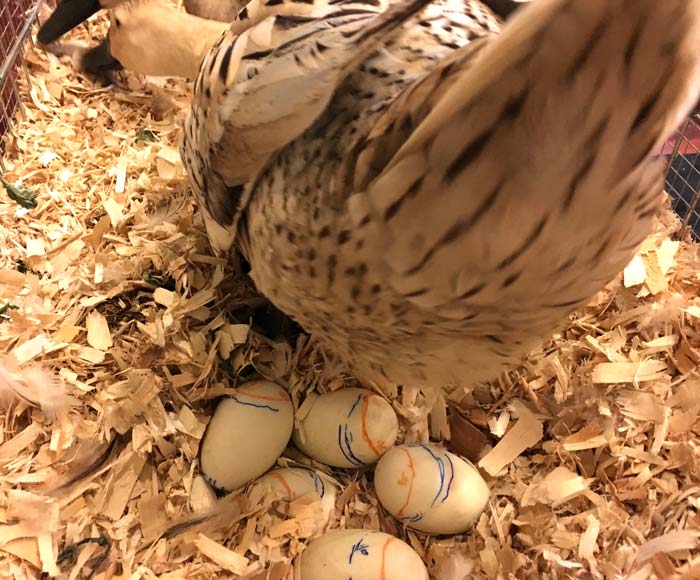
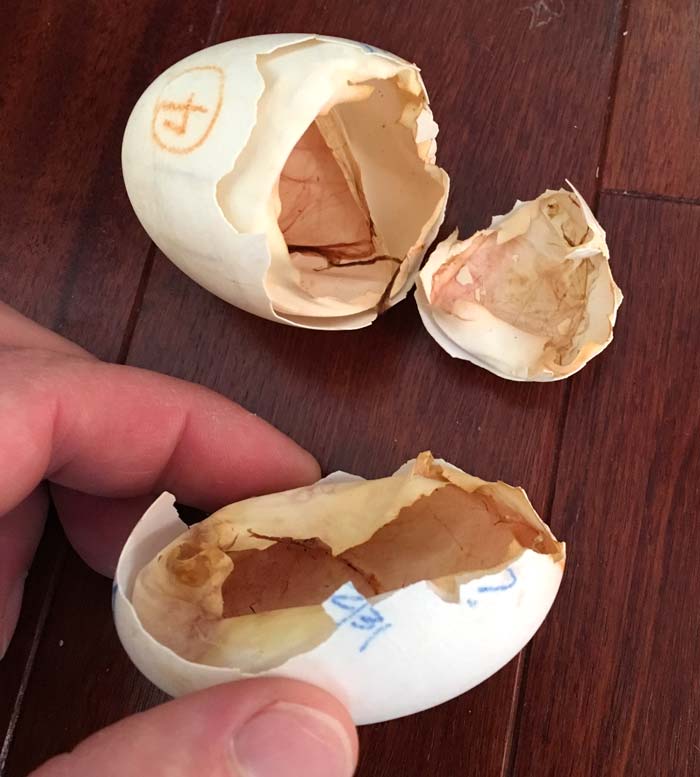
4. Mark your eggs
Even if you have a good incubator that automatically turns your duck eggs for you, how can you tell if the eggs are turning? Answer: you can’t unless you mark your eggs.
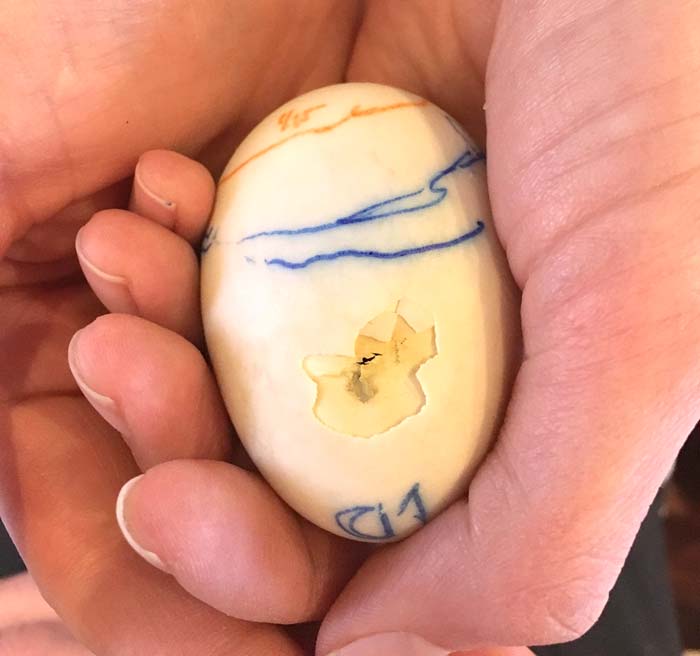
When you first put your eggs in your incubator, draw a mark on the exposed side, such as a dot, a line, or an X and another mark on the other side. (Or you can put a number on one side corresponding with the number of eggs and an X on the other side.) That way, you’ll have no doubt as to whether your incubator is working properly or an egg is stuck and not turning. Use a pencil rather than ink when marking your eggs.
It’s not essential, but we candled and marked the air sacks on our eggs so we could follow the air cell expansion which corresponds with the development. By 25 days after setting (when the hatching process is about to start), the air cell has increased to about 1/3 of the space inside the egg.
It’s also interesting to note that due to water loss during development, the egg will actually lose about 14% of its weight over the same time period.
5. Remove any bad eggs and candle eggs regularly starting one week after setting.
“Setting your eggs” means initiating incubation. Before setting your eggs, remove any eggs that are:
- cracked,
- soft-shelled,
- misshapen,
- double yolked,
- oversized or undersized, or
- coated in duck poo.
One week after setting, you’ll want to “candle” your eggs at least every couple days to check on their development and to make sure there are no bad eggs in your incubator. An egg that turns bad can grow bacteria that could infect other eggs in the incubator, so they need to be removed sooner rather than later.
“Candling” simply means holding a bright light (like a flashlight) on one side of the egg so you get something akin to an x-ray look inside the developing egg.
In a normally developing egg, you should see veining after 5-7 days. Seven days after setting, if there is no veining and an egg is clear, that means it’s infertile; cloudy means something went wrong and development has terminated.
*Important note: If your duck eggs still haven’t hatched after 28 days but candling reveals normal development, continue on with incubation. Some breeds and/or some individual eggs may take longer than average.
What hatch rate should you expect with your duck eggs? Under ideal conditions, plan for 50-75% success rates.
Eggs purchased from large hatcheries like Metzer Farms start with a 85-93% fertility rate. Metzer Farms also guarantees an 80% fertility rate by first candling (one week after setting).
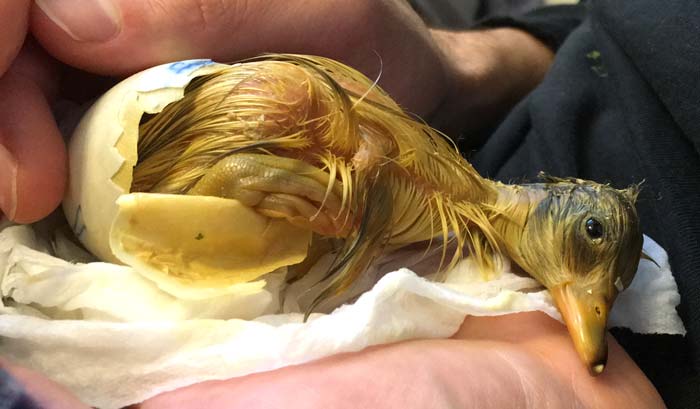
6. Remove newly hatched ducklings from incubator and place them under brooder lamp.
You don’t want to leave a hatched duckling in the incubator too long or they can injure themselves or even the other eggs. Once the duckling has come out of their shell and dried themselves, we’d recommend removing them from the incubator and placing them in clean, dry bedding underneath a brooder lamp to provide warmth. Position the brooder lamp so the duckling(s) have plenty of room to get out from underneath if they get too warm.
For reference, a newly hatched duckling’s wet egg feathers should be dry, fuzzy, and adorable within about one hour after hatching.
V. Tyrant Farms’ printable duck egg incubation checklist
If you’re using an incubator to hatch duck eggs, you’ll want to print and use our helpful duck egg incubation checklist shown below.
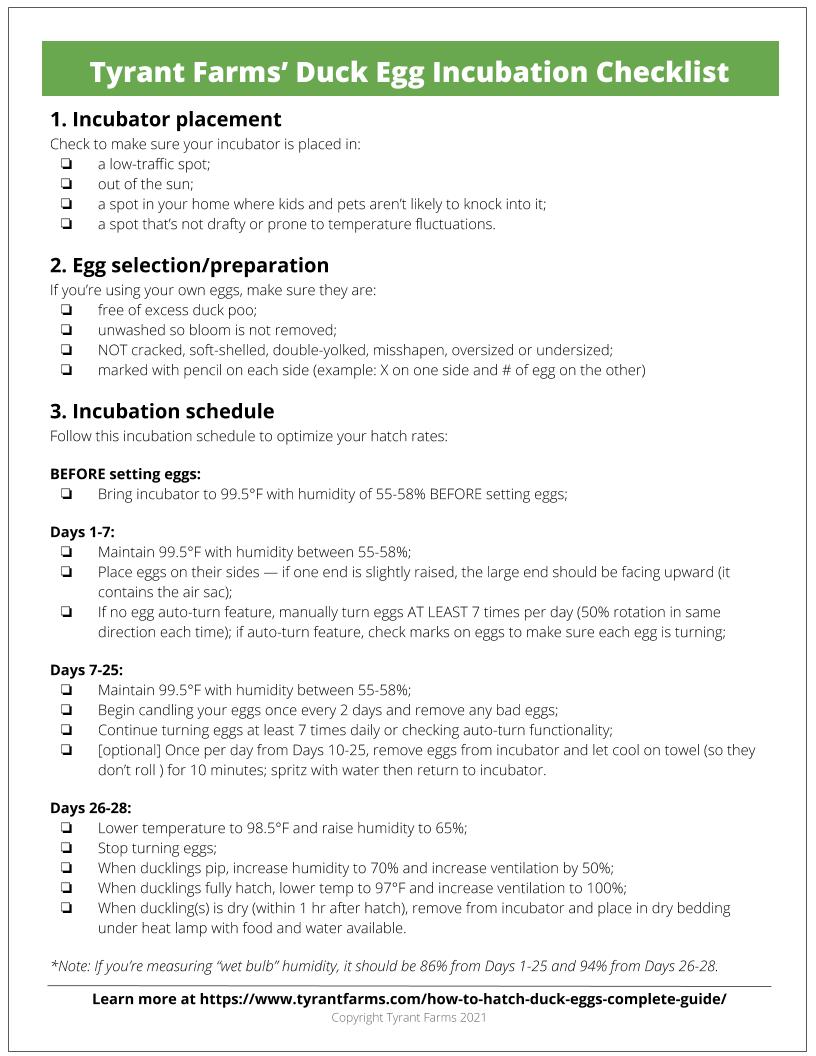
Here’s the link to download and print the 8.5 x 11″ PDF version.
We hope this how to hatch duck eggs guide was helpful! Have questions? Ask away in the comments below…
Happy quacking,


Want to see a quick video summary of this article? Check out our Google Web Story about hatching duck eggs!
More helpful duck articles from Tyrant Farms:
- Where to buy fertilized eggs, ducklings, or ducks for your backyard or small farm
- What to feed pet or backyard ducks to maximize their health and longevity
- How to build a self-cleaning backyard duck pond
- How to raise ducklings: a step-by-step guide
- How to build a long-lasting, predator proof duck coop and run
… or browse our full library of duck articles!
Hi Aaron, well ducklings are about 7 weeks old. I’ve put them in the big pen closed of from Buttercup and Cocoa in the day. They start screaming if they don’t see me for awhile. They’re getting better. I was working in the back, so I put them in their dog enclosure. I left the door open and finally they were brave enough to go it. In a foursome. They went back to the pen after about 10 minutes. Then Cocoa came over and started biting the mallard hen on the neck. I stopped that fast. I think he thinks she’s one of the wild ducks that visited the pond this spring. Until that day, he and Buttercup had never been in the pond. When he saw them, he got right in the pond swam back and forth,chased them off. This happened for about a week and the wild ducks finally left. So now I think he thinks one of them has returned. Today I had them in their dog pen and he went round and round the pen.
It’s really time for the babies to be out. I don’t want Buttercup and Cocoa to feel like their territory is being infringed on. I can fence off part of the pen. One way they didn’t have their trough to swim in at night or the other way, they don’t have their duck house . I don’t trust Cocoa to behave. Will he eventually come around? Not quite sure what to do. It’s just been the 2 ducks for a couple years with all the chickens. Any suggestions? Thanks, Debbie
What we’ve found over the years from our own experiences and from the experiences of other duck families we know is that each duck flock integration process can be a bit different depending on these six factors:
1) individual temperament variance (every duck is different);
2) sex of ducks (drakes are often particularly problematic compared to hens in mixed-sexed flock integrations);
3) age of ducks (young ducks tend to be a bit feistier than older ducks);
4) time of year (sunlight regulates hormone levels and high-sunlight months make for more difficult integrations since hormones are raging);
5) size of ducks (larger ducks can more easily bully or scare smaller ducks);
6) space allowance / amount of room in the setup (the more space, the better).
So we can offer generalized guidance and recommendations, but each situation (like yours) is going to be somewhat unique. It sounds like you’re doing exactly what we’d have done in your shoes. Some fighting and squabbling is normal and should be allowed until the social dynamics are established – unless the fighting is persistent or harsh enough to potentially cause injury.
Continuing on with ever more extended periods of supervised integration sounds like the way to go. Just bump up the time each day over the next week until full integration is achieved so you have some relief in sight. Caveat: If I’m understanding your statement, “or the other way, they don’t have their duck house” it sounds like one set of ducks wouldn’t have a predator-proof coop at night if you keep them separated, so that’s a definite “no.” It would be terrible to lose your ducks to a predator, especially after all you’ve been through.
Something else you might want to try as you move forward is separating your drake out temporarily while you’re out with the aim of allowing your new ducks and your existing female duck to form a relationship. It sounds like that’s unlikely to happen with your drake being present – at least until sunlight and hormone levels decrease.
Best of luck to you all! Duck flock integrations can be a real pain. We’re going through similar aggravations right now between our existing flock and the 6 new rescues we recently got.
Hi Aaron, me again. The ducklings are now a little over 3 months old. Cocoa got in their pen the other day because the door didn’t close behind me. He was chasing all of the ducklings and kind of biting on their heads. I finally got him out. No one was injured. Is this normal? It looked like he was was trying to maybe mate them, but I didn’t know. I don’t think it’s good that he does that. They are separated from the adults all the time. I don’t think Buttercup cares about them. She just ignores them. Do you have any suggestions? Cocoa and Buttercup have always been together so it seems mean to separate them. Hope your integration is going well. Thanks
Yep, that’s normal. Cocoa the duck was trying to grab the back of the females’ heads in order to jump on their backs and mate. Ideally, duck mating happens in water instead of on land so as to prevent potential leg injuries.
The good news for you is that we’re heading into fall, which means lower sunlight levels, which then translates into a decline in hormone levels that make ducks (especially drakes) go a little crazy. You mentioned not wanting to separate Cocoa and Buttercup, but you *could* put Cocoa in his own pen/run and let Buttercup integrate with the new ducklings. They’d probably be fine together in no time. Then, once Cocoa molts and/or his hormones dip, you could integrate him back in with the flock. You’ll still likely need to separate him from the flock again in late winter/early spring as his hormones start surging again. One of our drakes (our older Welsh Harlequin) just molted and has had a very welcome attitude adjustment, so he’s out with our girls all day right now. Our young Runner drake is still behaving terribly (by our standards) so he’s still separated from the flock during the day and night.
Thank you. I’ll try to separate the pair. If not, fall is rapidly approaching. So I’ll try then. I thought that’s what he was trying to do. I guess I have all females because he was doing that to all. My neighbor commented the other day about the loud quacking. They are very vocal compared to the adults. They love seeing their human mom.
Hi Aaron thanks for your suggestions. I guess I’m ready for them to be out, but I guess it’s not quite time. My nighttime pen is all enclosed and roofed. My adult ducks rarely stay in their house. It’s very large. The original part with the coop of the ground is about 12×30. An old Costco redwood swing set converted. Then I decided I needed more room, so added another 12x25ft plus a 6×10 covered dog run. Everything has a metal or wire roof. I can close the door between the duck and chicken area. There is a small duck house in there but lots of mice. I’ve been putting the ducklings in the main duck pen and closing the door during the day. So they’re safe from everyone. That’s the one I was taking about fencing off. I’ll try your suggestions. Thanks, Debbie
I have a question. I have a duck that has been sitting on her nest and ìt getting close to time for the the eggs to hatch. what I am worried about it that she shares a coop with 2 other ducks and couple of chickens. dobi need to remove the chickens for a couple of days and find a way to separate the ducks?
Adrianne – It’s entirely possible all your adult poultry will accept the new hatchlings and things will go perfectly well. However, if it was us, we wouldn’t risk it. The peck of an irritated chicken could easily severely injure or perhaps kill a small duckling. And even though ducks have bills, an adult could also severely injure your ducklings. Sorry if this creates a lot of extra work for you, but if it keeps your ducklings from getting killed or injured, then that work will be worth it.
I separated my chickens and my drake but my other female couldn’t not taken from other female and then this morning when I checked on the ducks both ducks were sitting on the nest. I let them run around for a bit while I checked the eggs and then the 2nd duck came and sat on the nest and not the 1 that has been sitting all this time. Do I have a problem or is the other duck just being friendĺy?
Ha! This means you have two ducks going broody, not just one. They’ll both probably try to share the nest or create adjoining nests – and if they create adjoining nests they might try to steal eggs from the other’s nest from time to time. We’ve had this happen before. Maybe just let them both figure out things together and co-parent the ducklings. As we mention in the article though: do be mindful that mother ducks can sometimes freak out as their eggs start to hatch and attack them. So keep a close eye out and be prepared to remove and hatch the eggs yourself.
So another question for you. My Rouen has been sitting on the eggs for 28 days and still nothing has hatched how long do I let them sit. My kaki Campbell only joined her in sitting on the nest like a week ago. I have candled the 9 eggs and 7 show development and 2 show all most no signs.
If you candled the eggs and see clear signs of development, let momma ducks continue sitting. 28 days until hatching is typical, but there can be variability. If you don’t start seeing signs of hatching (tweet sounds coming from inside the eggs, pipping and zipping) within another week, then something most likely has gone wrong. But hang tight for now.
Hi Aaron, So there is still no change with my eggs. They still look good and have no bad smells. Do I wait a little longer or take the eggs from her? What is the best way to break her from being broody?
35 days is the longest we’ve heard it taking for Mallard-derived domestic duck eggs to hatch. Muscovy duck eggs can take 35-38 days, but they’re a different species. Are you certain you’ve crossed the 35 day threshold from the first day momma duck actually started brooding/sitting on the nest? Since candling revealed embryonic development, it would be very strange for there to be a 100% hatch failure rate; maybe 10-20%, but not 100%.
Perhaps try candling the eggs one more time and also listen to them to see if you hear any faint chirps coming from inside. If candling reveals that the eggs appear to have development, I’m very hesitant to tell you to get rid of them. We want to avoid the possibility that you’re throwing out ducklings that are close to hatching. In fact, if/when you do reach the point where you’re ready to throw in the towel, you might want to start by cracking open only one egg that you think has had development take place to see what’s going on inside. That way, in case they’re developing (albeit oddly slowly) you’d only be killing one duckling instead of the whole brood.
Sorry you’re going through so much aggravation and please check back in!
Hi Aaron, one more question. I brought baby inside and she/ he was doing ok, but not good. I got 3 day old ducklings ar tractor supply. I know bad, but I couldn’t get any mail order until this week and was afraid baby wouldn’t make it. I put them all in a plastic box with wire lid. Heat lamp, food, e.t.c. The new ducklings started eating right away. So then Baby got the idea that she should do the same. So now I have a huge plastic box with bigger waterer and more room. I have brought them outside twice in a wire enclosure just to let mama see them. No way. I have removed all but 1 egg from the nest. That is going tonite. I’m going to clean the duck house tomorrow and put new bedding. I can borrow a large dog crate from a neighbor to put the ducklings in. My question is how do i know if she accepts them? Is there a behavior? i know she doesn’t want them now. If no go, i will bring in the house again. Really want mama to raise them. Are there certain signs? If it’s a no go, and I bring them when they’re fully feathered, how do I introduce Buttercup and Cocoa to them? Thanks, Debbie
When our mother duck wasn’t accepting the ducklings, she would immediately become agitated in their presence and start trying to peck at them. However, once her brain flipped over to motherhood mode, she showed no aggression. If you’re right there with her and the ducklings, you can supervise to make sure she doesn’t harm them. Being in the presence of ducklings while she’s broody should eventually get whatever switches in her brain are currently turned off, turned to the on position. Then you can let her take over.
Integrating new ducks to an existing flock can be a little tricky. It seems like everyone we’ve talked to who’s done it has slightly different experiences depending on the breeds, ages, and individual temperaments of the ducks involved. We’re actually integrating 6 new rescue ducks into our flock right now that we’ve had for about a week. General rules for duck flock integration:
1) Start off by keeping them physically separated by fencing or caging that allows them to see and interact with each other without actually being able to touch each other. Observe how they interact to see if there are signs of aggressive behavior.
2) Once it seems like they’v acclimated to each other (time may vary), let them fully interact under human supervision. If things remain calm, you’re pretty much good to go. If not, you may need to keep them separated a bit longer.
For instance, our new duck coop (https://www.tyrantfarms.com/duck-coop-tour-design-ideas/) has separate internal partitions so we can keep different groups of ducks separated inside the same coop. Our new rescue ducks (5 females/1 male and 5 different breeds) are in one section, the original girls (4 Welsh Harlequins) in another, and our original drake (Welshie) is in another section. After the first day and night we could tell they weren’t going to fight with each other. So since then, during the day, everyone except for our original drake is sharing the same back yard. The two flocks don’t fight, but they don’t intermingle much either. They basically keep to their own sections of the yard. Our guess is that the social dynamics between the groups is likely to shift over the seasons and years ahead. Once sunlight levels drop in the fall and everyone is more hormonally calm, we think they’ll do a lot more intermingling and allegiance-shifting. For now, they’re still in their own sections in the coop, but we’re probably going to open that up at night sometime in the next couple weeks.
Keep us posted and best of luck to you! You’ve got a lot on your hands, and we appreciate all the care and thought you’re putting into taking care of your ducks.
Hi Aaron, the saga continues. When I took the last egg out of Buttercup’s nest, she was very mad. She was scolding me in duck language when she discovered no egg. The next day, she was off her nest and out in the enclosure. Then she and Cocoa started free ranging in the yard. When I brought the ducklings outside in a little pen, she was not having it. No mother there. So I’m the mama. All the enclosed rooms are upstairs. So they are in a big plastic box right now. I’m getting a kiddie pool. I take them outside once a day for a swim in the duck trough. They love it. Then I put them in a portable dog fence , where I can watch them. Cocoa seems to be adjusting to them a little. Buttercup just sits and eyes them, with an occasional quack. I still clean their coop twice a day. So messy. I’ll follow your instructions for integrating , once they are old enough. For now just letting everyone get adjusted to each other. Thanks again.
There’s never a dull day with ducks around! Thanks for sharing your adventures and misadventures. Thanks also for taking good care of your ducklings. Luckily, they grow up quickly, so you won’t have to be a duck momma for too long.
Hi Aaron, thank you for your advice. I will try your suggestions. I really appreciate all your help.
Thanks again,
Debbie
Hi Aaron, don’t know if my last comment went thru. I was able to bring the eggs inside and candle in my little bathroom. Three looked undeveloped. Basically yolk with air underneath. Two of them looked possible and I thought I saw beaks. Might be my imagination. Should I bring those 2 inside and try to hatch? As I said, it’s been since May 23, The new one is doug good. I could put them in a washcloth under a heat lamp with the new baby. Appreciate your advice
Hi Aaron, well the eggs are still under Buttercup. I had one egg that got out of the nest when Cocoa decided it was time to mate and pulled her off her nest. It rolled down the ramp and was cracked and falling apart. I picked it up with a bag to. throw it away. Then I decided to see what was inside, there was a duckling. I thought it was dead, but opened its eyes. Unfortunately, it was too young and died the next day in the homemade box I had set. up. I was sad. So today I went out to feed and water and there was a cracked open egg. In the corner was a duckling. I thought it was dead. I went over to pick it up and it was alive. I tried to put it in the nest, but Buttercup was not having it. So inside to the box and heat light. He or she is still alive and doing good, Basically sleeps a lot. I’m going to order more ducklings online. I don’t think the other eggs will hatch. I’m not good at candling. I did it and thought there was nothing inside. So I was wrong obviously. What do you suggest? Buttercup is a good brooder, but doesn’t seem to want to be a mom. So do I try to take the baby out to her again? I really didn’t want to raise ducklings again. Although I do know more now. I just thought she’d be a good mom. I put the eggs under her around May 23. It’s been cold here in Northern Nevada, so she may not have had enough warmth. I think I should just remove an egg once a day when she’s off her nest. Any input would be appreciated.
When we had a momma duck who was a good EGG momma but freaked out and actually started killing the ducklings once they hatched, we kept the ducklings in an adjoining enclosure where the mom could see and interact with the ducklings without actually getting to them to harm them. The enclosure also had a heat lamp plus food and water. After about 12 hours, we could tell she was coming around to the ducklings so we started doing supervised visits. Both ducklings and momma duck soon fell in love and she stopped attacking them and started guarding and caring for them. You might want to do the same thing as yours continue to hatch.
Also, it’s very difficult to give advice on what to do with Buttercup’s remaining eggs. They require pretty precise humidity levels, warmth, and regular turning – something that momma duck/Buttercup instinctively does and that can also be done fairly easily by a human with a good incubator. Out in the open under a heat lamp (even with a cloth towel) it’s going to be much harder to create ideal conditions for successful hatching, which is a multi-day process. Ideally, you could leave the eggs under momma duck until they hatch (or not) and then remove the ducklings only if necessary if she’s not caring for them. Perhaps you could start allowing brief, supervised visits with the first duckling to help Buttercup acclimate to being a mother of ducklings, not just eggs.
Hi Aaron, Quick update. I was able to find die eggs from a local farm that has ducks. They raise them to train herding dogs. I got the eggs and when Buttercup was off her nest I put them in and covered with shavings. When she got back on, she immediately began covering them with more shavings. Perched herself on top just so happy, it was great. She’s been sitting on them ever since. She keeps moving her nest from one side of the duck house to the other. I’m waiting to see what hatches and what happens. I was very surprised that she just accepted the eggs as her own. I send further updates when they hatch.
Neat! Yes, please keep us posted with egg and duckling updates, Debbie!
We have an adopted female duck who looks like our three Blue Swedish (one male, two females), except she is brown. (No idea her breed.) She’s brooding! She’s made herself a huge, fantastic nest of sawdust and hay in a corner of our chicken coop, as our ducks (ten female mixed of Blue Swedish, Pekins, and Khaki Campbells) and chickens share a yard, run, and coop. Do we need to remove her to her own pen and coop (adjacent to the main one) for brooding and hatching? If so, when? She successfully mouth-threatens everyone away from her nest right now. THANK YOU for writing and sharing this article!! I saved it as a magnificent, concise, yet thorough resource! Thank you!!
Hi and thank you for your kind words. Glad this article was helpful for you! As for whether you should move your broody momma duck, it depends… Is there plenty of room in the coop for her plus your other poultry? Is she (and her nest) out of the way of chicken poop that will come down from the roost which might contaminate the eggs or harm the ducklings after hatching? If everyone is reasonably comfortable, happy, and hygienic, let her stay there. You may also want to provide a small bowl of water and food near her nest so she can more easily keep herself up. Good luck to all!
Wonderful! I am soooo relieved. There is a small ramp up into the coop, but yes, it is very spacious with more than plenty of room for everyone, especially now that about half the chickens and almost all the ducks roost or sleep “outside”in the enclosed secure run for the night. Do we just leave it up to her to guard and guide the ducklings once they’re hatched? We’ll be vigilant, of course, but one can’t watch nor predict animals 100% of the time. God has designed nature to do this successfully all the time, without my lil’ ole help! :- ) We just want to provide her with the best opportunity. Again, many, many thanks for your kindness in sharing your wife’s and your experience!!
The odds of a duckling/duck surviving to one year old in the wild is somewhere between 30-50%. The highest cause of mortality is predators, but diseases and illnesses certainly take their toll as well. Ideally, domestic ducks cared for by humans can have a MUCH higher survival rate. However, even domestic ducklings are especially vulnerable during their first 3-4 weeks given their small size. A mature duck or chicken could easily kill or injure them, so it would be helpful if you could provide some additional protection during that time window by keeping them separated. As they get larger and the other birds acclimate to their presence, there’s minimal risk. Best of luck to all!
Hi Aaron, I don’t see evidence of anything getting her eggs. Once she started nesting and brooding I kept the chickens away. They had been eating them before she went broody. I’m looking for some eggs locally, but don’t think I’ll find any. If I can’t find any, should I let her brood for a few weeks and then slowly get her off her nest? Or do a full month? As always, thanks for your help.
You can buy hatching eggs online if you’re aiming to let her hatch and raise ducklings. Just keep in mind that there’s no way to sex eggs so you’re very likely to end up with some males which will create challenges.
If you’re NOT trying to hatch eggs, you don’t really need to do anything at this point. Without eggs to sit on, she shouldn’t stay broody for too long. If she does continue to stay broody for more than a few weeks, you may have to forcibly snap her out of it by separating her from the nesting area and keeping her in a well-lit area throughout the day. Unfortunately, when they’re broody, they barely leave the nest to eat or drink, which causes weight loss. So maybe supply a bowl of food and water next to her in the meantime.
Hi Aaron, quick question. My duck is brooding. she’s built a nest, exhibiting all the behavior. I’ve kept the ducks and chickens isolated. When she was off the nest to swim in the trough,I checked her nest. No eggs at all. this is after about a week of brooding behavior. Does it take awhile for them to lay or is she just doing the brooding thing. I have a male duck. Should I isolate her nest from her like I did last year when the chickens got her eggs or just wait?
Hi Debbie. I can’t quite tell from your prior comments – what happened to Buttercup’s eggs? Did you collect them or do you think your chickens got to them again? We’ve never had a duck go broody on an empty nest, but have read of that happening on occasion. Once they go broody, their hormones shift and they’ll stop producing eggs while they sit on their nest for several weeks. Without eggs to hatch and break her out of her broody trance, you might have to be the one who snaps her out of it when the time comes if she doesn’t do it herself.
Hi Aaron, Thanks for this article. We had two ducks- 1 black swede, 1 black swede runner cross sitting on eggs last year. they were sharing a nest and as you can imagine things went a bit sideways- we had seperated them but we ended up finding several dead, freshley hatched ducklings. the runner cross was the best with the eggs so we seperated her and she successfully hatched one little one. We found one egg in distress and were successful in assisting it’s hatch. We were planning on incubating this year as she lost a lot of weight last year for a very unsuccessful hatch – however she had other plans, she managed to get herself a clutch before we realized it- We have 4 laying ducks and she stole some eggs and hid them. I moved her nest with the eggs in them when I found them and put it in a sectioned off part of our barn. My incubator had not arrived so I thought if she followed the nest then she was serious. Well she did and she has been dedicated to the nest. Now my incubator has arrived and I am considering taking half the eggs and putting them in the incubator. What do you think? She has been sitting on them about 10 days.
Hi Alison! Yep, ducks can sometimes be lousy “egg parents” and even good egg parents can be lousy parents once the eggs start to hatch. Certain breeds are better/worse than others and younger inexperienced ducks are generally not as good at parenting as older/experienced ducks. Since your duck has already had parental experience from start to finish, she *might* be a better momma this time around. It’s really impossible to say until the moment of truth arrives, at which point you’ll need to be ready to intervene should she become filicidal. It does seems like a good idea to remove and incubate some percentage of the eggs yourself to guarantee success while also giving her another shot at parenting. If you don’t mind, please check back in and let us know how things go? We’re very curious to hear if she does a better job hatching/parenting the second time around.
Hi Aaron, I’m hoping that with all of your duck-hatching experience, you’ll have an answer. When our teenage mother Runner duck abandoned her nest after 4-5 weeks of irregular brooding, we took the remaining two living eggs to our incubator. The movement and peeping let us know there was life inside, but it seemed to be dwindling. Finally we pried open the shells from the tiny pip and over many hours peeled away the hard parts, stopping when any bleeding occurred. . Both ducklings survived, but inside the egg with them was a gooey mass that we wiped away. It was not yellow as an unabsorbed yolk might have been, but gelatinous and mostly clear. What was that sticky blob, and does it occur in normal hatchings?
Hi Gale! What you’re describing isn’t something we’ve had happen when hatching duck eggs, but it sounds like something we’ve read about. The clear, gelatinous goop inside the egg was likely excess albumen. The reason for the excess albumen (or at least our hypothesis) was overly high humidity in the incubator during the final days of incubation, which didn’t allow the egg to loose as much moisture as it might have under normal conditions. This can cause them to drown or to be “glued” in place if it dries on them as air enters the egg during pipping and zipping. You did the right thing to wipe the excess goop off of them after hatching before it dried. Hopefully, your ducklings are healthy and eating/drinking normally now that they’re hatched. Best of luck!
the chick in the duck egg seems to me ready to come out.
I’m hearing him pulse in the shell since sunday but nothing’s happening. Also the shell of a duck egg is really thick and it is not clear to me how he will succeed on his own.
Just wait? How long is this story supposed to take? It is important to know that our hen incubates on the egg and the duck shows no interest
Hi Leeyah! Ducklings/hatchlings are well-suited to pip and zip right through a duck egg, despite the thickness of the shell. They have a specialized “egg tooth” (pointy part on the tip of their bills) that helps make this process possible. Assuming all conditions are right (namely temperature and humidity) it’s best NOT to intervene in the hatching process. If you crack the egg shell or help the duckling emerge prematurely, you can actually rupture veins and blood vessels and kill it. So if we’re understanding your current situation properly: just sit back and wait. Do keep an eye on your duck momma if she is a first-time mom as they can sometimes freak out when the zipping and pipping starts, as mentioned in this article. Best of luck!
My 16 month old Pekin female, just this morning, showed signs of nesting her egg. It is probably fertile, my drake is very active! Should I let her keep it? How often, and how long periods of time should she be laying on it? She gives me daily eggs. What should I do?
Hi Lorry! We can’t tell you what you should do, but we can share some things for you to consider that might help you make a more informed/better decision:
1) Your duck will probably lay a clutch of ~10+ eggs before she dedicates herself fully to sitting on the nest and tending them. This process triggers a hormonal shift, which in laymen’s terms is called going “broody.” Once that switch flips in her brain, she’ll want to spend the majority of her days and nights on the nest, coming off occasionally to eat, drink, swim, and *poop. (*Pretty much the only time a duck will hold their poop is when they’re sitting on eggs/broody.) She’ll also stop laying new eggs at that point.
2. As a breed, Pekins are known to be pretty good mothers. However, new duck moms and/or ducks that haven’t been around other hatching ducks and duck moms often have mishaps. For instance, we’ve had a new duck mom who was a wonderful mom to her EGGS, suddenly freak out as those eggs started the multi-day hatching process. The chirps coming from inside the eggs made her think something was wrong and she actually attacked two of her eggs, which didn’t end well. This means you’ll need to on guard to prevent this sort of thing from happening and have a duck egg-compatible incubator on-hand to finish hatching the eggs yourself if it does.
3. If you let your duck hatch 10+ eggs, you won’t have any idea what sex ducklings you’ll get. You’ll also have to have time and accommodations to raise all those ducklings and mature ducks (or re-home them at some point). The likelihood is you’ll get a 50-50 male/female ratio, which means you’ll eventually need to re-home some male ducks since you really don’t want more than 1 drake: 3 hens. Even then, in our experience, having multiple drakes around is not a lot of fun as they have to be kept separate from each other to prevent them from attacking and injuring each other.
This is not an attempt to talk you out of letting your duck hatch eggs; just trying to give you an accurate assessment of what you can expect (and should be prepared for) if you do. Best wishes to you and your flock either way.
Thank you for this article! Just ordered 6 eggs so hopefully will have ducklings by the end of next month! Complete novice at this and appreciate all the details and insights. Thank you!
You’re very welcome, Stacy, and thanks for the kind words! Best of luck hatching your first ducklings. Feel free to reach out any time we might be of help.
Hi I don’t know if you can help, we have just rescued 13 duck eggs after the mother duck flew away from her nest this morning, she has been constantly troubled by four male ducks for the past couple of weeks so we have been watching her closely, it has been about four hours since she flew away chased by the males, we have put the egg in an incubator that we used for chickens, can you help us with what the temperature should be and any other information that you think would be useful,
Hi Shirley! Best of luck hatching your abandoned duck eggs. We’d suggest you carefully read this article or at least print the downloadable PDF duck egg hatching checklist at the bottom. Duck eggs incubate at 99.5°F. As the eggs begin to hatch, temperatures should be slightly decreased, as the article details. Let us know if you have any questions as you move forward – fingers and flippers crossed for you!
Great article! We are beginning our journey with Welsh Harlequin ducklings this spring! Taking the next few months to get prepared as we want for warmer weather. I’ve read many of your articles and thrilled to have found a local homestead to emulate here in GVL! Thanks!
Thanks Robyn! As we said in our facebook message, feel free to reach out any time you have questions about ducks or growing food.