Japanese knotweed & strawberry hand pies
Tyrant Farms' articles are created by real people with real experience. Our articles are free and supported by readers like you, which is why there are ads on our site. Please consider buying (or gifting) our books about raising ducks and raising geese. Also, when you buy through links on our site, we may earn an affiliate commission. Learn more
We have to start this recipe post with a disclaimer about Japanese knotweed:
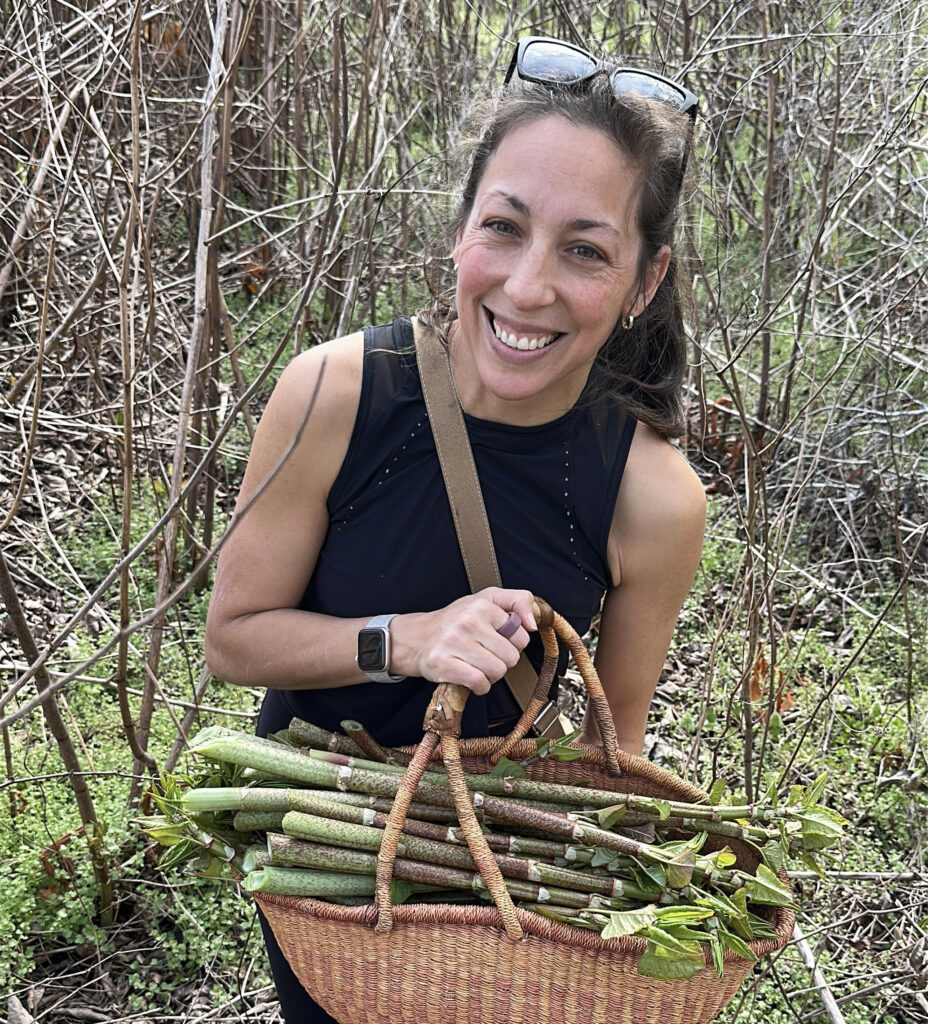
- Japanese knotweed is highly invasive. NEVER plant it in your garden — or anywhere else. Instead, forage it in the spring when the tender shoots are emerging, but be very careful to get it from spots that have not been sprayed by herbicides or other pesticides.
- When you process Japanese knotweed in your kitchen, either: a) microwave the scraps prior to composting them, or b) throw them away. This ensures that it doesn’t take root around your compost and take over your property.
With that disclaimer out of the way, let’s get cooking!
What does Japanese knotweed taste like?
Japanese knotweed has a tangy flavor similar to sorrel or rhubarb with earthy, citrusy notes. This flavor profile means you can use it in sweet or savory dishes.
We wanted to see how Japanese knotweed worked as a rhubarb substitute when paired with strawberries, so we decided to make Japanese knotweed & strawberry hand pies with whole wheat organic pastry flour. They turned out amazingly well, so we’re sharing our recipe with you!
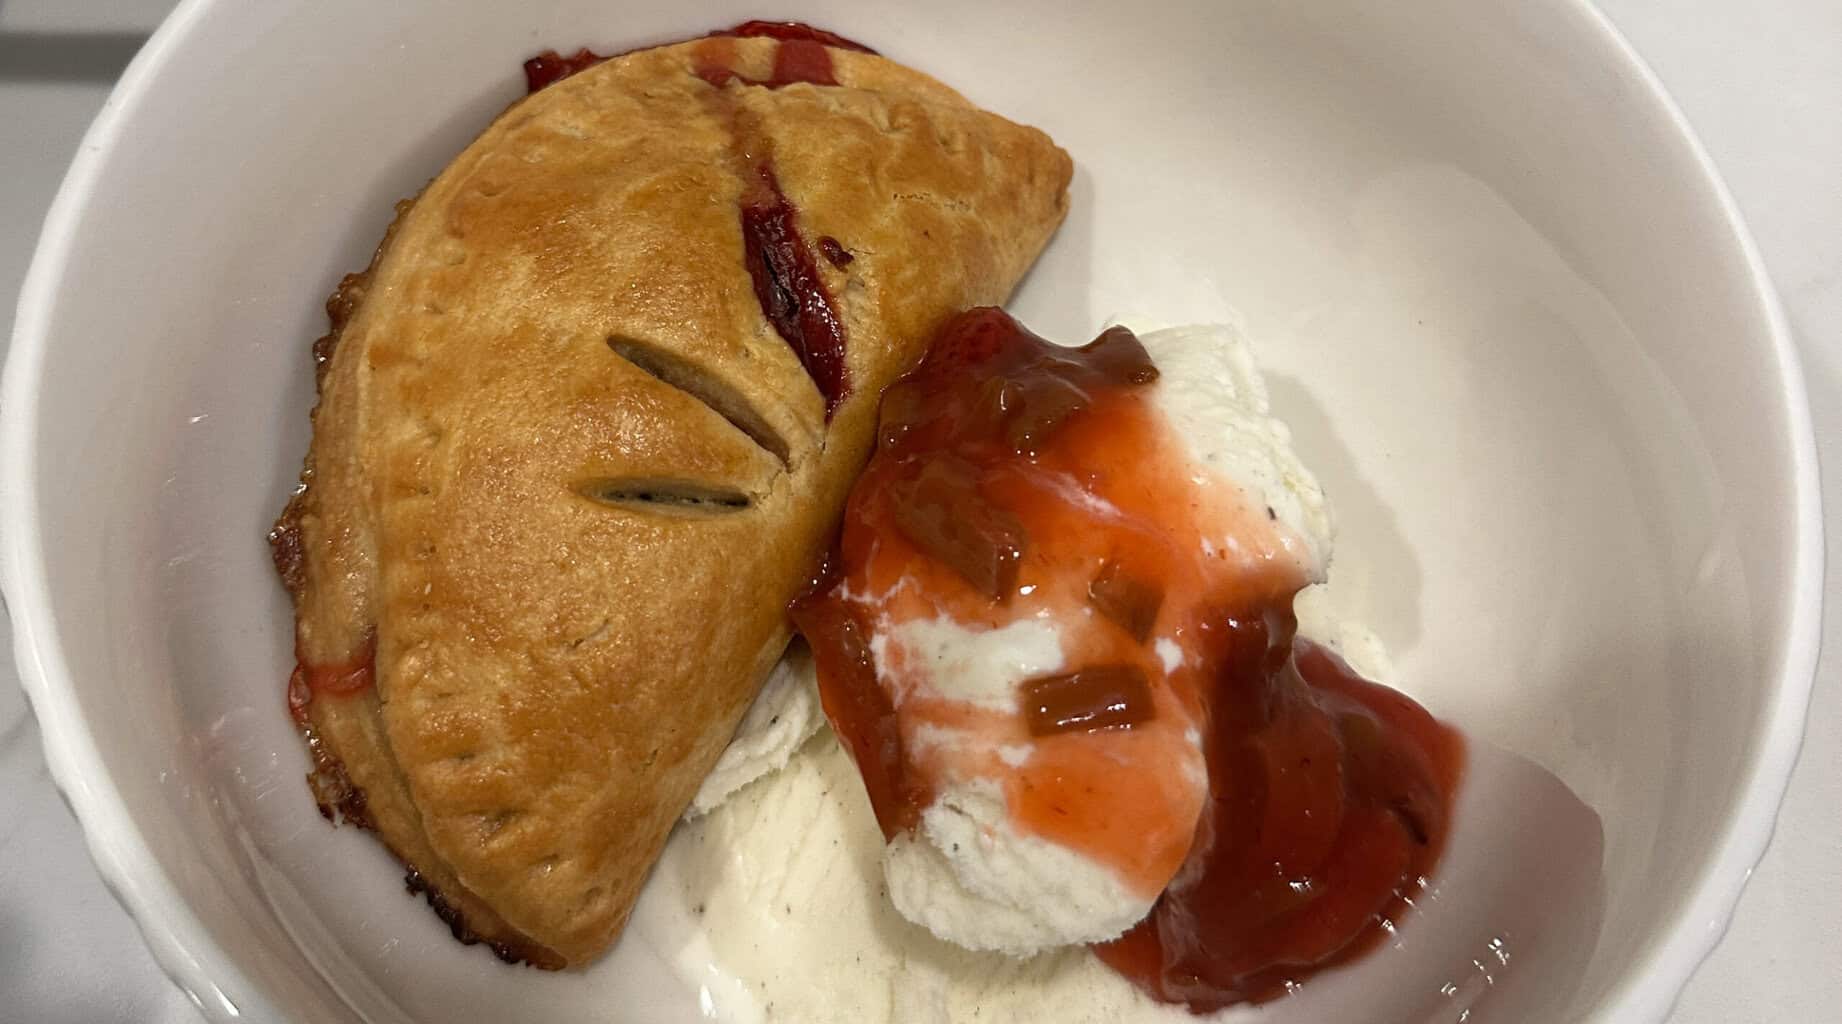
What’s a hand pie? Each hand pie is basically an individual pie serving wrapped in pie crust so you can pick it up and eat it without getting your hands messy. However, for this knotweed-strawberry hand pie recipe, we recommend eating each one with a scoop of vanilla ice cream with a drizzle of extra knotweed and strawberries on top.
That’s why our recipe calls for more filling than you can fit into the hand pies. The extra filling is meant to be cooked in a pan to thicken it, then served on top of the ice cream alongside the hand pie.
Size and servings
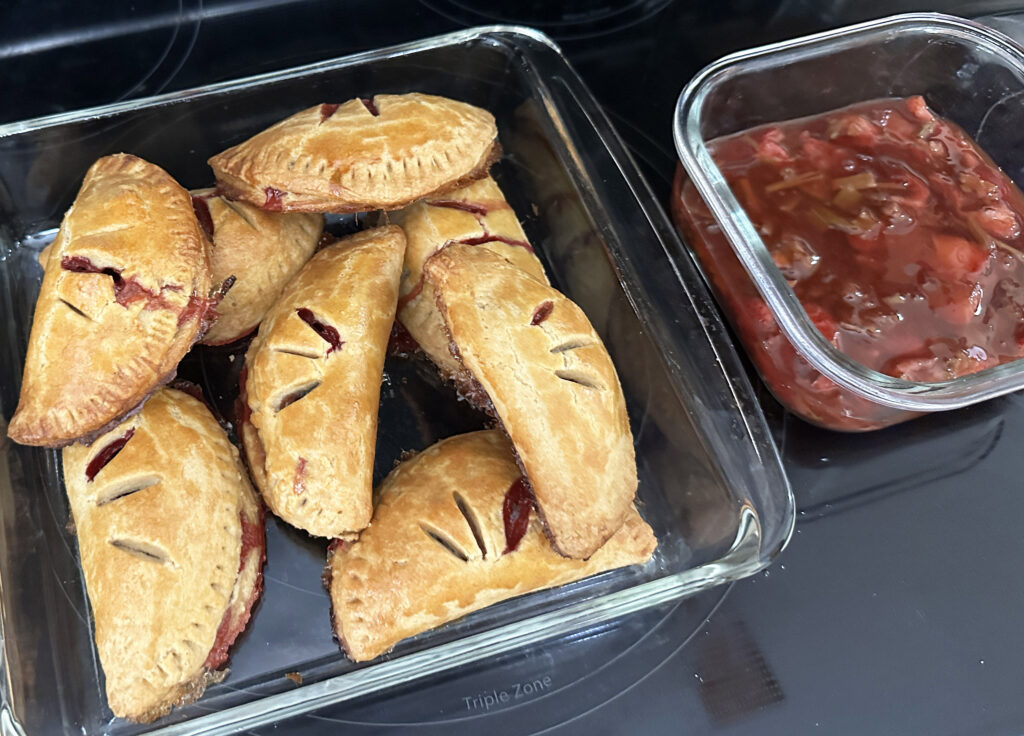
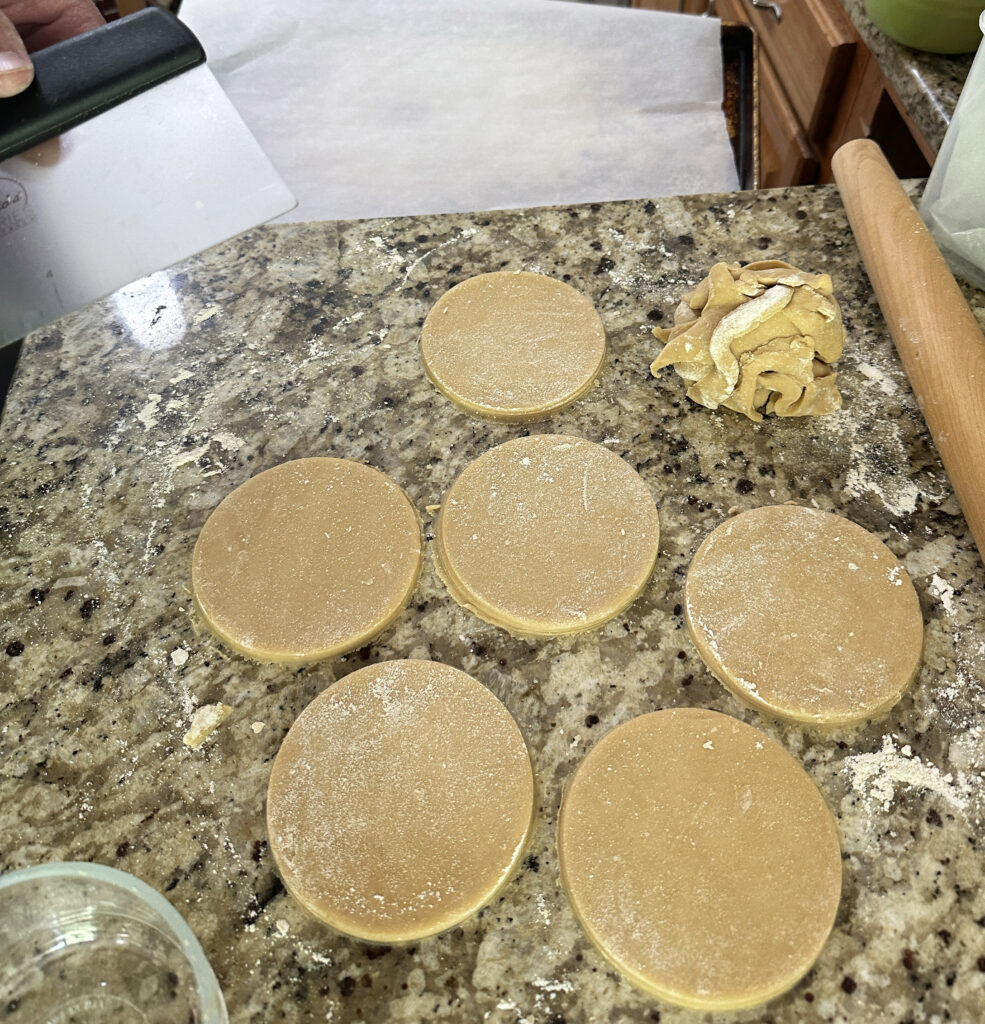
We used a 4 1/2″ diameter circular glass storage dish to cut our hand pie dough. Each pie was then stuffed with filling and folded over to make ten palm-sized hand pies. You can go larger in size, but we wouldn’t recommend going any smaller or you may have difficulty putting enough filling in each hand pie.
Avoid this mistake!
A mistake we made (that you should avoid) was making our filling before we rolled out our hand pies. That caused the filling to be very watery, since the sugar liquified and drew the water our of the knotweed and strawberries. This made it more difficult to stuff the hand pies.
Instead, we recommend cutting all your hand pies and putting them on the baking sheets BEFORE you make the filling.
Organic whole wheat pastry flour substitution
We use Whole Foods’ 365 brand organic whole wheat pastry flour for this recipe. If you don’t have that ingredient, substitute regular pastry flour 1:1.
How long will Japanese knotweed store?
We’ve found Japanese knotweed to be surprisingly long-lasting in the fridge. We put our knotweed in silicone bags with a paper towel inside (to soak up moisture), and it has lasted up to four weeks. (It may last longer, we’ve just used it by then.)
You could also slice and freeze your Japanese knotweed for longer storage. This information may come in handy in areas where knotweed and strawberry season don’t overlap!

Japanese knotweed strawberry hand pies
Equipment
- food processor
- Rolling Pin
Ingredients
For pie crust:
- 338 grams organic whole wheat PASTRY flour (slightly more than 2.5 cups, measured with spoon and sweep method) (Note: Standard whole what flour is not ground fine enough to make a good crust. If substituting, use conventional pastry flour.)
- 1 tbsp maple sugar (or leave out for less sweet pastry)
- 1/2 lb chilled unsalted organic grass-fed butter, cut into 1" cubes (2 standard sticks)
- 1/2 cup ice cold water (you'll actually use a little less than 1/2 cup, as detailed in instructions)
- 2 tbsp organic apple cider vinegar
- 1 egg (NOT added to dough – you'll whisk the egg and use it as a "wash" on dough surface)
- 1 tsp salt
For filling:
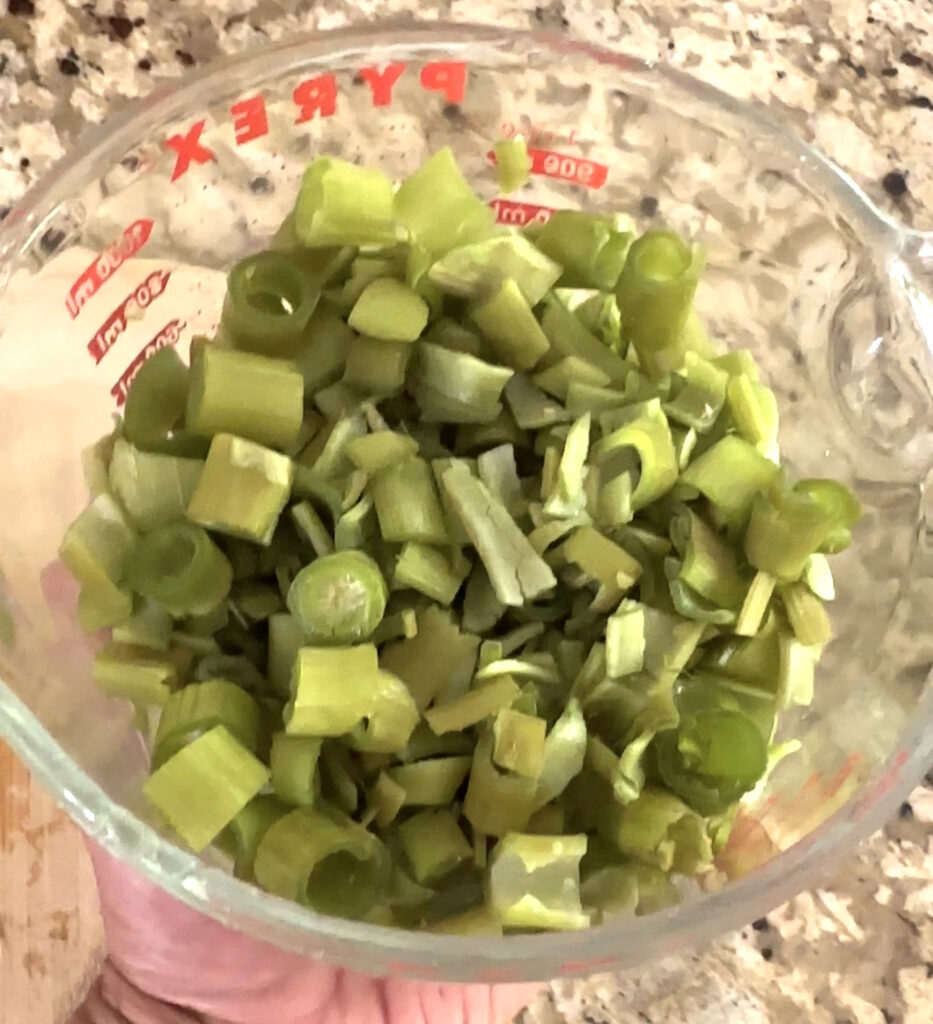
- 3 cups Japanese knotweed, measured cut into small rounds
- 3 cups fresh, organic strawberries, measured thin-sliced
- 1 cup organic cane sugar
- 3 tbsp organic corn starch
- pinch of salt
Instructions
- Start making your pie crust at least a couple hours before you plan to bake because you want the pie crust dough to be rested and chilled before rolling and filling it. Put ice in 1/2 cup water, then set aside to allow water to chill. Mix dry ingredients in bowl, then transfer them to a food processor. Cut cold butter into ~8 equal sized chunks or 1" cubes. Add butter to food processor and use pulse setting to work butter into flour mixture. Do NOT over-blend; you want butter chunks of varying sizes for ideal crust.Next, remove 2 tablespoons of the ice water, then add 2 tablespoons of vinegar back to the water. (Adding a bit of vinegar to pie dough makes it easier to work and creates a better finished crust.) Next you're going to slowly add your ice water/vinegar combination to the dough by slowly pouring it into the food processor, then pulsing after each addition. You don't want to over-process/over-mix the dough so don't keep the food processor running the whole time. This will create a fairly wet dough, but you're going to add/fold in more flour as you're rolling it out in the next steps!
- Cover and chill dough in fridge for AT LEAST one hour.
- Once dough is chilled, pre-heat oven to 400°F (204°C). Cover two cookie sheets with parchment paper. In small bowl, whisk 1 egg and set aside along with a kitchen baster for egg wash (before baking).Generously dust countertop with pastry flour and roll out dough to about about 1/8" thick (or slightly more, but not less or it's more likely to tear). You'll want to occasionally dust rolling pin, dough surface, and counter surface with more flour as you go.Use a form or bowl to cut out circular hand pies. Use a dough scraper to remove and transfer each circle of dough and transfer it to a covered baking sheet. You should end up with 8-10 hand pies if you cut 4-6" dough circles.
- Next, cut your knotweed into 1/4" rounds and slice your strawberries into thin pieces. Put them in a mixing bowl along with sugar and corn starch and give them a good stir until all ingredients are combined.
- Next, spoon knotweed-strawberry filling into the middle of each hand pie. A little less than 1/4 cup of filling seemed to be ideal us. Use baster to apply a rub of egg to half of the outer edge of the dough (like you're creating a smiley face) – this will help the dough better stick together when you fold it in half. Fold dough over filling, then smush together with fingers. Next, use a fork to push down on the outside edge of each hand pie, further helping the dough stick together and providing a decorative touch. *You should have plenty of filling left over! You'll make this into a sauce that you'll pour over vanilla ice cream when you serve your hand pies. Score (make small incision) each hand pie with a sharp knife, wiping the knife clean between each cut. (We made three small cuts as you can see in pictures.) This isn't just for decoration, it allows steam to escape and keeps your hand pies from exploding.Apply final egg wash to each hand pie, which gives it a beautiful, shiny finish.
- Place pies in pre-heated 400°F oven for 10 minutes. (Set timer.)IMPORTANT: After 10 minutes, turn heat down to 350°F (177°C) and bake for another 30 minutes until hand pies are golden brown. Remove from oven and put baking sheet on cooling rack until ready to eat.
- While hand pies are baking, put your remaining filling into a saucepan over medium heat. Cook for about 10 minutes, stirring regularly, then remove from heat and let cool.
- Once cooled, knotweed-strawberry hand pies can be stored covered at room temperature for a few days. For longer storage, refrigerate or freeze.
- We recommend serving a warm hand pie in a bowl with a scoop of vanilla ice cream covered with knotweed-strawberry sauce.
Knotweed-strawberry hand pies are a sweet and tangy delight! We shared ours with a group of friends and our kids and all bowls were scraped clean.
We hope you enjoy them as much as we did! Please share or drop us a comment or recipe rating to let us know what you think!
Thank you,
-Susan and Aaron