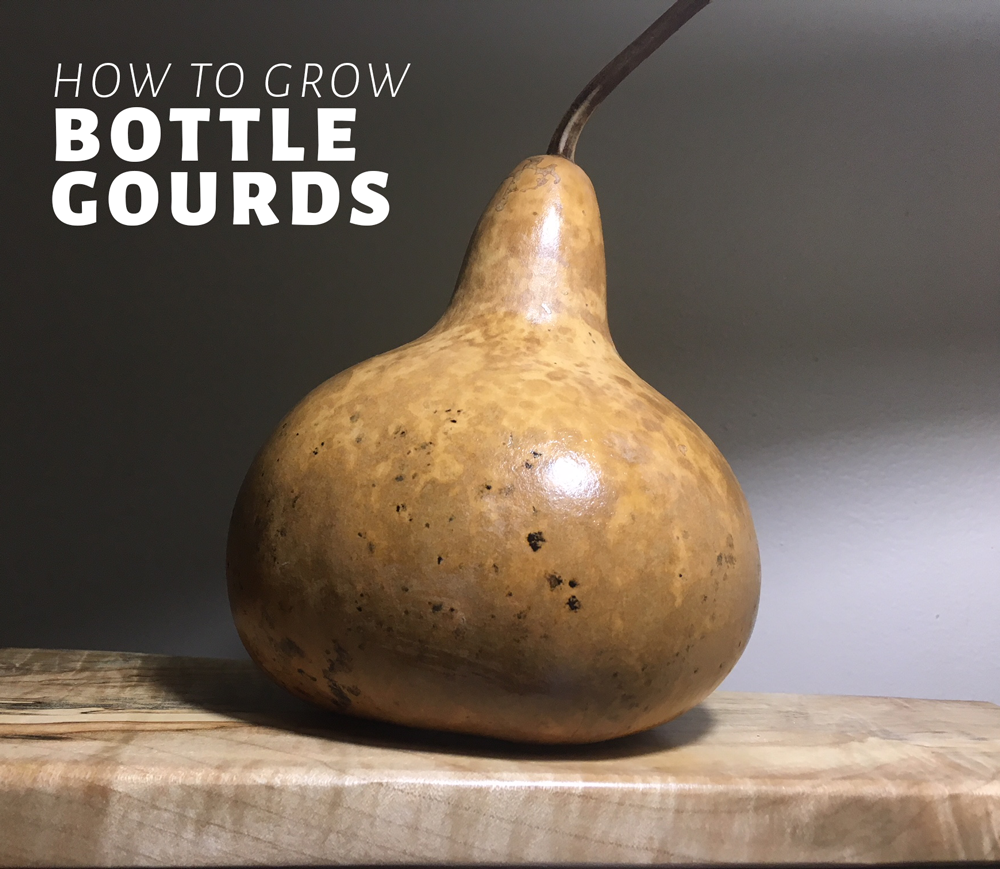
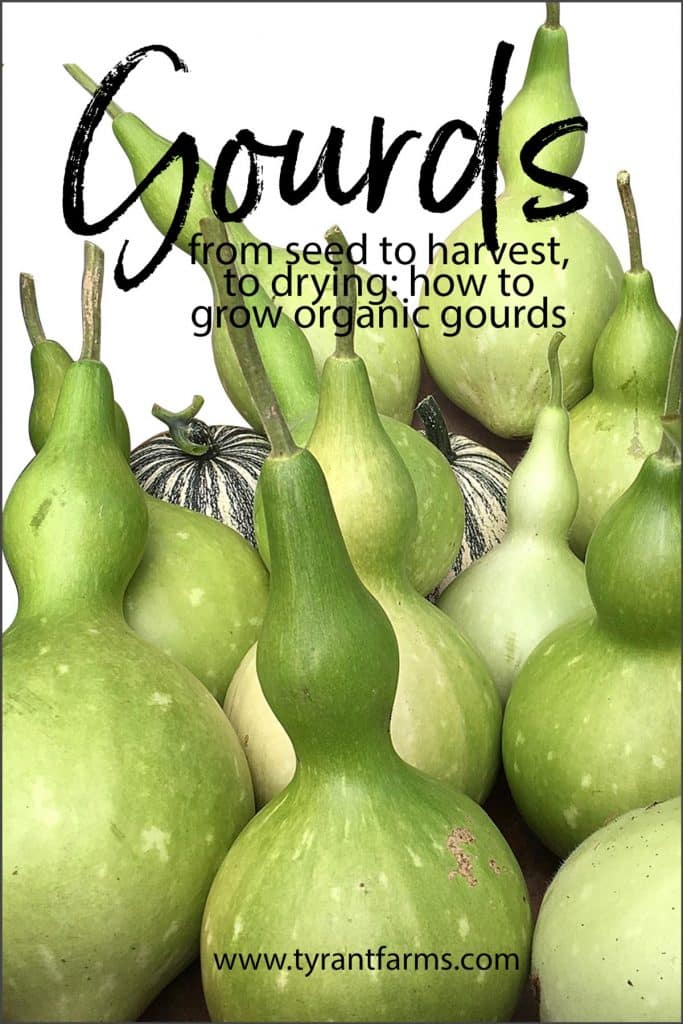
How to grow organic bottle gourds
Tyrant Farms' articles are created by real people with real experience. Our articles are free and supported by readers like you, which is why there are ads on our site. Please consider buying (or gifting) our books about raising ducks and raising geese. Also, when you buy through links on our site, we may earn an affiliate commission. Learn more
If you want to find out how to grow organic bottle gourds, this article will help you learn lots of tips & tricks for success!
[divider top=”no” size=”2″ margin=”10″]
Updated: April 25, 2019
We garden because we can’t imagine life without being surrounded by and intimately connected to living plants and animals. It’s an addiction that makes us feel whole.
Obviously, a garden can grow tons of edible plants. It can also grow medicine (example: elderberries), fiber (example: cotton), and useful tools and art as well.
Although bottle gourds are edible when they’re young, they primarily fall into the tool and art categories. You can use bottle gourds to make breathtaking artwork, birdhouses, musical instruments, serving bowls, kitchen utensils, jewelry, and more.
What Are Bottle Gourds, Botanically Speaking?
The term “gourd” may refer to quite a few different genera of plants:
- Cucurbita ficifolia – Malabar gourds, native to North America and mostly used for their edible seeds and leaves;
- Cucurbita maxima – Turban squash, native to North America – edible but mostly used for decoration;
- Crescentia and Amphitecna – Gourds that grow on trees; native to various regions of the Americas; primarily used to make bowls and art;
- Lagenaria – Bottle gourds that grow on vining plants; native to Africa and primarily used to make birdhouses, dippers, containers, arts & crafts.
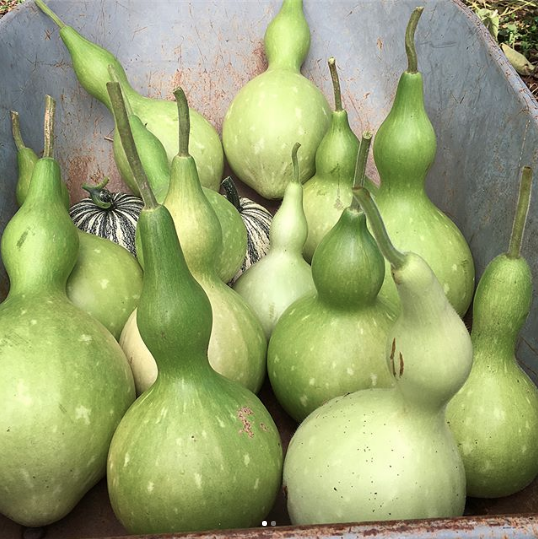
In this article, we’re writing about the last plant genus on that list, Lagenaria. Specifically, we’re writing about the species Lagenaria siceraria (aka bottle gourds), which come in a wide range of sizes and shapes: birdhouse, club, dipper, dolphin, etc.
The amazing history of bottle gourds (Lagenaria siceraria)
Lagenaria siceraria gourds are in the Cucurbitaceae family, and share a common ancestor with other familiar garden plants like cucumbers, watermelons, pumpkins, and summer squash. Cucumbers originated in India and squash originated in the Americas.

Originating in southern Africa, bottle gourds may be the oldest domesticated plant in the world.
One fascinating historical and botanical mystery that was recently solved using genetic research: how the heck were native people throughout South, Central, and North America growing bottle gourds before Christopher Columbus arrived, since bottle gourds are from Africa?
Were gourds brought over during Asian migrations during the Paleolithic era?
Genetic testing revealed that the bottle gourds being grown by Native Americans were genetically proximate to African gourds, and less genetically similar to Asian gourds. So, the working theory now is that gourds with seeds still inside must have floated across the Atlantic Ocean from Africa, perhaps even being propelled across the ocean by a hurricane.
Imagine being a Native American and finding a bottle gourd washed up on the beach. A gift from the gods!
[divider top=”no” style=”dotted” size=”2″ margin=”5″]
How To Grow Organic Bottle Gourds (Lagenaria siceraria)
Why do we grow bottle gourds organically if we’re not going to eat them? Because we have an organic garden and we consider the use of synthetic fertilizers and pesticides to be unnecessary and damaging to the long-term health of our ecosystem.
We hope you’ll adopt the same approach!
Here’s how you can grow your own bottle gourds from seed using organic growing methods:
I. Starting Bottle Gourd Seeds
A. Should you start bottle gourd seeds indoors or outdoors?
We typically recommend direct-sowing your gourd seeds in your garden after your last frost date rather than starting them indoors/transplanting. Why?
Gourd seeds are huge – typically even larger than winter and summer squash seeds (all of which are edible, by the way).
With Cucurbitaceae seeds in general, we usually recommend direct sowing them outdoors in your garden since they tend to get more transplant shock than other plants. That means starting their seeds indoors doesn’t really provide a big jump on the growing season like it does with other plants such as tomatoes and peppers.
A possible exception is if you live above Ag Zone 8… Bottle gourds needs a long growing season to develop a nice thick shell: between 120-140 days depending on the specific variety and size. Any gourd fruit that isn’t fully mature when the first freeze of fall or winter hits will end up turning to mush as it dries.
If you need a long jump on the growing season to get a 120-140 day growing season, start your gourd seeds indoors. To reduce transplant shock when starting gourd seeds indoors, use larger biodegradable seed starting pots. These 3.5″ square coco fiber pots are perfect and fit snuggly against each other, unlike round pots.
B. Use organic seed starting mix, not potting mix, when starting your bottle gourd seeds.
Potting mix works fine for large potted plants but tends to have large chunks of partially decomposed bark and wood chips in it. Those chunks are there to help keep the soil from compacting and to maintain moisture, but they can be a problem when starting seeds.
As the name implies, seed starting mix is specifically designed for starting seeds. It’s much finer and no large chunks of bark are present that could keep your sprouting seeds from punching through to the soil surface. Our favorite seed starting mix is Espoma, which is loaded with beneficial microbes that will help feed and protect your gourd plants throughout their entire life.
C. When and how to start gourd seeds indoors:
About 4-6 weeks before your average last frost date in the spring, sow your bottle gourd seeds about 1″ deep inside in pots.
Keep the soil damp (but not wet) and warm. 80°F is ideal soil temperature for bottle gourd seeds to germinate. If your soil is kept cooler than 70°F, you’ll either have poor or no germination.
II. Transplanting Bottle Gourd Seedlings (If Necessary) & Selecting the Right Site
A. Selecting the right location for your bottle gourd plants
Each bottle gourd plant needs a LOT of room to grow. We put three plants on a 6′ tall chain link fence in our back yard that runs about 50 yards long. By early fall, the entire fence was completely covered with vining bottle gourd plants.
Bottle gourds are not a plant you want to let run on the soil surface in your garden or put on a small tomato cage. Run them up a tree, a tall fence, a porch, or an arbor.
B. Transplanting bottle gourds
If you decide to transplant your gourd seedlings rather than direct sowing them outdoors, do everything possible to minimize root disturbance.
Once you’ve selected a spot to transplant your bottle gourd seedlings, make sure it’s got rich, but well-draining soil. Bottle gourds are fairly heavy feeders. If necessary, dig a 1′ x 1′ hole, then fill it with good compost or worm castings to boost your soil fertility.
Place your biodebradable pots with gourd seedlings in each hole. Don’t bury the stems of the plant, and don’t leave the root ball sticking out above the soil surface. You want the top of the root ball to be level with the soil surface in your garden.
Some people like to plant up to three bottle gourd plants per hole to provide really dense vegetation – and they also pinch off all but 5-10 gourds so they’re sure to mature (more on that below).
III. Bottle Gourd Plant Maintenance, Pests & Diseases
A. Watering your bottle gourds
Relative to other plants we’ve grown from the Cucurbitaceae family, bottle gourds are quite drought tolerant. However, to keep them happy and get maximum gourd production, you’ll want to make sure they get at least 1″ of water per week.
That means you’ll need to irrigate if rain isn’t regular during the summer.
B. Bottle gourd soil fertility
If you place your bottle gourd seedlings in good rich soil (or soil amended with compost or worm castings), they shouldn’t require any additional fertilizer throughout the season. If your plants start to get yellow leaves or show other signs of nutritional deficiency despite having even soil moisture, apply a liquid organic fertilizer.
C. Preventing and treating powdery mildew on bottle gourd plants
“Powdery mildew” is the term used to describe any number of airborne fungal diseases that infect various Cucurbitaceae plants (squash, cukes, melons, and gourds). It leaves a powdery white appearance on the leaf surface, eventually turning the leaf brown and killing it.
As we’ve written about here, the most effective way to treat powdery mildew is with milk. Yes, milk! Mix 3 parts milk to 7 parts water and spray the mixture on the leaf surface of your bottle gourds in the morning on a sunny day.
Scientists still aren’t quite sure how or why this treatment works – it might be the proteins in the milk binding the fungi that is then able to be burned away by the sun.
Another thing that will help with the general health of your plants and work to prevent diseases is giving them a weekly spray of Serenade. Serenade is made of beneficial bacteria that operate like a probiotic, helping your plants improve their natural defenses against multiple diseases.
D. Common bottle gourd pests
Squash Bugs
Yes, squash bugs like bottle gourd plants too. After many years of gardening, we’re quite accustomed to dealing with various insects, so we don’t mind scooping these off by hand and dropping them into a bowl of soapy water – or just squishing the nymphs by hand.
We see predatory bugs in our garden eating virtually every pest insect we know of, but squash bugs just don’t seem to have many predators, so intervention is often necessary to prevent an infestation – and the earlier you can intervene in their lifecycle the better.
Voles
Voles are small rodents that are closely related to mice, only they live below the soil surface in elaborate tunnel systems. They also love eating plant roots. We lost one nice healthy gourd plant last summer to a vole.
If you have a severe vole problem in your garden, you might want to consider burying underground cages made from 1/4″ – 1/2″ flexible wire caging to put your gourds in. Or, you can do what we now do and buy “vole king plant baskets” which work like magic. The feeder roots can grow out through the wire openings, but the core roots won’t be accessible to voles.

IV. Harvesting Gourds
A. How many bottle gourds can each plant produce?
Veteran bottle gourd-growing enthusiasts like to let each gourd plant set 3-5 gourds and then pluck off any others that set. This allows the plant to put the maximum amount of energy into maturing those handful of fruit and creating a nice, thick inner shell.
We didn’t do this last summer because we were curious how many mature bottle gourd fruit we could get our plants to produce if we just let them go. The plants kept setting fruit up until first frost and each plant was loaded with gourds. However, once frost hit, only the ones that had set early in the season and had time to mature made it. Some of the gourds we thought were mature actually ended up turning to mush months later.
We live in Zone 7B. Unless you live in a really warm climate region with a long warm growing season, we’d recommend only letting each gourd plant set and mature a handful of fruit. That’s what we plan to do next time we grow gourds.
B. When do you harvest bottle gourds?
What do you call a bottle gourd that’s been picked too early? Compost.
Sure, it’s tempting to pick that mature looking gourd off of the vine, but don’t do it! Your best bet with bottle gourds is to leave them on the vine. Period. In fact, many Amish farmers leave their bottle gourds in the field through the fall and winter to dry, only picking them once they’re ready to clean up and carve the following spring!
If you pick your bottle gourds before they fully dry (we did to get them off of our fence), make sure to leave as much stem on the top of the gourd as possible (at least 1″) to help the gourd mature and dry properly. The stem helps to wick moisture out of the inside of the gourd as it dries.
C. Should you clean bottle gourds after harvesting them?
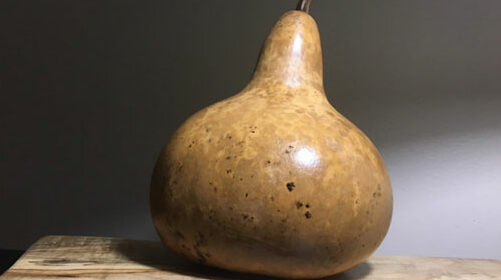
Some people recommend cleaning your gourds as soon as you’ve harvested them to reduce/prevent molding. Molding can effect the coloration on the inner shell.
Personally, we think molding leaves a more interesting burl wood pattern so we didn’t bother to clean ours. If you do want to clean your bottle gourds, use hot soapy water or a bleach-water solution.
V. Drying & Storing Bottle Gourds
A. Drying bottle gourds for seeds
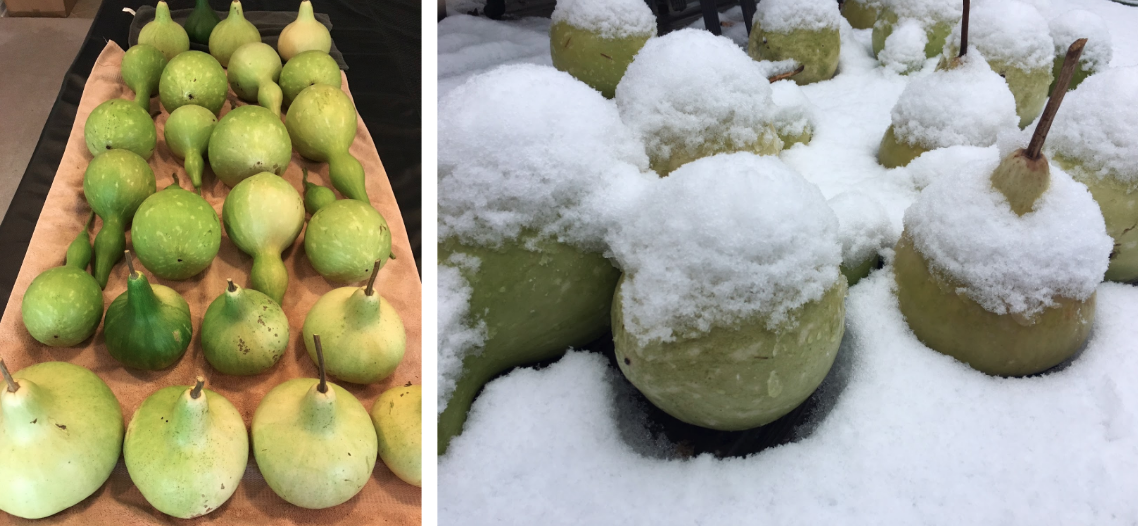
Are you drying bottle gourds to save their seeds to plant next year? If so, you’ll want to dry them in a location that won’t get too cold (as in far below freezing). A garage, laundry room, or storage room will work – just put some newspaper or paper towels under them to prevent a mess.
Freezing temps can cause bottle gourd seeds to rupture since there’s still moisture inside them as the gourd dries. If the seeds freeze and rupture, this means you won’t have viable seeds next year. Repeated freezing and thawing will effect gourd seed viability too.
B. Drying bottle gourds for decoration & art
As the skin on the outside of the bottle gourd starts to rot and mold and the interior “guts” decompose, bottle gourds don’t have a very pleasant smell. (It’s like a rotting squash smell.)
Ideally, you can just leave your bottle gourds outside in the field/garden to dry. If not, put them in your garage or a shed – but do NOT pile them on top of each other. Instead, lay your bottle gourds out one layer deep so that air circulates around them.
If you dry your bottle gourds inside, put newspaper or old towels underneath them to prevent any mess.
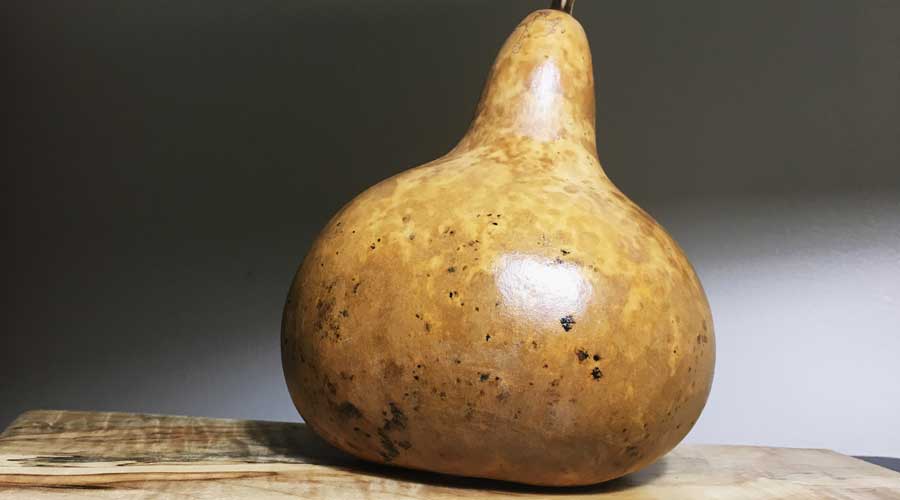
C. When are bottle gourds ready?
Bottle gourds take 3-6+ months to dry.
Bottle gourds are finished drying once:
- the stem is dried, brown, and shriveled;
- they feel really light in weight;
- you can shake them and hear the seeds rattling around inside.
D. Final prep: skin removal
If you’ve let your bottle gourds dry outdoors, the combination of bacteria, fungi, and weather will eventually remove all or almost all of the skin on your gourds.
If you’ve dried your bottle gourds indoors, it might take more work to remove the outer skin. Don’t use steel wool or anything too abrasive to remove the bottle gourd skin! If you’re planning to use the bottle gourd as artwork, rub/grind marks from an abrasive surface can ruin their finish.
A softer but still slightly abrasive luffa sponge and soapy water should do the trick. (Luffas are a close relative of bottle gourds so you can grow those too!)
E. Warning: “Gourd Flu”
If and when you decide to carve into your bottle gourds, be careful! Those dry dusty guts on the inside could contain high quantities of microbes and particulates that you don’t want to inhale into your lungs.
Wear a mask and work in a well-ventilated space when carving, dusting, or cleaning your bottle gourds. Some unfortunate people who didn’t heed this advice have ended up with flu-like symptoms, a condition referred to as “gourd flu.”
What are we going to do with all of our bottle gourds? Make arts and crafts!
We hope this article helps you grow piles of your own beautiful bottle gourds. Let us know what you decide to do with your gourds once they’re dried and ready to go!
KIGI,


ty for comprehensive well written article. Not only informative but enjoyable to read.
Thank you, Wendy!