How to start a no-dig garden and do seasonal bed transitions
Tyrant Farms' articles are created by real people with real experience. Our articles are free and supported by readers like you, which is why there are ads on our site. Please consider buying (or gifting) our books about raising ducks and raising geese. Also, when you buy through links on our site, we may earn an affiliate commission. Learn more
Want to find out how to do no-dig gardening and see how to transition a no-dig garden bed from season to season? Find out in this beginner’s guide to no-dig gardening!
We’ve been utilizing no-dig gardening methods for over a decade with great success. Now, we want to share what we’ve learned with you!
In this article, you’ll find out:
1. What no-dig gardening is and isn’t.
2. The advantages and disadvantages of no-dig.
3. How to start NEW no-dig garden beds in-ground or in raised beds.
4. How to transition and maintain a no-dig garden from season to season.
(*You can also use the links above to jump right to the specific section you’re interested in.)
I. What is no-dig gardening?
No-dig or no-till gardening is an approach to home food production that aims to minimize soil disturbance in order to protect and enhance the microbial soil communities that nurture healthy plants.
This gardening approach is based on findings from modern soil science showing that soil is not a lifeless medium; rather it is a living community of macro and microorganisms collectively referred to as the soil food web. The healthier this soil system is, the healthier the plants growing in that system will be.
No-dig growing methods aren’t just helpful for home gardeners, they’re also increasingly being utilized by large-scale farming operations as well.
II. Pros and cons of no-dig gardening
In our experience and based on all evidence we’ve read, the benefits of no-dig gardening far outweigh any disadvantages. Plus, any disadvantages can be mitigated with a little thought and planning.
Below, we’ll quickly detail the pros and cons of no-dig gardening:
What are the advantages of no-dig gardening?
The advantages of no-dig gardening versus conventional tilled gardens include:
- better soil fertility due to nutrient cycling;
- reduced irrigation needs;
- reduction or elimination of soil erosion;
- weed suppression;
- healthier, more resilient plants;
- improved crop yields;
- more nutrient-dense foods.
Here’s a good way to think about it: living soil is like a civilization full of people with different skills, functions, and aptitudes improving upon prior generations of work. When you till your soil, it’s akin to that civilization being hit by a devastating natural disaster. The economy collapses and whoever is left alive has to start rebuilding again from scratch.
In geeky biological terms, tillage is a severe disturbance which causes a reset in the stages of secondary ecological succession.
What are the disadvantages of no-dig gardening?
There is no single method of no-dig gardening and exact methodologies used may vary depending on a gardener’s climate region, resources, and other factors. Therefore, any disadvantages will vary by the methods used as well as your climate region.
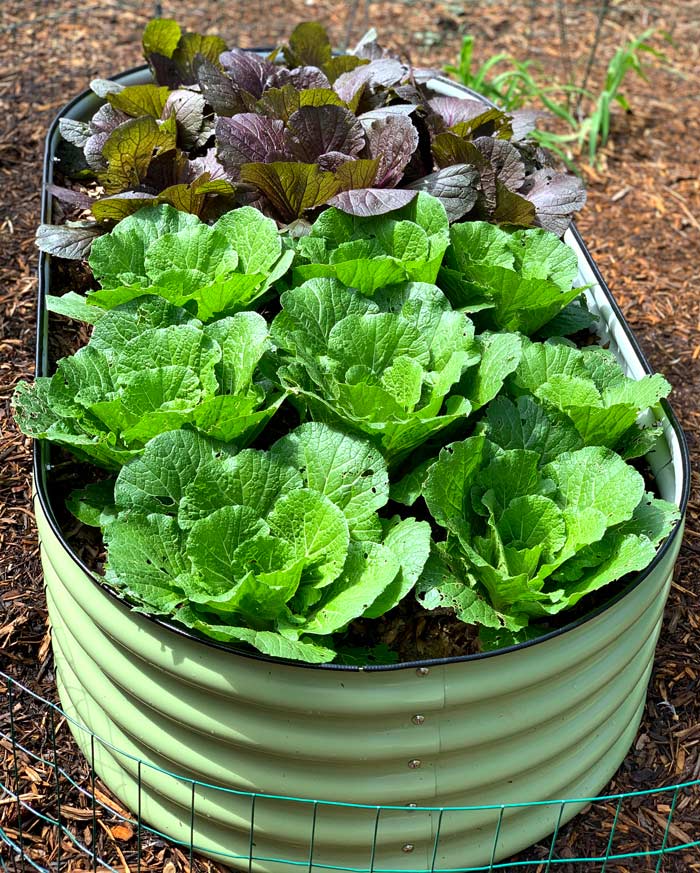
The no-dig methods we employ in our Zone 7b garden involve continual cropping 365 days per year (there are always living roots in the soil) plus the use of heavy mulch layers on top of our soil. (We primarily use wood chip mulch but we also use chopped leaves, old duck bedding, and other materials.) The mulch serves to protect the soil, suppress weeds, and provide a slow-release fertilizer.
Two disadvantages we’ve experienced with our no-dig gardening methods are:
1. Voles
Voles are small root-eating mammals that look like mice but live in underground tunnels. They can wreak havoc on everything from root crops (radishes, carrots, sweet potatoes, etc) to fruit trees.
Voles thrive in undisturbed soil, especially when there’s an abundance of tasty roots to eat. Solutions? See: How to stop voles from eating your plants.
2. Rain water penetration
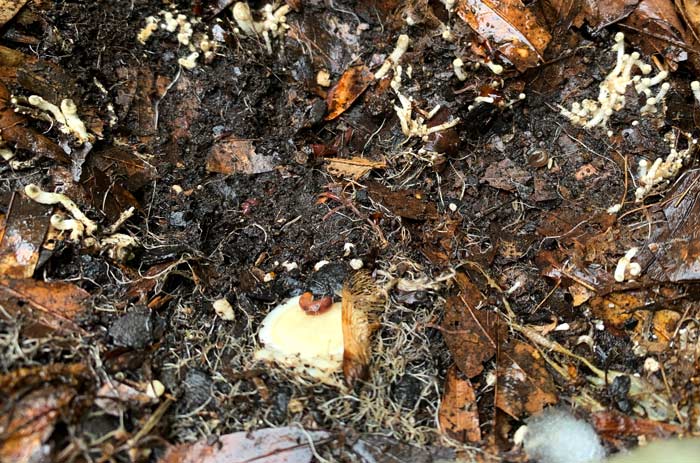
When you top-dress soil with thick layers of wood chip mulch, species of decomposing fungi quickly move in to consume the bounty. Over ~8-12 months, these fungi help transform the wood chips into rich black soil.
However, in the early stages of the process, fungal hyphae (mushroom roots) soon turn the carbon-rich mulch into a dense fungal mat. This fungal mat can soak up a lot of water like a sponge, thus preventing rain water or irrigation from actually reaching the soil below. In the summer, this can lead to dry or even hydrophobic soil.
Solutions?
- Use thinner layers of wood chip mulch in the 2-3″ depth range;
- Instead of wood chips, use lighter types of mulch such as straw, pine straw, or chopped leaves — at least in areas where you can’t provide supplemental irrigation;
- Irrigate deeply rather than for short durations;
- Utilize foraging animals like ducks and chickens to help break up the fungal mat.

III. How to start NEW no-dig garden beds
You can do no-dig gardening in-ground and in raised beds. We use both types of beds.
Below, we’ll cover the basics you need to know to start a no-dig garden:
Option 1: How to start a no-dig IN-GROUND bed
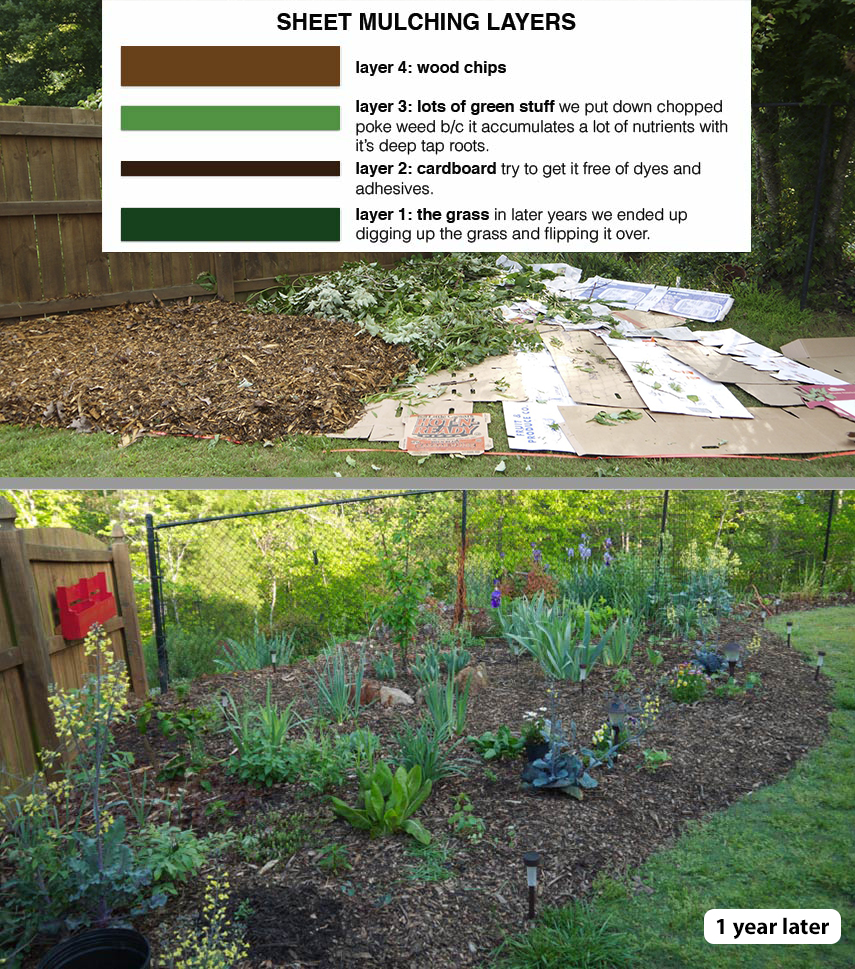
If you’d like to put new in-ground beds into a grassy or weedy area, we recommend using a method called “sheet-mulching.” Here’s how:
Step 1. Install biodegradable weed barrier.
Put down a slowly decomposing, non-toxic weed barrier over the area you want your garden beds. We typically use recycled brown (not colored) cardboard with all tape and labels removed.
We also use a pitchfork to poke holes in the cardboard to allow for soil air exchange and water penetration.
(*Alternate: You can also smother out freshly mowed grass/weeds with heavy piles of mulch or leaves (12+ inches). No cardboard required. Come back in a year and you’ve got beautiful soil ready to plant.)
Step 2. Choose compost plus mulch (fast-planting method) OR mulch-only (slow-planting method).
A. Fast method – If you want to start planting immediately, put down 4-6″ of quality compost on top of your cardboard. Then, put in your seedlings/transplants before top-dressing the compost with 2-3″ of mulch, such as wood chips, straw, pine straw, etc. (Try to make sure the mulch you use is seed-free and pesticide-free!)
Also, be careful not to bury the stems of your plants in mulch, unless they’re plants that can form adventitious roots. (Tomatoes, tomatillos, and ground cherries are examples of plants whose stems can develop adventitious roots.)
B. Slow method – If you’re on a tight budget and/or you can delay planting for 6-12 months, put down about 6″-10″ of wood chip mulch on top of the cardboard, then wait for the wood chips to decompose. Optional: It’s not essential, but you can also put down nitrogen-rich materials like fresh lawn clippings, chopped weeds, etc. under the mulch to speed things up a bit and add more fertility to your eventual soil.
Decomposition time will vary by climate region, but your new soil could be ready to plant in anywhere from 6-12 months. The warmer and wetter your climate is, the faster the decomposition time.
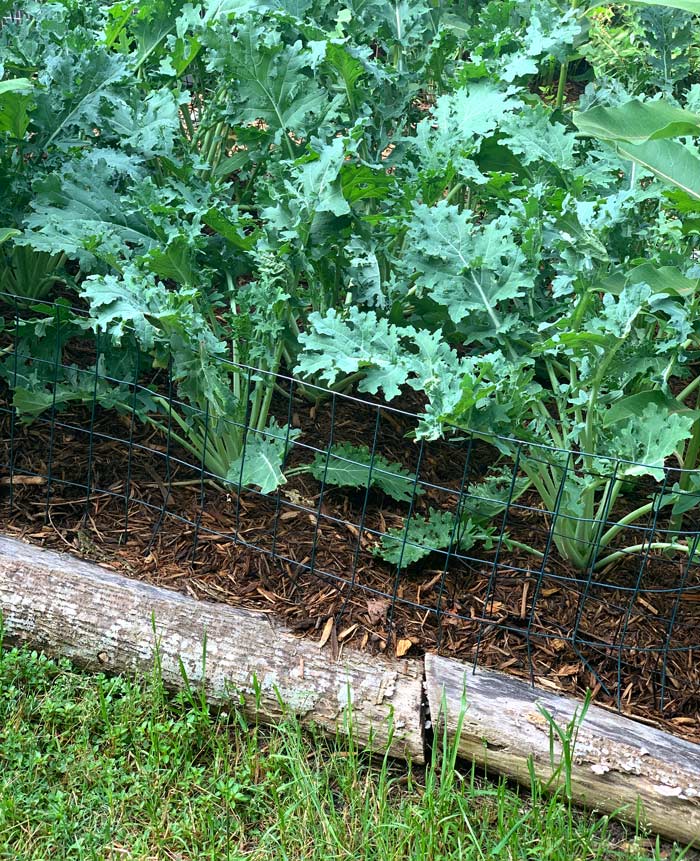
Step 3. Install edging.
It’s optional, but we recommend you edge your in-ground beds to help keep things neat and tidy while holding your soil and mulch in place. You can use free materials like logs or rocks or store-bought materials like pavers and lumber.
Since we’re surrounded by forests, we like to edge our in-ground beds with hardwood logs. The logs slowly decompose over 3-5 years, further enriching the soil as they break down. We can also inoculate the new logs with edible mushrooms, thus stacking functions. Once the edging logs are in need of replacement, we use them as the base for hugelkultur beds or in compost.
Option 2: How to start a new no-dig RAISED bed
Here’s how to start a no-dig raised bed:
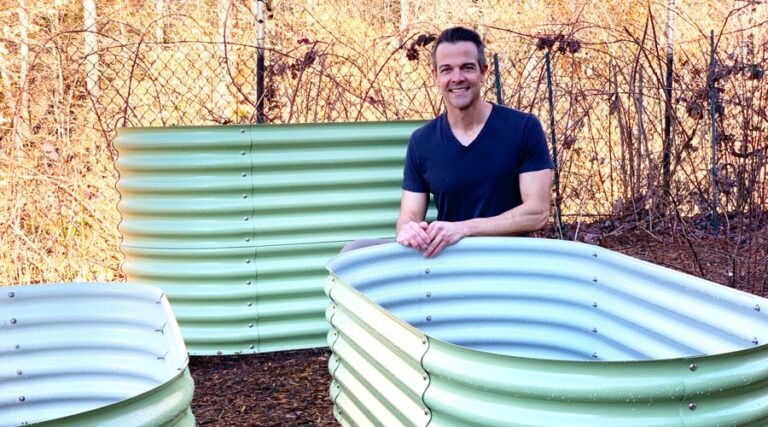
Step 1: Select the type of raised bed that matches your needs.
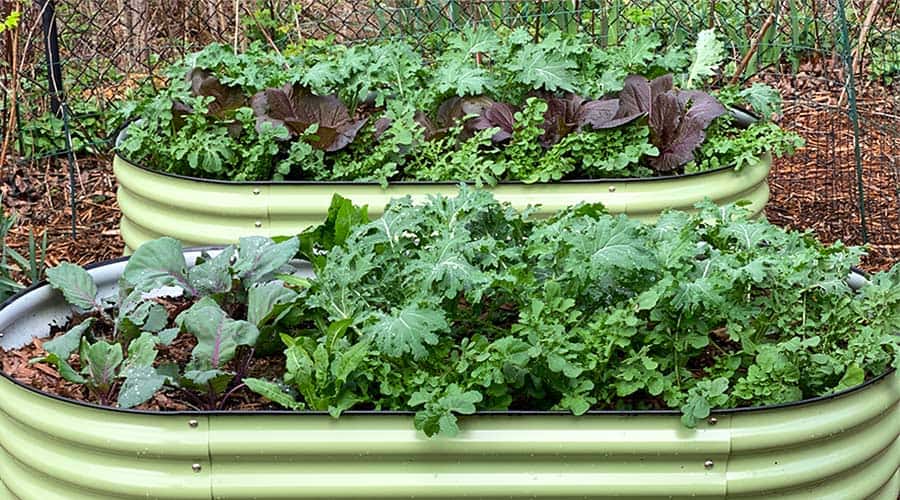
Choose the type of raised bed that’s right for you. You can do no-dig gardening in any type of raised bed: metal, wood, fabric, etc.

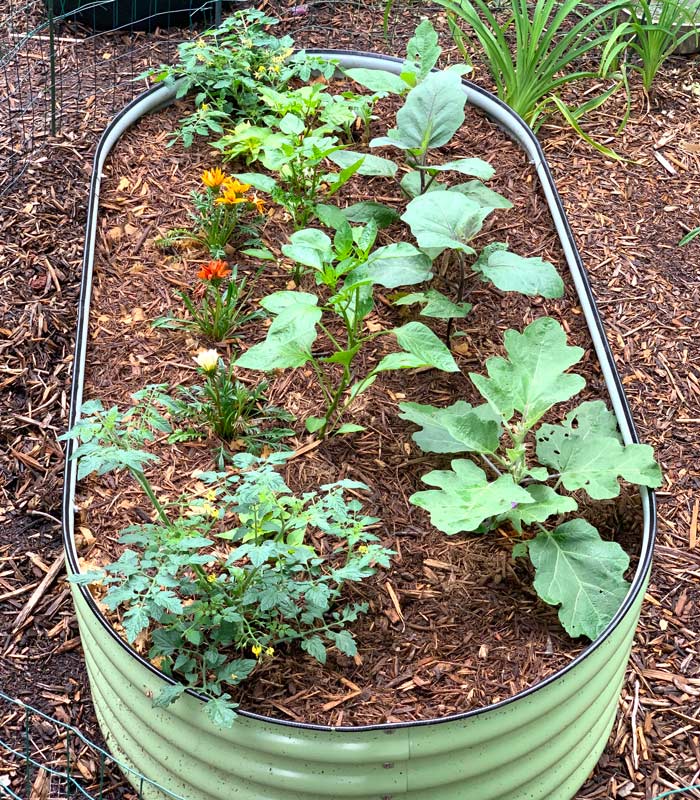
We use Olle metal raised garden beds because we like the aesthetics, durability, and functional benefits of metal raised beds relative to other alternatives. (Bonus: We like our OLLE beds so much, we signed up to be an affiliate, which means you can get 10% off when you order from OLLE’s website by using the discount code TYRANTFARMS at checkout.)
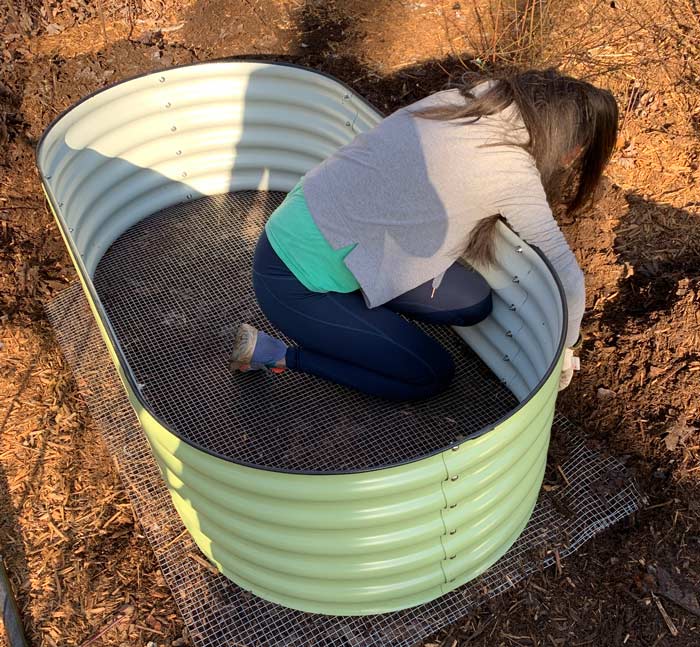
Step 2: Install 1/2″ or smaller wire mesh/hardware cloth under beds to prevent voles.
Remember us griping about voles earlier? Well, you can completely block them out of your raised beds if you install 1/2″ or smaller hardware cloth underneath them.
If using lumber-framed beds, firmly attach the wire to the bottoms with galvanized fence staples/u-nails. If using metal beds, level the ground, lay the wire down so it sticks a few inches out from the beds on all sides, then rest the metal raised bed on top. You can hide the wire with mulch.
Step 3: Fill your raised beds CORRECTLY.
If you fill your raised beds 100% with garden soil, it will most likely become too heavy and compacted for optimal root development. If you fill it 100% with potting soil, it will be too light and fluffy. If you can’t buy a soil mix specifically formulated for raised beds, the general DIY recommendation is a garden soil to potting soil mixed at a 5:1 ratio.
However, there are less expensive or even free ways to fill your new raised beds. Here’s how we filled our new OLLE raised beds:
Layer 1. Foundation (bottom 20%): Use decomposing carbon-rich materials.
We start with rotten logs:
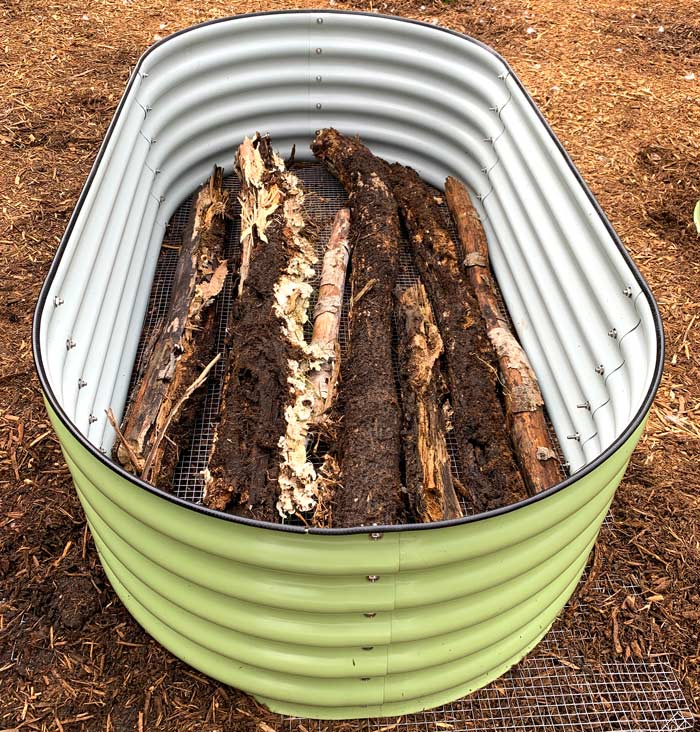
On top of the logs, we use old duck bedding (yes, that means poopy) from our coops:
Other materials you could use in your foundation layer include:
- used chicken bedding,
- chopped leaves,
- lawn clippings,
- aged wood chips (1+ years).
Layer 2. Middle layer (~70%): Use biologically rich and nutrient rich compost, worm castings, or aged manure.
We use our homemade compost for this layer, but worm castings or aged manure work great too.
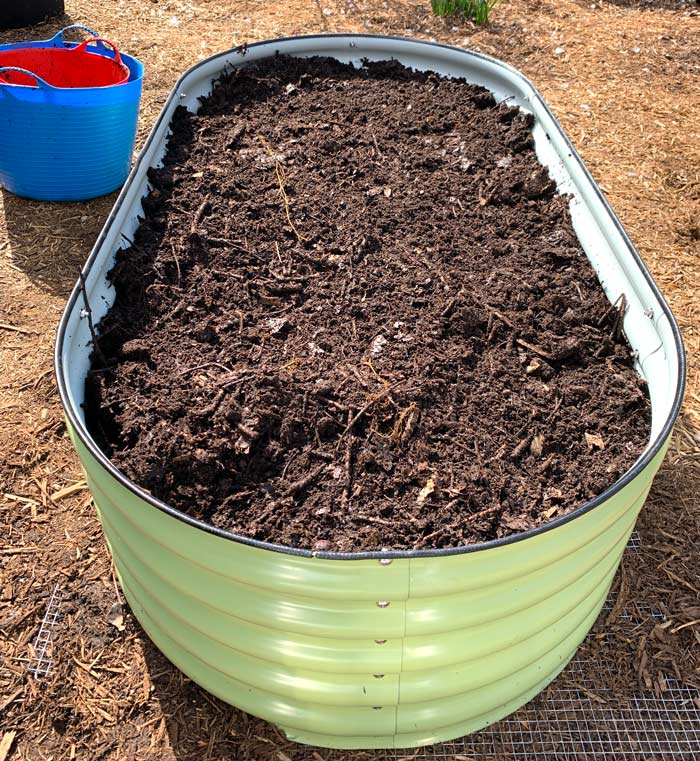
Layer 3. Top “seed bed” (2″-3″): Use quality organic raised bed soil or potting mix.
This is your “seed bed” which helps give your new seedlings or seeds a good start. However, if you have enough compost or worm castings on hand, you can use that instead of store bought soil mixes.
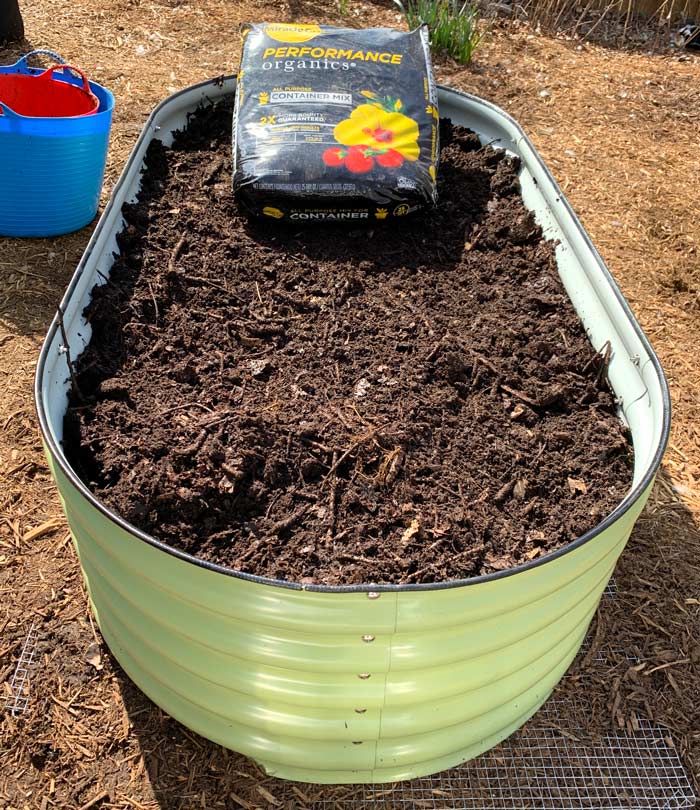
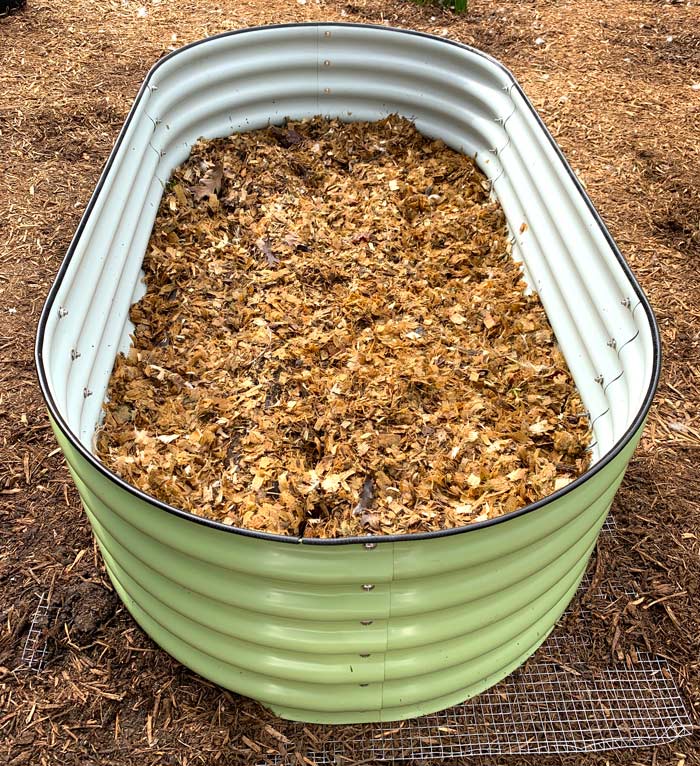
Layer 4. “Icing” on top (top 3″): Use the mulch of your choice.
If we’re planting taller fruits and veggies like tomatoes, peppers, eggplants, etc, we’ll put down used duck bedding for our mulch layer. If we’re planting smaller leafy greens, we’ll use wood chips or chopped, dried leaves (especially in the fall when they’re abundant).
Why? The used duck bedding has potential contaminants that we don’t want to risk eating. We sometimes also use a hybrid approach wherein we put down 1-2″ of duck bedding then 1-2″ of wood chips on top. (You’ll see this hybrid mulch method below in the season transition section.)
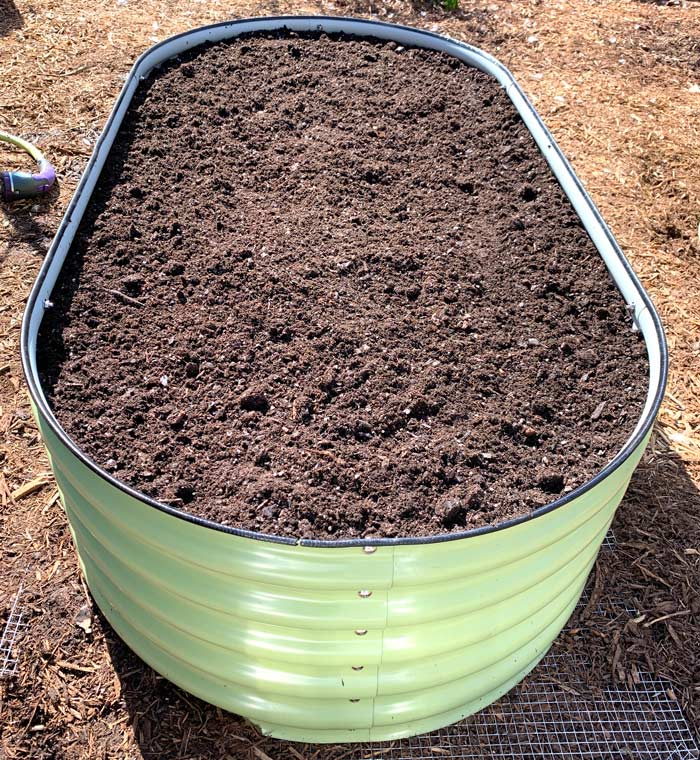
Step 4. Put in your seedling transplants.
You could put your seedling transplants in your new raised beds BEFORE you put in your mulch layer during the previous step. Or you could do it after. Regardless, we recommend keeping living plants in the ground for as many days as your climate allows.
Why? Plants feed the soil microbial community via their root exudates and the soil microbes feed the plants. You want your soil microbes breaking down old plant material and feeding plant roots as much of the time as possible.
Burying stems – As mentioned previously, be careful not to bury the stems of your plants in mulch, unless they’re plants that can form adventitious roots. You can taper the layer of mulch down to the level of the soil as it nears your plants’ stems so as not to bury them and cause them to rot.
Fertilizer or not? – If you’re using high quality compost and/or worm castings in your new raised beds, you don’t need to add any additional fertilizer to your beds when planting them. Otherwise, use an organic slow-release pelleted fertilizer.
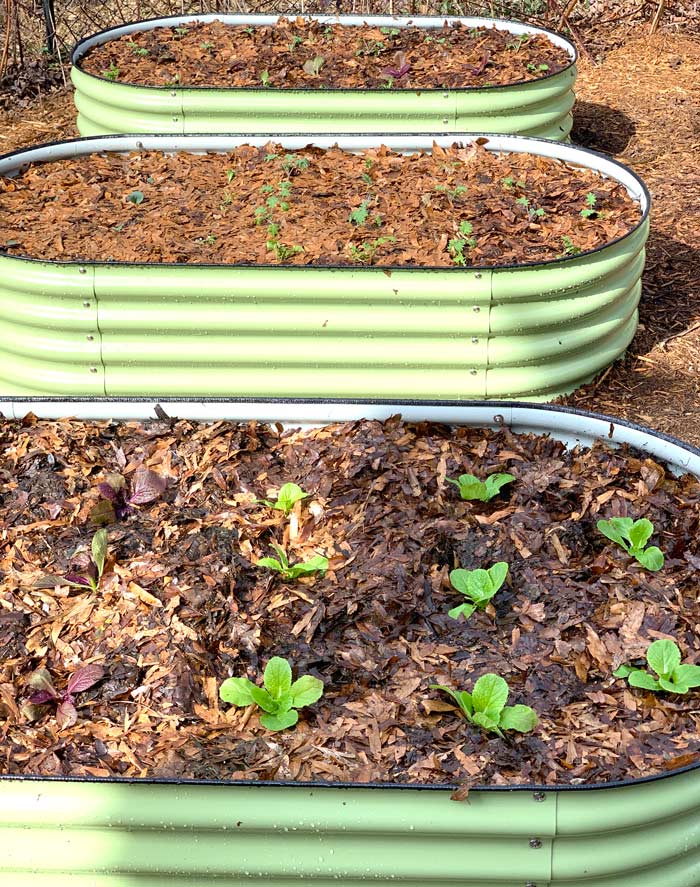
IV. How to transition and maintain a no-dig garden from season to season
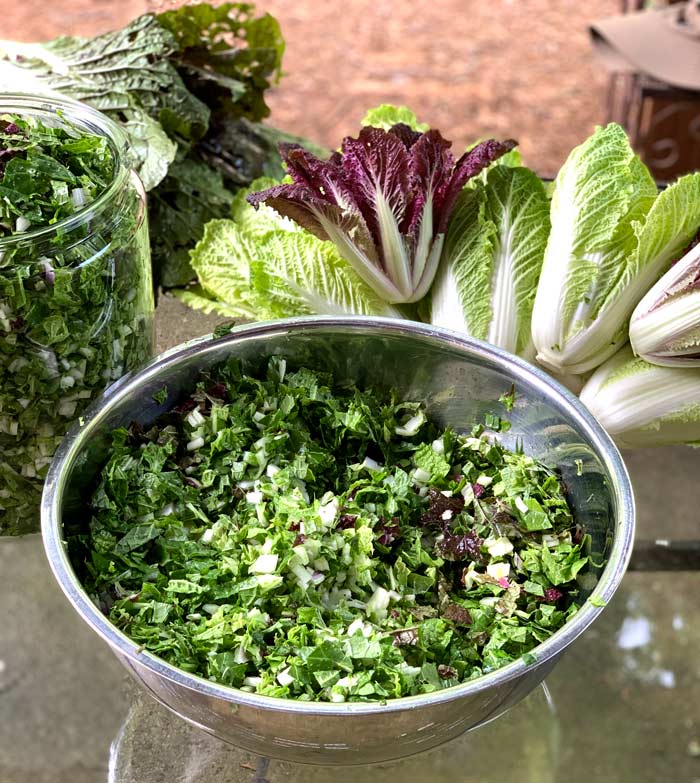
Now it’s time to harvest one crop from your no-dig beds and transition to the next!
Here’s how that process works in our no-dig system, whether it’s an in-ground bed or a raised bed:
Step 1: Leave the old roots in the ground.
Time to pull those old plants out of the ground? Not so fast!
The roots and rhizosphere on your old plants are surrounded by beneficial soil microbes that you don’t want to loose. The old roots can also function as a soil builder and slow-release fertilizer for your new plants as they decompose IF you leave them in the ground instead of pulling them out.
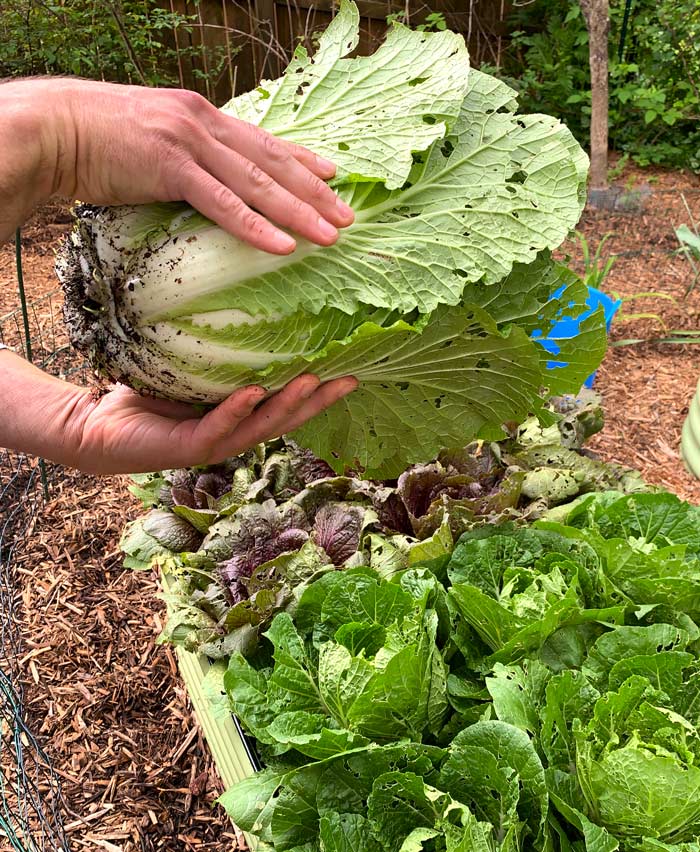
Obviously, this rule doesn’t apply for root crops like beets, carrots, and potatoes. But it does apply to most everything else. For all other plants, cut them at the base just above the soil line rather than pulling them out roots and all.
And hang on to any parts of the plant you’re not going to eat for Step 3!
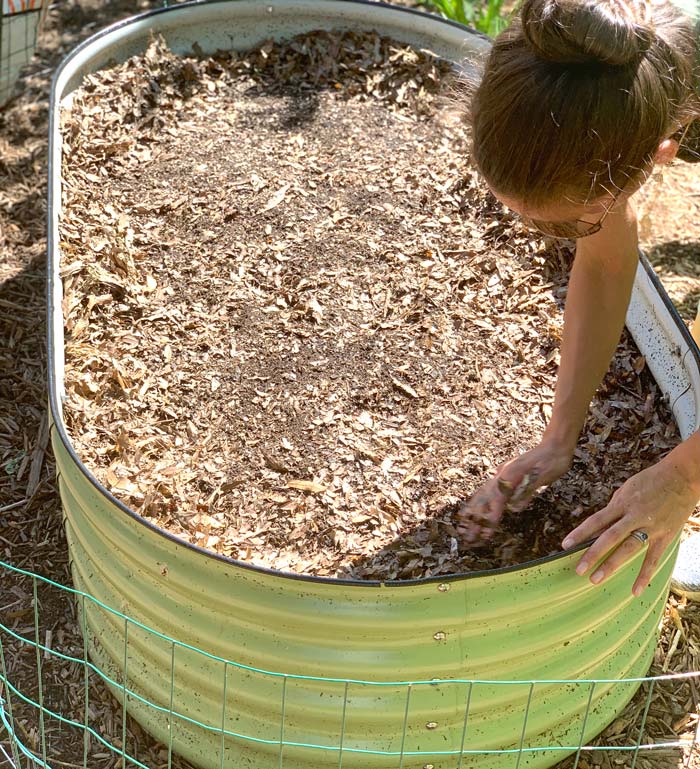
Step 2: Rake or pull back mulch.
Once your old plants are out of the bed, pull the mulch back to the sides of the bed to expose the soil surface and prep for the next steps. Use your hands, a rake, or any other garden tool as-needed.
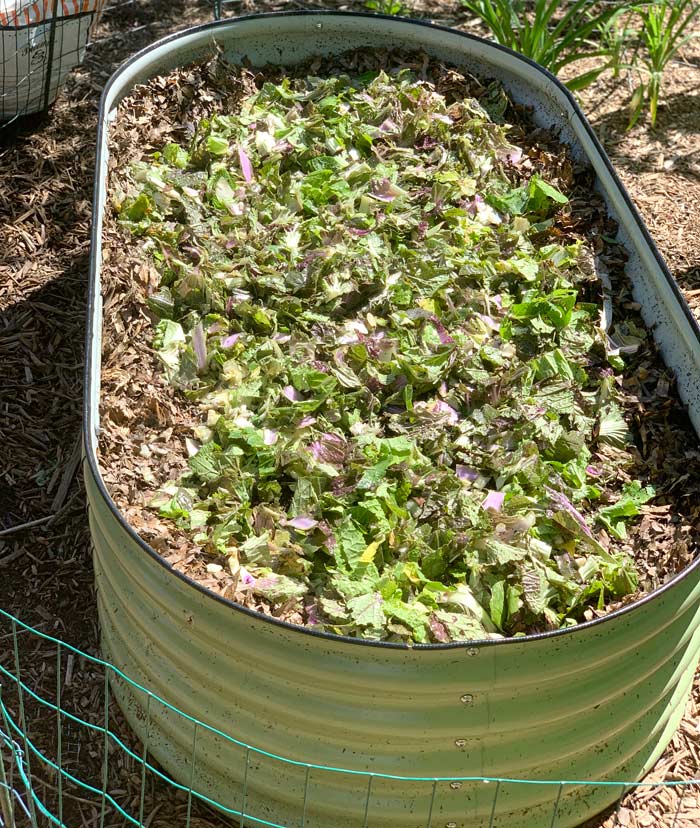
Step 3: Chop up any old plant materials from prior crop and feed it to your worms/soil.
Any unused parts of the previous crop can be rough-chopped and laid back on the soil surface. This is primo worm food and fertilizer for your next crop!
Step 4: Top-dress with 2-3″ of new compost or worm castings.
Put a new layer of quality compost or worm castings over the top of the existing soil and/or old plant materials. This is your new seed bed plus an extra boost of biological fertility for your new plants.

Step 5: Put in transplants or seeds (preferably transplants).
We prefer getting a 4-8 week jump on the growing season by growing our own garden seedlings that we transplant into our no-dig beds on the same day that we harvest out the old plants. Larger transplants mean:
- more root exudates to feed soil microbes;
- better ability to quickly crowd/shade out any weed seeds that might germinate;
- shorter harvest window.
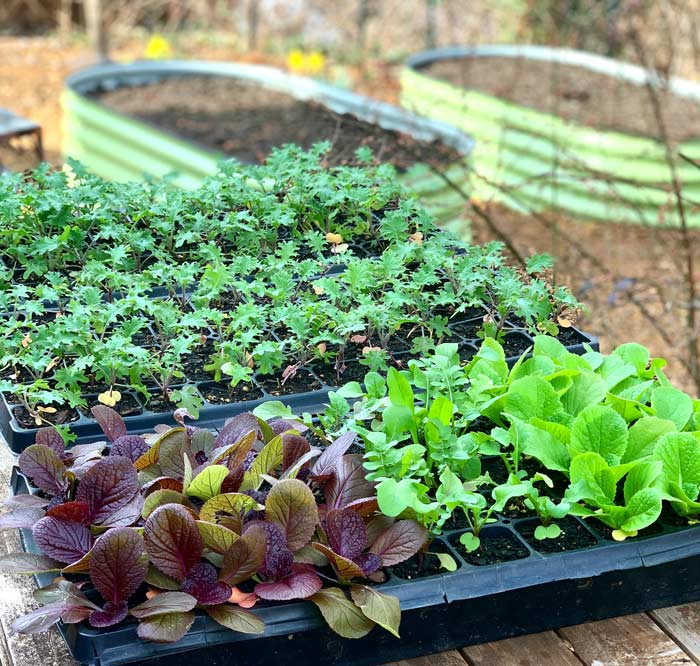
We usually even prefer using transplants rather than direct-sowing seeds for larger-seeded plants like corn/maize, squash, and melons. We will usually direct-sow beans and peas, however.
However, if you don’t want to start your own seedlings, you can direct-sow your no-dig garden beds the same day that you remove the old plants. If you do, you’ll need to use less mulch or even no mulch around the spots you sowed seeds, depending on the seed variety.
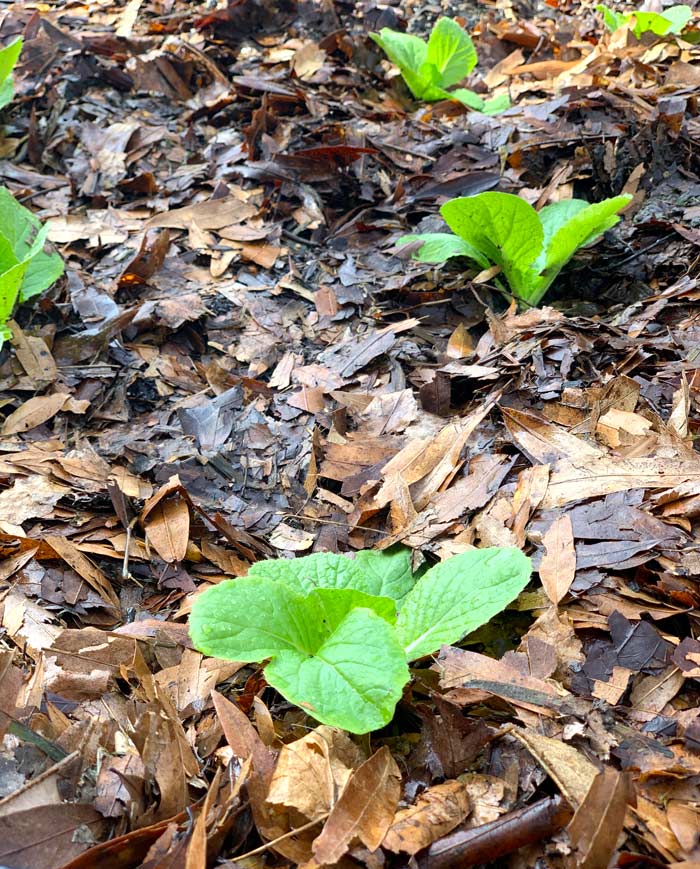
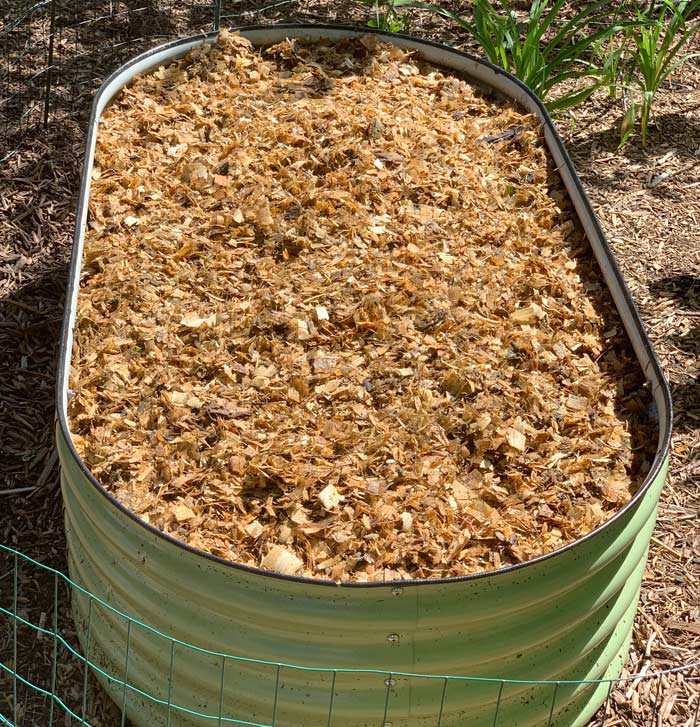
Step 6: Mulch.
Once your transplants are in the soil, put the old mulch back over the soil and add new mulch as-needed to create a 2-3″ top layer of mulch.
Done! Water as-needed, watch, and wait as the next harvest day approaches. Repeat this process throughout the year as your climate allows.
No-dig gardening helps keep your soil and your family healthy and well-fed throughout the year. Now that you know how to start your own no-dig garden, get to it!
KIGI,


Hi Aaron! For the “fast” method-are you planting seedlings on top of the cardboard then? And would this work for a direct sow method?
Hi MJ! For the fast-planting sheet mulching method, you’re putting down a 4-6″ layer of compost or worm castings ON TOP of the cardboard (which has hole punctures in it for drainage, air exchange, etc). Then you mulch the soil surface. Your seedlings or seeds go into the compost/castings.