Recipe: Calamondin and ginger upside down spice cake
Tyrant Farms' articles are created by real people with real experience. Our articles are free and supported by readers like you, which is why there are ads on our site. Please consider buying (or gifting) our books about raising ducks and raising geese. Also, when you buy through links on our site, we may earn an affiliate commission. Learn more
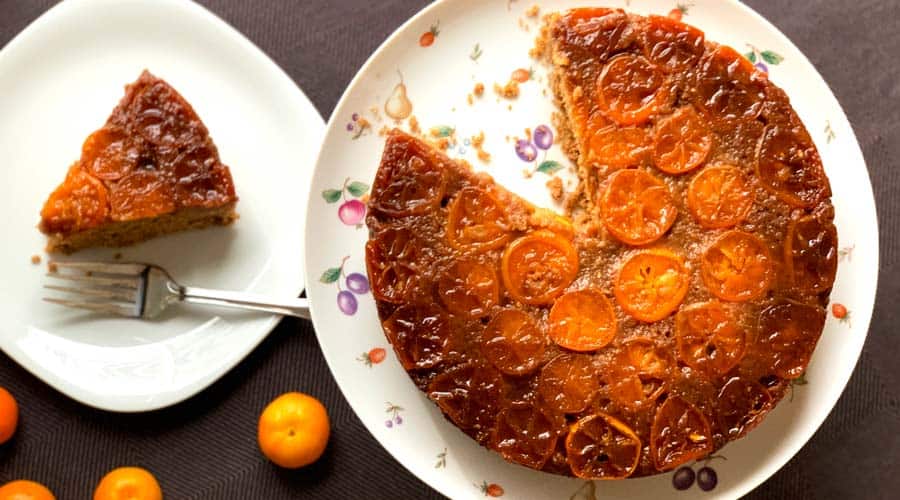
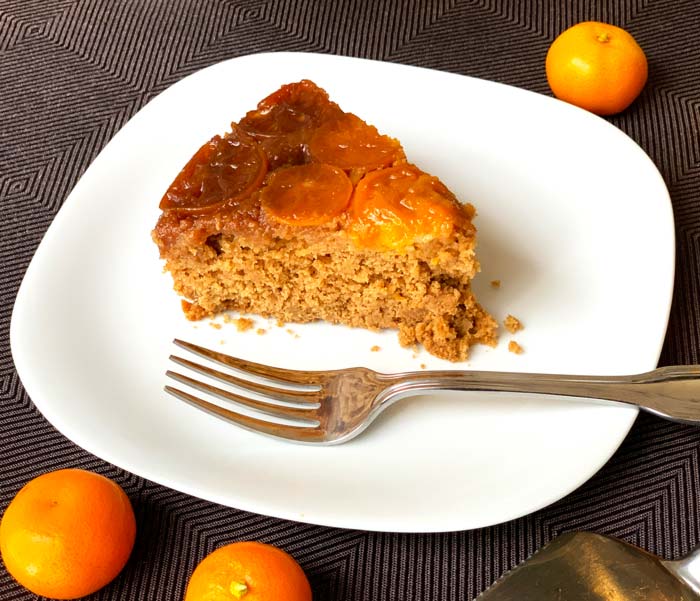
If you’re looking for the ultimate dessert recipe for calamondin citrus fruit, this calamondin and ginger upside down spice cake is for you. This moist spice cake (made with lots of fresh-grated ginger and dripping with calamondin topping) is a ginger and citrus-lover’s dream!
I don’t like most cakes, but I do like moist cakes. I also love the flavor of ginger. The Tyrant seconds these sentiments.
With a pile of fresh calamondin fruit (aka calamansi) from our potted tree and another pile of homegrown baby ginger from last summer’s garden, a lightbulb went off…
Could these two flavors be combined into one delectable moist cake recipe? Answer: yes.
With this calamondin and ginger upside down spice cake recipe, we think we may have just invented a cake that showcases the culinary potential of calamondins, a small, tart but intensely flavorful citrus fruit. If you love citrus and ginger as much as we do, you’ll want to make this recipe again and again!
Important recipe notes:
There are a few important things you’ll need to pay close attention to in order to get this recipe just right:
a. What are calamondins + substitutions?
Calamondins are a fairly rare citrus variety popular in southeast Asia (especially the Philippines). They’re a cross between kumquats and mandarin oranges. The fruits are about 1.5-2″ in diameter with thin edible skin and a tart flavor.
(Read: All about calamondin or calamansi fruit – with recipe roundup!)
What could you substitute for calamondins in this recipe? The citrus with the closest size and flavor to calamondins is kumquats, which makes them the ideal substitute. Even though the flavors wouldn’t be the same, you could also use blood oranges, Meyer lemons, or limequats.
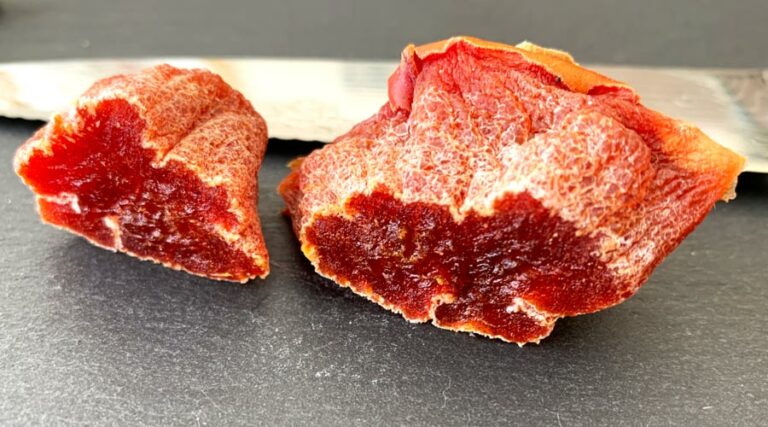
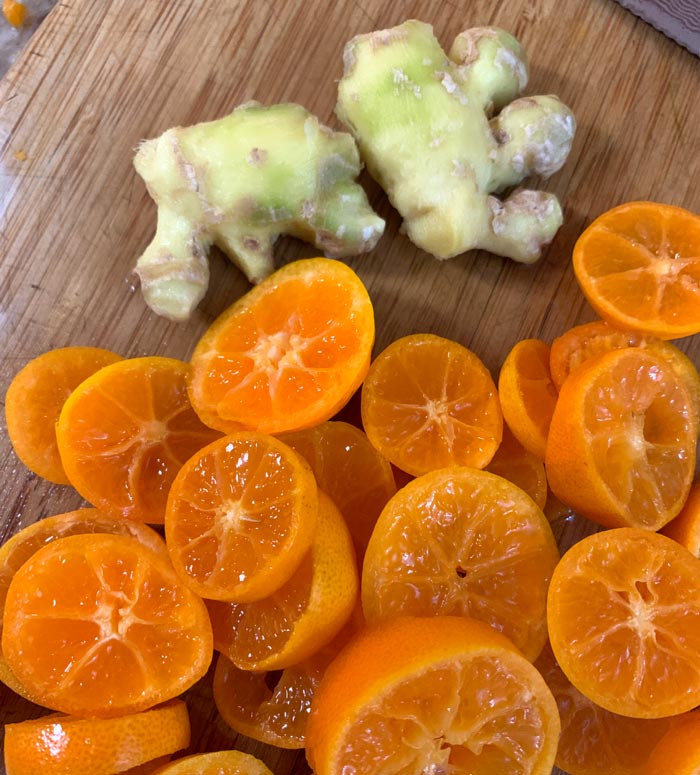
b. What is “baby” ginger + substitutions
Baby ginger is immature ginger rhizomes that are harvested 6-8 months after planting. (Mature ginger takes 10-12 months to develop.) Baby ginger is a bit milder and not as fibrous as mature ginger. It also contains a bit more moisture than mature rhizomes.
(Read: How to grow organic ginger and turmeric anywhere)
What could you substitute for baby ginger? Mature ginger that you get at the grocery store is the best substitute for baby ginger.
If you use mature ginger in this recipe, just do your best to finely grate it, using a microplane, the finest side of a cheese grater, or even a blender/food processor. No matter what age of ginger you use, you’ll also want to remove the outer skin before grating it.
Note that powdered ginger is much more intensely flavored than fresh-grated ginger and it doesn’t have any moisture in it. Thus, we don’t recommend it as a substitute in this recipe.
c. Cake pan size + metal, glass, or ceramic cake pan
The size and type of cake pan you use is VERY important. For this recipe, we used a 8″ diameter x 2″ deep Wilton aluminum cake pan.
Our pan holds 5 1/2 cups. You can measure the holding capacity of your cake pan by filling it with water then pouring out and measuring the quantity of water.
We’d highly recommend using a cake pan as close as possible to these size parameters even if it means you have to run to the store to get one. You could also use a pie pan with sloped sides so long as the dimensions are close.
It’s equally important to note that cake made in a metal cake pan (which heats very quickly) will cook faster than cake made in ceramic or glass cake pans (which takes longer to heat up). If you go with a ceramic or glass cake pan, you’ll probably need to add about 5-10 minutes to the bake time.
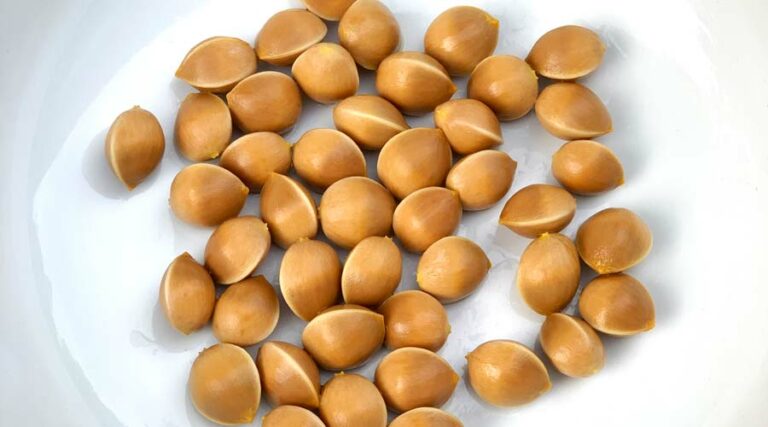
d. Slicing and de-seeding the calamondins
Each calamondin fruit will probably have 2-3 seeds in it that need to be removed prior to using. You’ll remove the seeds when you’re slicing the calamondins during prep. Do so with the tip of your knife (rather than your fingers) to leave as much of the pulp and juice intact as possible.
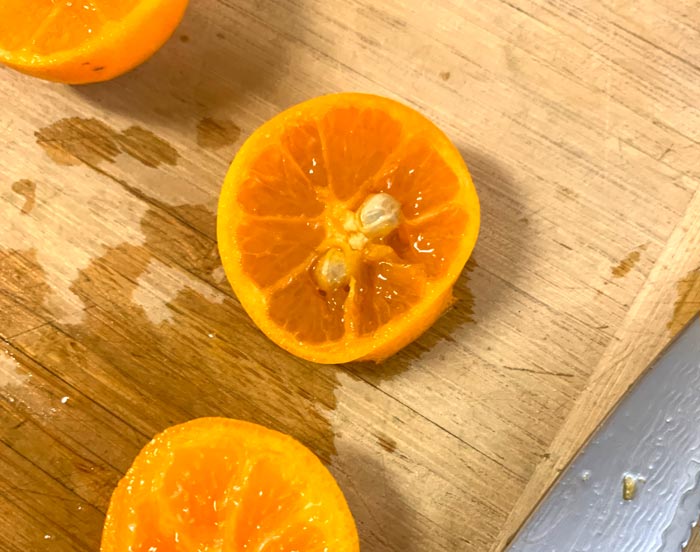
Each calamondin will yield 3-4 slices. You can use the end piece slices if you want, just be sure to put them face down for a more attractive final appearance.
e. Use room temperature wet ingredients (and no egg yolks)
The milk, eggs, yogurt, and butter should all be brought to room temperature before you start mixing them. This makes a smoother, more uniform batter and better final cake texture.
f. Organic whole white wheat flour + correctly measuring or weighing flour
A cake recipe that doesn’t use refined flour? Yes!
We use and highly recommend King Arthur’s organic white whole wheat flour, made from hard white spring wheat, which is naturally lighter in color. It also cooks and tastes almost identically to typical refined flours, like cake flour even though it’s a bit heavier since it contains the whole grain.
Ideally, you have a kitchen scale (which makes baking easier and more precise). That way, you can precisely measure 200 grams of flour when making this cake.
If you don’t have a scale, note that 1 1/2 cups of flour should be measured out using the spoon & level method, not the dip the measuring cup into the bag method (which compacts the flour and gives you more than you need).
When you spoon and level your flour, you scoop out a spoonful of flour at a time into your measuring implement, then use the back of a knife or a bread scraper to level the surface. In this case, you’d use one 1-cup measuring cup and one 1/2 cup measuring cup.
g. Chill the topping + butter pan sides
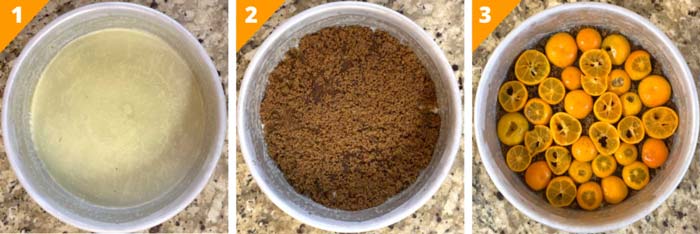
The first thing you’ll do is make the calamondin topping, in the order shown below:
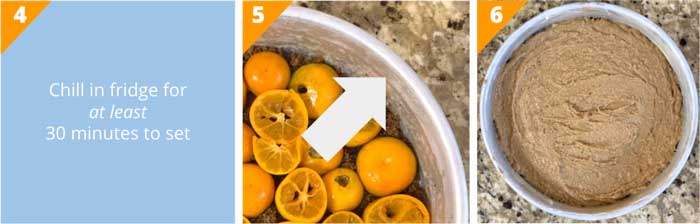
Once the topping is in place, put it in the fridge for at least 30 minutes before you make and pour the cake batter on top.
Chilling the topping helps it set so the pieces don’t move when the cake batter goes on top, which would make for a less attractive final appearance.
BEFORE pouring in your cake batter, make sure the sides of the pan are generously buttered. You can do this step either before or after chilling the topping, just make sure it’s done. Otherwise, the cake won’t turn out of the pan as cleanly.
h. Tent the cake with foil to finish baking
For the first 20 minutes your cake is in the oven, you’ll leave it open. Then you’ll make a v-shaped aluminum foil “tent” to cover the cake while it continues to bake for the last ~27-30 minutes.
Why? This prevents the top of the cake from burning while the inside bakes to completion.
How will you know the cake is done regardless of what type of cake pan you use?
- The center of the cake should rise up.
- It will no longer be jiggly in the middle.
- A toothpick stuck into the middle of the cake will no longer have raw dough on it. (Note that this is a very moist cake so expect some damp crumb to stick to the toothpick.)
i. Turning out the “upside down” cake (and repairing it if necessary)
Once your calamondin and ginger upside down spice cake is out of the oven, immediately place it on a baking rack to cool. Let it cool until it’s (at a minimum) only slightly warm or room temperature before trying to turn it out.
For the record, the cake in these pictures sat overnight in the pan before being turned out because we had to make it after our toddler went to sleep and we were exhausted.
Also, be sure to run a butter knife between the cake and pan edges before turning out your cake to help ensure a clean exit. Then turn the cake upside down on a cake plate or serving dish and give it a little shake and a pop on the back with your hand.
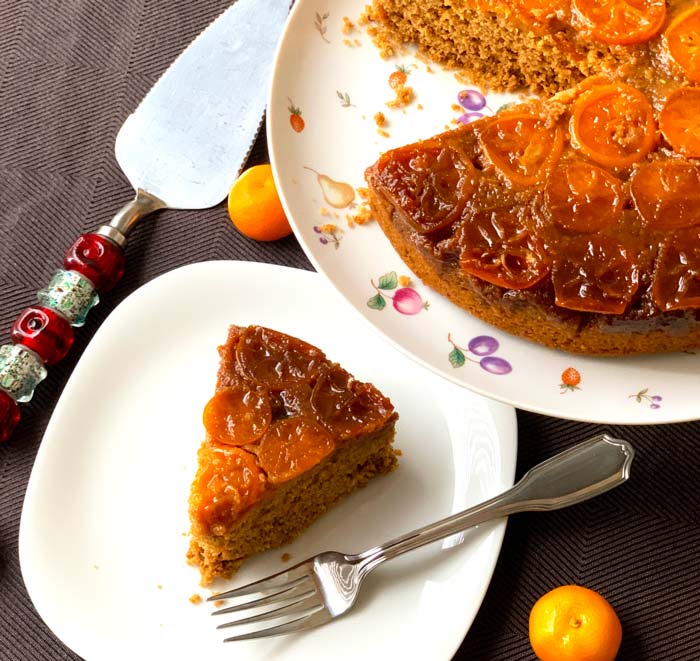
The cake should dislodge with the top perfectly or almost entirely intact. Note that you can easily patch up any calamondin pieces that stick to the cake pan as you can see below:
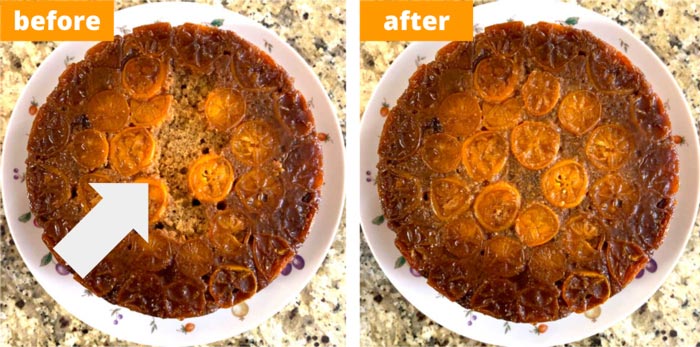
There will be some delicious caramelized calamondin-brown sugar-butter in the bottom of the pan. You can decide whether to also apply this to the top of the plate or scrape it out with a spatula and eat it when your spouse isn’t looking.
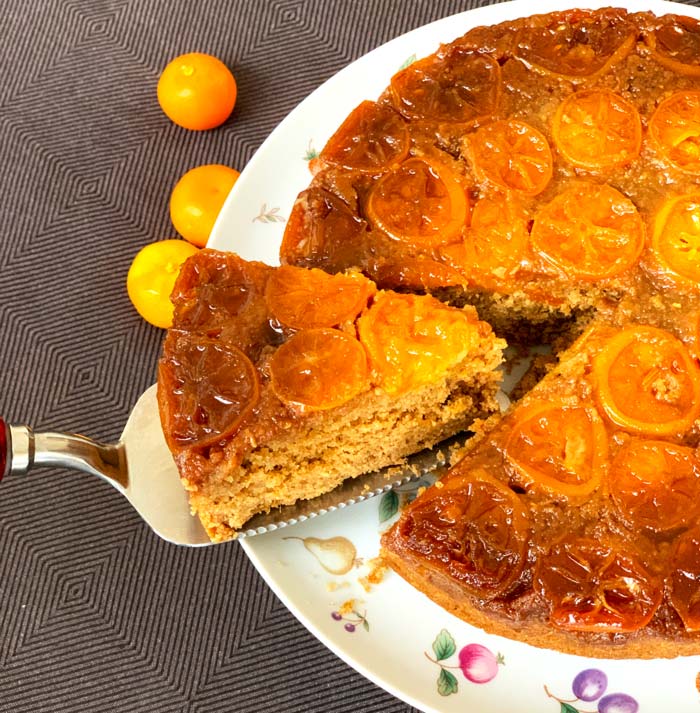
j. Slice with a serrated or very sharp knife
To cleanly slice through the calamondin pieces when serving this cake, you’ll want to use a serrated knife. A dull knife, like a butter knife, won’t cut it. (Pun intended.)
k. Storage notes
Assuming it doesn’t disappear during Day 1, how do you store this calamondin and ginger upside down spice cake?
We put ours back into its cleaned cake pan, calamondin-side-up. Then you can either cover it with foil (loosely on top) or insert toothpicks to hold saran wrap over the top.
This cake will store for up to a week in the fridge. Cover and heat each slice for 15-30 seconds in your microwave before serving.
Recipe: calamondin and ginger upside down spice cake
Now that you’ve read the important recipe notes above, it’s time to get baking!
Calamondin and ginger upside down spice cake
Equipment
- Electric mixer
- 8" x 2" aluminum cake pan
- fine grater or microplane
Ingredients
For topping
- 15-20 calamondin fruit, orange-ripe but still firm (a little less than 1 lb of fruit)
- 1/4 cup unsalted organic grass-fed butter, melted (weighed at 60g)
- 1/2 cup organic dark brown sugar (100g)
For cake
- 1 1/2 cups organic white whole wheat flour (200g)
- 1 1/2 tsp baking powder
- 1/2 tsp baking soda
- 1 1/2 tsp cinnamon
- 1/2 tsp salt
- 1/3 cup organic grass-fed unsalted butter, softened to room temperature
- 3/4 cup organic dark brown sugar (150g)
- 1/3 cup peeled, finely-grated ginger (See notes in article - ideally use tender young baby ginger; use mature ginger rhizomes as substitute.)
- 2 egg whites, at room temperature (The egg yolks make the cake a bit too heavy. Instead of tossing them, use them separately to make scrambled eggs, cured egg yolks, etc.)
- 1/3 cup whole organic yogurt, at room temperature
- 1 tsp pure vanilla extract
- 1/3 cup whole organic grass-fed milk, at room temperature
Instructions
- First, prepare calamondin topping. Pour melted butter into an 8" diameter × 2" deep aluminum cake pan and swirl it around to get bottom pan edges coated. Evenly sprinkle brown sugar over the butter. Arrange sliced calamondin pieces on top of the brown sugar. If you use calamondin end pieces, be sure to arrange them so that fruit side is facing bottom of pan for attractive final appearance. (See pictures in article.)Butter sides of cake pan now or wait until you remove from fridge in later step. Next, place pan in the refrigerator for 30+ minutes so that the toppings set. This helps ensure they don't move as batter is poured and leveled.
- Preheat oven to 350°F (177°C).
- Prepare the cake batter. In a mixing bowl, whisk the dry ingredients together (flour, baking powder, baking soda, cinnamon, and salt). Set aside.
- Using an electric mixer with whisk attachment, beat the butter on high speed for about a minute until it's smooth and creamy. Add the brown sugar and beat on high speed until creamed together, about 1 minute. (Use a silicone/rubber spatula as-needed to remove ingredients from side and bottom of mixer.) Next, beat in egg whites on high speed, then yogurt, grated ginger, and vanilla extract. Use the spatula again to scrape ingredients off sides and bottom of mixing bowl and mix again until fully incorporated. Pour the dry ingredients into the wet ingredients. Turn the mixer to low speed and as the mixer runs, slowly pour in the milk. Continue mixing on low speed until all of the ingredients are combined. Use the spatula again to make sure no unmixed ingredients are left on side or bottom of mixing bow.
- Remove toppings/cake pan from fridge. If sides of pan are not yet buttered, do it now. You want a generous coating to ensure the sides of the cake don't stick to the pan. Slowly pour cake batter over chilled topping - a spatula helps to remove it from the bowl and evenly spread it over the surface of the calamondins.
- Bake for 20 minutes, then put a tent of aluminum foil over top of cake before baking for another ~27 minutes. This prevents the top of the cake from burning as the insides finish cooking. You'll know the cake is done when: 1) the center has risen, 2) it's no longer jiggly, and 3) a toothpick doesn't have any liquid dough on it. Note there will be some sticky crumb, since this is a very moist cake.
- Cool cake on a baking rack until it's only slightly warm or room temperature before turning it out. Or you can wait longer - the cake pictured in this article was made late at night and turned out the following morning. Before turning it out on to cake plate or serving dish, run a butter knife along the edges of the pan to loosen it. Place upside down on cake plate and pop the back of the pan firmly with your hand. Cake should dislodge with all or almost all of the toppings perfectly intact. You can do repairs to topping as shown in article. For best presentation: 1) slice cake with a serrated knife (a dull knife won't cleanly cut through the calamondins), and 2) wait until the cake has had plenty of time to cool.
Let us know if this calamondin cake recipe helps scratch your citrus and ginger itch!
*Special thanks to Proportional Plate and Sally’s Baking Addiction! The ginger cake and pineapple upside down cake recipes on their respective websites helped us speed up the development of our calamondin ginger upside down spice cake recipe.
KIGI,

Dig your teeth into similar recipes you’ll love:
- Calamondin candy recipe
- Recipe: Blood orange bars with sage brown butter shortbread crust
- Easiest way to zest lemons, oranges, and other citrus
- Buddha’s hand citron: make tea, candy, and simple syrup from the same recipe
- Recipe: Meyer lemon guava ice cream
- Recipe: Duck egg Meyer lemon curd
- Recipe: Meyer lemon bars with rosemary brown butter shortbread crust
- Chewy ginger candy recipe (great for nausea)