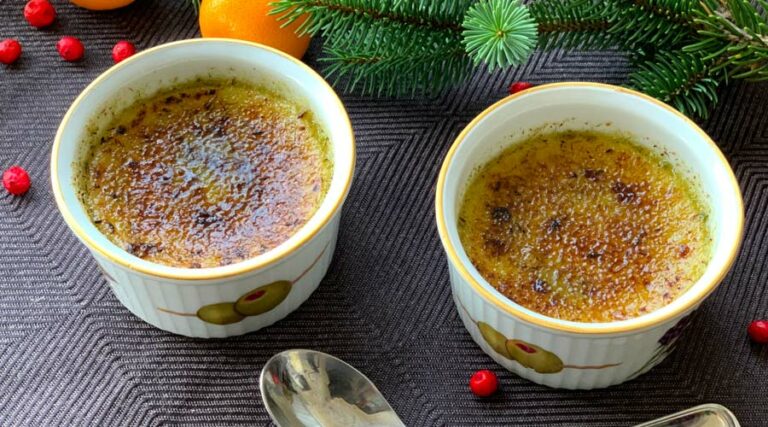
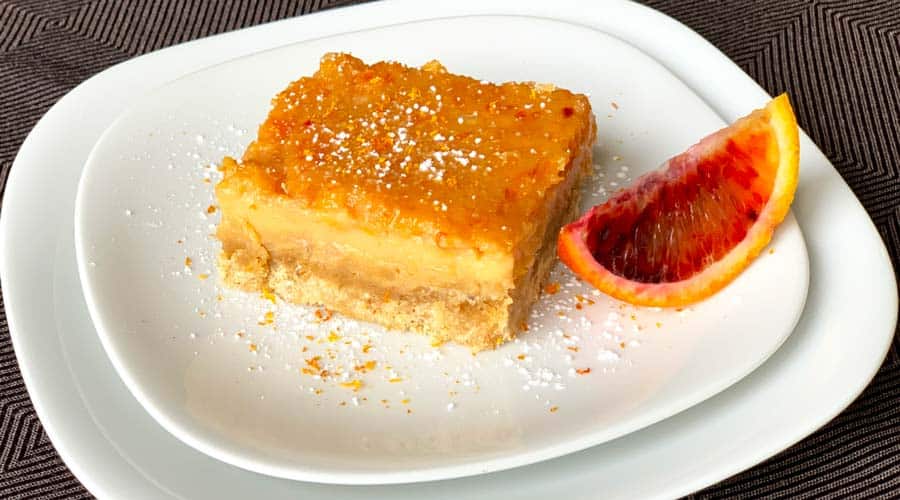
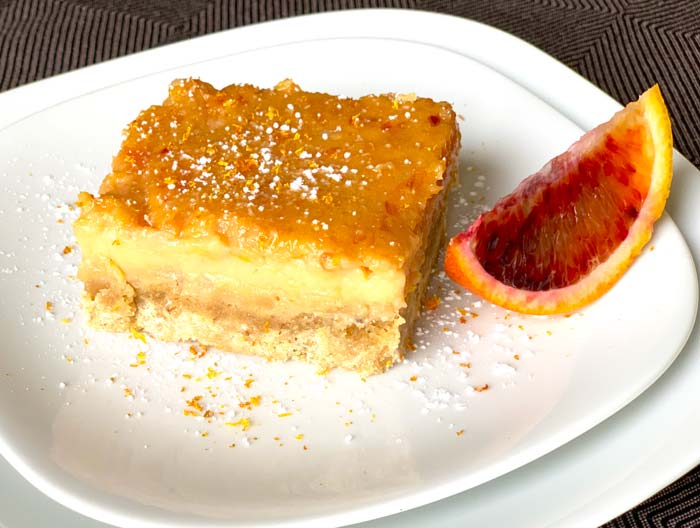
Blood orange bars with sage brown butter shortbread crust
Tyrant Farms' articles are created by real people with real experience. Our articles are free and supported by readers like you, which is why there are ads on our site. Please consider buying (or gifting) our books about raising ducks and raising geese. Also, when you buy through links on our site, we may earn an affiliate commission. Learn more
These delectable ‘Moro’ blood orange bars feature a sage brown butter shortbread crust made with white whole wheat flour. If you’ve got blood oranges to spare, this is the perfect dessert recipe!
‘Moro’ blood orange flavor changes throughout the season
A neat thing about growing food is you get to experiment with various stages of edibility throughout a plant’s lifecycle. That’s certainly true with citrus.
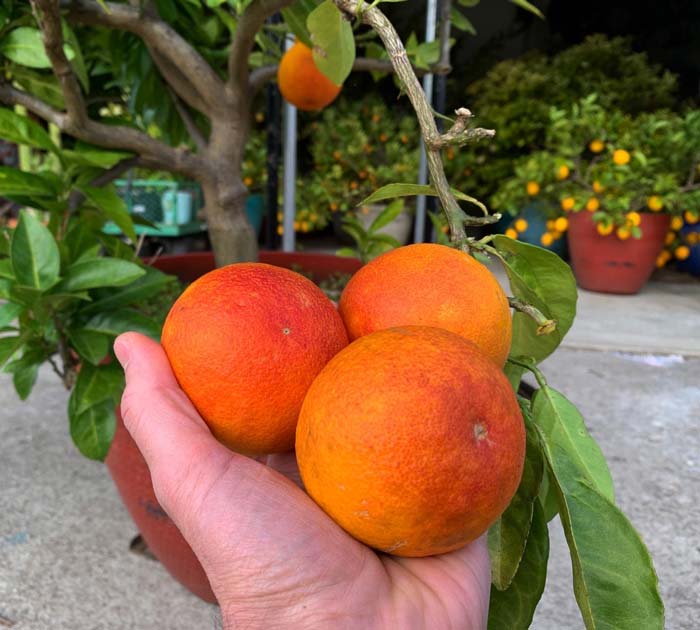
Among other citrus trees we grow in pots in our decidedly non-tropical Zone 7b climate is ‘Moro’ blood oranges.
First, we get to enjoy orange blossom tea in late winter/early spring. Then comes the fruit…
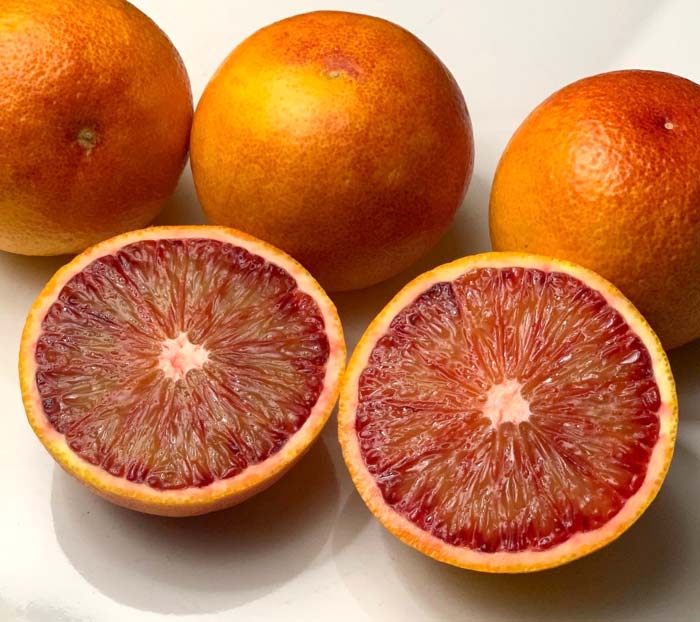
When a Moro blood orange’s skin and pulp first turn orange in early fall, they’re deliciously tangy. At that point, they’re like the best, juiciest tangerine you ever ate.
Then they start turning sweet and take on more berry-flavored notes, starting to lose some tang as the pulp and skin blush red-purple. This is our preferred stage of edibility; it’s just the right balance of sweet-berry-tang.
This stage of ripeness is also where we recommend making this blood orange bar recipe so the bars have some tang to balance out the sweet (without adding lemon or other tangy citrus juice to the recipe).
Another month on the tree, and the tang will be virtually undetectable as the dark red/purple pulp tastes as proximate to a blackberry as it does to tangy citrus.
The Moro of the story? Grow and play with your food if you can! And if you plan to make this recipe, please be sure to use blood oranges that still have some tang to them, not just sweet!
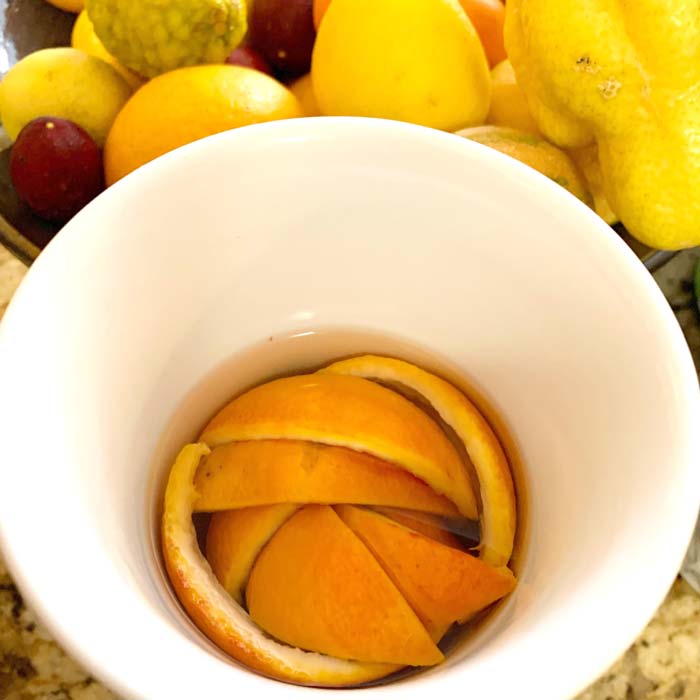
How to use blood orange skins
At the various stages of ripeness, ‘Moro’ blood oranges also offer some of the best zest and skins you’ll find on citrus.
Blood orange zest is gorgeous as a flavorful garnish. You’ll use it in this recipe, both in the filling and as a garnish.
Blood orange skins are also delicious whole in teas. So don’t just toss those skins, use them!
Use organically grown citrus
We strongly advise you to use organically grown citrus, in general and specifically for this recipe. This directive is especially true if you’re making recipes that use the citrus skin, which is where pesticide residues are most concentrated. (Although systemic pesticides can be found throughout the cells of a plant including its fruit.)
Diseases like citrus greening are causing conventional farmers to really up the quantities and combinations of pesticides used on their trees. Yes, organic growers can and do use pesticides too, but they’re OMRI listed non-synthetics that are generally much safer to humans.
Another benefit of using homegrown citrus: you know what was used on your trees. In our case, the answer is nothing.
Recipe notes and tips:
In addition to: a) using blood oranges that still have some tang to them, and b) using organic blood oranges, here are a few other important recipe notes and tips:
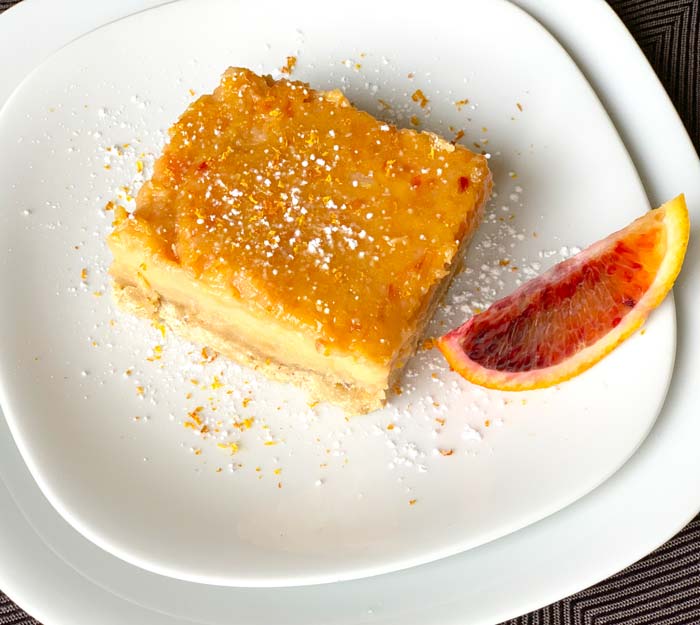
1. Your blood orange bars won’t be red — unless you use food coloring.
It might be a bit disappointing but blood orange bars are going to be more yellow-orange in color than red. That’s because the other ingredients in the mixture (which are essential) dilute the color.

Don’t worry: they’re still delicious and you can add a flash of red color when serving with the addition of blood orange zest and a slice of fresh blood orange.
If you absolutely must have red-colored blood orange bars, there are some good organic red food colorings available.
2. How to make sage brown butter for the shortbread crust.
If you’ve never made browned butter or made herb-infused brown butter like sage brown butter, then this step might make you a little anxious. Not to worry, it’s pretty simple.
Since the sage leaves are going to be added to the crust, you’ll want to start by finely dicing them. We used fresh sage from our garden, measured at about 3 tablespoons after dicing.
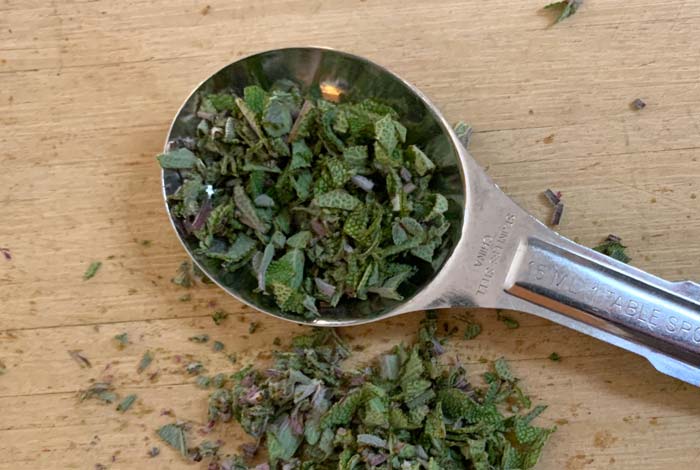
You can use dried sage if necessary, but use less since dried herbs are generally more intense. (Conversion: 3 tbsp if using fresh sage, so 1 tbsp if using dried sage.)
Next, put your butter (cut into chunks) in a saucepan over medium low heat. It will start to sizzle a few minutes after melting. We whisk it every few minutes to prevent it from heating too fast or unevenly.
After about 10-15 minutes, you’ll notice a change in color to a brownish hue and some of the milk solids dropping to the bottom of the pan and browning. At this point, add your diced sage, stir it vigorously, then immediately remove from heat.
You want your sage brown butter to re-solidify before using it so you can either stick in the fridge (more time) or put the pan in an ice-bath (less time). Either works fine and now you have your sage brown butter ready to use!
3. Make sure to pre-bake the shortbread crust before pouring in the blood orange mixture.
For your sage brown butter shortbread crust, we recommend using organic white whole wheat flour (we used King Arthur’s). Yes, it’s whole grain but it cooks, looks, and tastes more like white flour than the typical brown whole wheat flour you might be accustomed to. It also makes this dessert recipe a touch healthier!
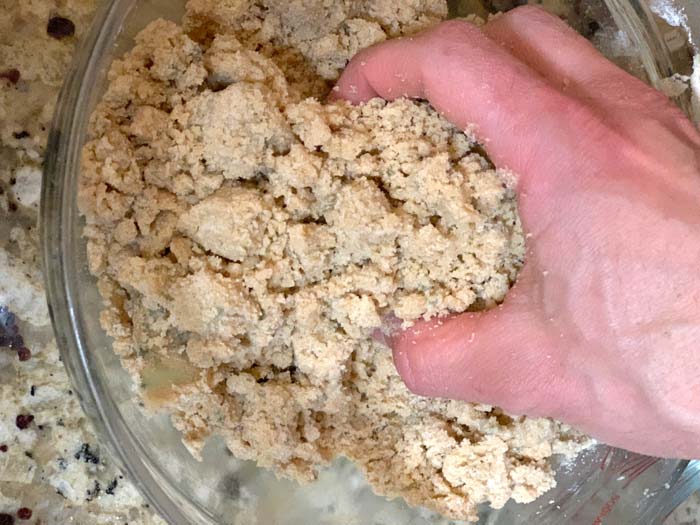
You can use a pastry knife or a food processor to get your shortbread dough to come together. However, the easiest way to do it is to quickly smush it all together with your hands. Cheating? Maybe, but it’s fast and you’ll have less dishes to clean.
The final consistency of the shortbread dough should be similar to dark brown sugar. Crumbly, but it will glob together when pressed.
Next, generously butter a 8″x11″x2″ glass or ceramic baking dish and pour in the shortbread dough. Push it evenly into place around the baking dish using a firm spatula or your hands.
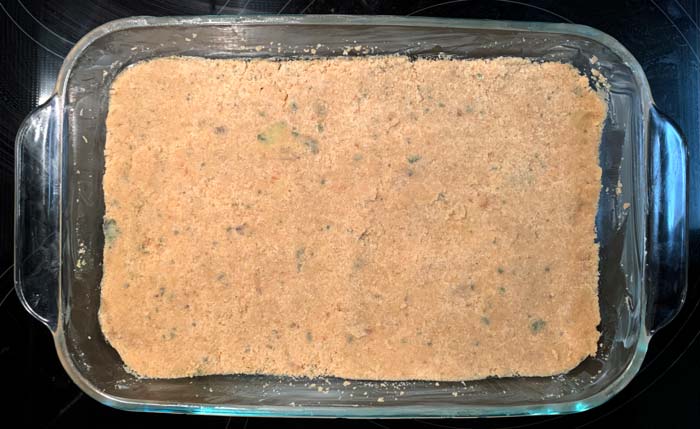
Then bake it in a pre-heated 350°F (177°C) oven for about 35 minutes or until it’s just starting to take on some golden-brown edges.
4. Your blood orange bars are done when they’re not jiggly in the center.
While your shortbread crust is pre-baking, start making your blood orange filling…
When adding a tapioca starch or corn starch thickener, it’s important to remove a small amount of blood orange juice (maybe 1/2 cup) to fully mix the starch before adding it to the main ingredients. If you add the starch right to the whole bowl of liquid ingredients, it’s going to quickly glom together forming small balls rather than evenly distributing throughout. The same is true of the flour you’ll add.
Once all wet ingredients for your blood orange filling are combined, give them a vigorous whisking to make sure the egg whites/yellows and other ingredients are all blended so you don’t end up with egg chunks on top at the end. (You may need to whisk them again just before pouring over the cooked shortbread crust.)
Another tip: it’s way easier to zest your blood oranges before you juice them. This recipe uses the zest of one blood orange (about 1 tbsp fresh) to add some kick and color to the filling + more zest as a garnish when serving.
Once your shortbread crust is out of the oven, pour the liquid blood orange filling on top of the hot crust and stick it back in the oven. Immediately turn the oven down to 300°F (149°C) and bake for about 45 minutes. “About” because every oven cooks a bit differently, so start checking yours at ~35 minutes.
How do you know your blood orange bars are done? When the center isn’t depressed and jiggly.
5. Serve cold.
Now, it will be tempting to eat your blood orange bars straight out of the oven. Resist the temptation.
Instead, you’ll want them to cool down to room temperature then stick them in the fridge (covered) because they’re actually best served cold. Note that if you cover them and put them in the fridge while still warm, you’ll trap condensation and make the top of the bars more wet/tacky.
Again: cool to room temp > fridge > serve.
Garnish with a dusting of powdered sugar (optional) via a sifter plus a dusting of blood orange zest.
Recipe: Blood orange bars with sage brown butter shortbread
Blood orange bars with sage brown butter shortbread crust
Ingredients
For blood orange filling
- 1.5 cups organic fresh blood orange juice (about 3 blood oranges)
- 1 cup organic cane sugar
- 1 tbsp organic blood orange zest for filling + more for garnish when serving (1 blood orange makes about 1 tbsp zest)
- 1/3 cup organic white whole wheat flour to help thicken
- 3 tsp tapioca flour or corn starch (to thicken)
- 6 large pastured eggs
For shortbread crust
- 1 cup organic grass-fed butter
- 3 tbsp fresh sage, finely diced (or 1 tbsp dried sage)
- 1 1/2 cups organic white whole wheat flour
- 2/3 cups organic cane sugar
- 1 tsp pink Himalayan sea salt or other salt of your choice
Instructions
For shortbread
- Start by making the sage brown butter. Place butter in small pan on low heat (3 on our stove). Your goal is NOT to burn the butter, but to slowly brown the butter fats/solids. Stir every few minutes. Once butter takes on a brown hue (about 10-15 minutes), add diced sage, stir for a few seconds, then immediately remove from heat. Cool butter until solid in the fridge or more quickly using an ice bath method.
- Preheat oven to 350F. Generously butter an 8" x 11" x 2" glass or ceramic baking dish. Alternately, you can place parchment paper in base with extra hanging over lips to make extraction easier after cooking. (We've done both methods and don't really have a preference.)
- Add solid/cooled sage brown butter to flour, sugar, and salt in mixing bowl. Smash together (using hands, food processor, or pastry cutter) until all ingredients mixed into a crumbly consistency similar to dark brown sugar. See picture in article for desired consistency. Pour crumbly dough mixture into baking dish and smash down with hands or a firm spatula until an even surface is formed.
- Bake the shortbread crust FIRST before adding blood orange topping. Bake crust for ~35 minutes at 350F until crust is getting some golden brown hues.
- While shortbread crust is cooking, make the blood orange filling. Set aside 1/2 cup blood orange juice in bowl to whisk in starch and flour to ensure they don't clump. After whisking, this will basically be an evenly mixed paste that you'll add back to the rest of the blood orange juice and whisk again. Then add sugar and zest and whisk again. In a separate bowl, whisk eggs until evenly beaten. Then add the eggs to the blood orange mixture and whisk vigorously again. You'll want to give the mixture one more vigorous whisking just before pouring it onto hot pre-baked shortbread crust.
- Once shortbread is out of oven, pour on the blood orange filling. Place back in oven but immediately turn temp down to 300F. Bake for about 45 minutes or until the center is firm, not jiggly.
- Cool on rack to room temperature, then refrigerate. Serve chilled for best flavor and consistency. Garnish with sifted powdered sugar and blood orange zest as desired.
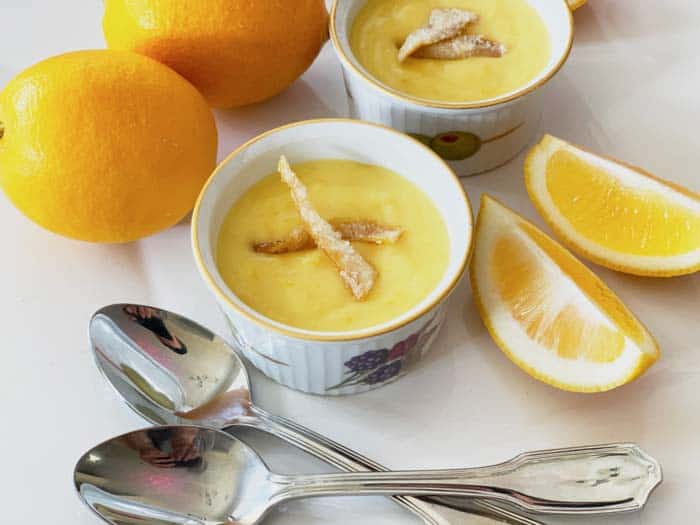
We hope you enjoy these blood orange bars with sage brown butter shortbread crust! This recipe was inspired by our Meyer lemon bars with rosemary brown butter shortbread crust, so be sure to try that recipe as well!
KIGI,

More helpful articles for citrus-lovers:
- How to grow citrus in pots in any climate zone
- Tyrant Farms’ potted citrus garden tour (Zone 7b)
- Easiest way to zest lemons, oranges, and other citrus
- Recipe: fresh guava and Meyer lemon ice cream
- Recipe: calamondin marmalade with baby ginger
- Buddha’s hand citron: make tea, candy, and simple syrup from the same recipe
- How to grow and make lemon blossom tea