Recipe: Orzo with chanterelles and Common milkweed

Tyrant Farms' articles are created by real people with real experience. Our articles are free and supported by readers like you, which is why there are ads on our site. Please consider buying (or gifting) our books about raising ducks and raising geese. Also, when you buy through links on our site, we may earn an affiliate commission. Learn more
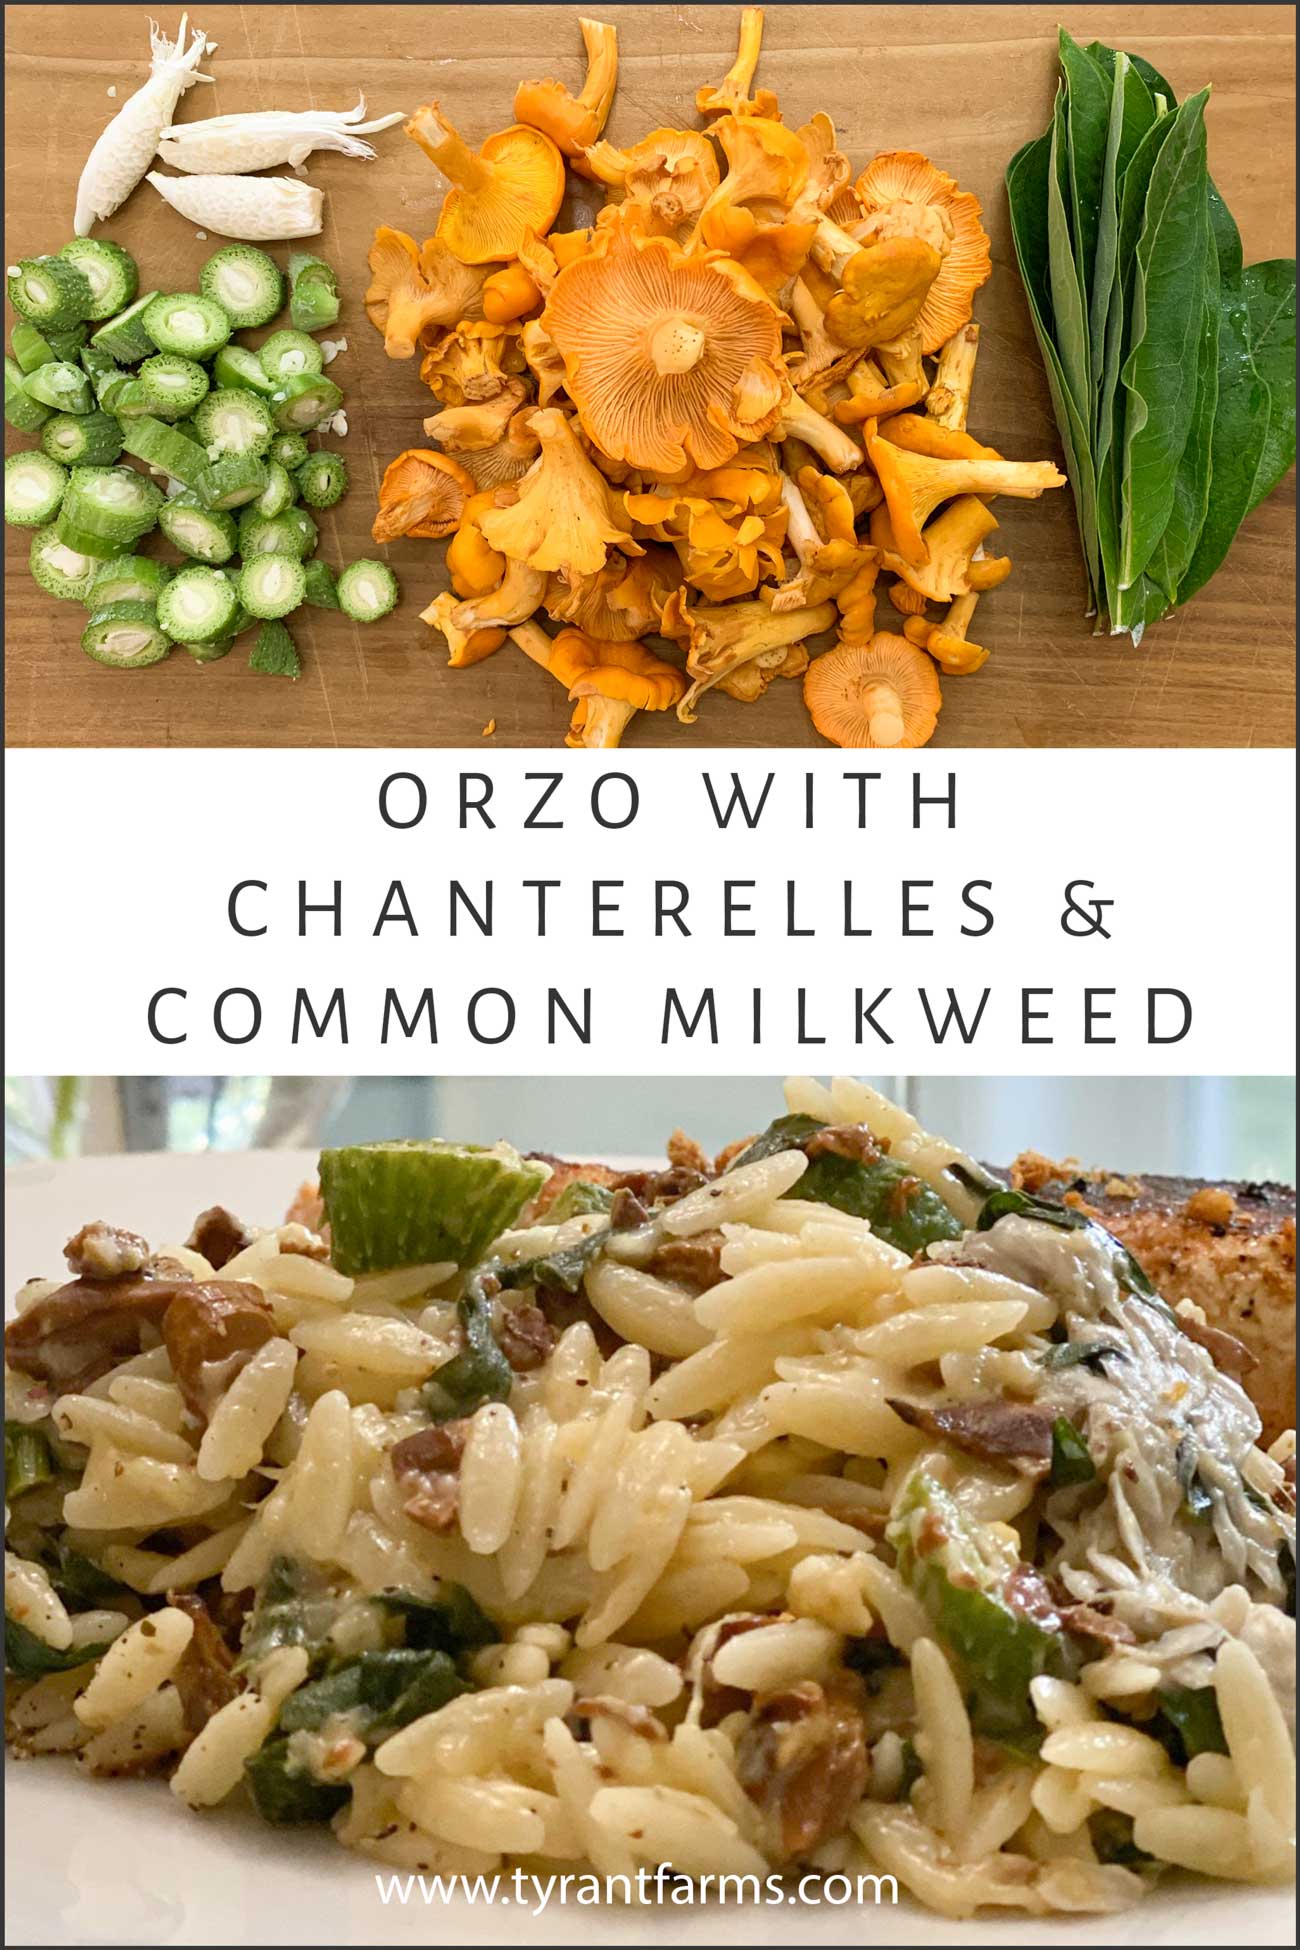
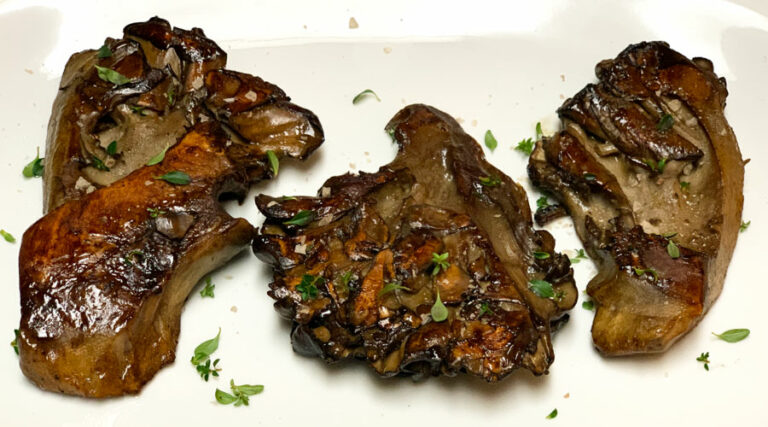
This orzo recipe features chanterelle mushrooms and the immature pods and leaves of Common milkweed. It’s sure to be a seasonal favorite for other foragers and gardeners alike!
The first time we ate young/immature Common milkweed (Asclepias syriaca) pods and leaves, we fell in love with this remarkable native plant, recognizing it as one of the best veggies growing in our garden. The delicate but delicious flavors made us want to pair them with another seasonal favorite: chanterelle mushrooms.
With our garden cranking out lots of edible milkweed parts and our surrounding forests producing copious quantities of chanterelle mushrooms, we finally had the opportunity to pair these two ingredients together on a steamy summer night.
The results were every bit as good as we’d hoped. We hope you love this Orzo with chanterelles and Common milkweed recipe as much as we do. But first…
Legal disclaimer
A recipe that comes with a legal disclaimer? It must be good!
Rule #1 in our Beginner’s guide to foraging is “never eat anything you’re not 100% certain you’ve correctly ID’d AND you’re not 100% certain is edible.”
This recipe is a more advanced both in the techniques used to make it and in the ingredients required to make it. Common milkweed and chanterelle mushrooms are wild-foraged foods with poisonous lookalikes and should only be eaten with utmost caution:
Common milkweed
If you’re not familiar with harvesting and using various edible parts of Common milkweed (Asclepias syriaca), please read our detailed guide to growing, foraging, harvesting, and using Common milkweed before you consider making this recipe.
This recipe specifically uses young leaves and pods of Common milkweed, not any other milkweed species. Non-hybridized Common milkweed offers parts that are safe and edible (and quite delicious) to humans after preparation.
However, there are milkweeds with high concentrations of compounds that are poisonous to humans and should NOT be eaten. Also, as we mention in our Common milkweed guide: always check the leaves when harvesting to make sure there are no Monarch butterfly eggs or caterpillars present.
Chanterelles
If you’re not familiar with harvesting chanterelles, please make sure to read our detailed article, Chanterelle mushroom guide: how to forage and use. Also note that jack-o’-lanterns are another species of beautiful orange-colored summer mushroom that look somewhat similar to chanterelles, however they can make you very sick.
Repeat: never eat any wild plant or fungi that you’re not 100% certain you’ve properly identified and know to be safe.
Recipe tips & process photos
As mentioned, this is a relatively advanced recipe that requires some nuance to get right. Below are key tips — along with photos — to help you nail it your first time trying.
1. Harvest only immature Common milkweed pods and leaves.
Mature/older milkweed pods and leaves are inedible and unpalatable. Both parts become fibrous and bitter as they age, as well as potentially unsafe due to higher concentrations of cardenolides.
General rule when trying to determine which Common milkweed pods to use:
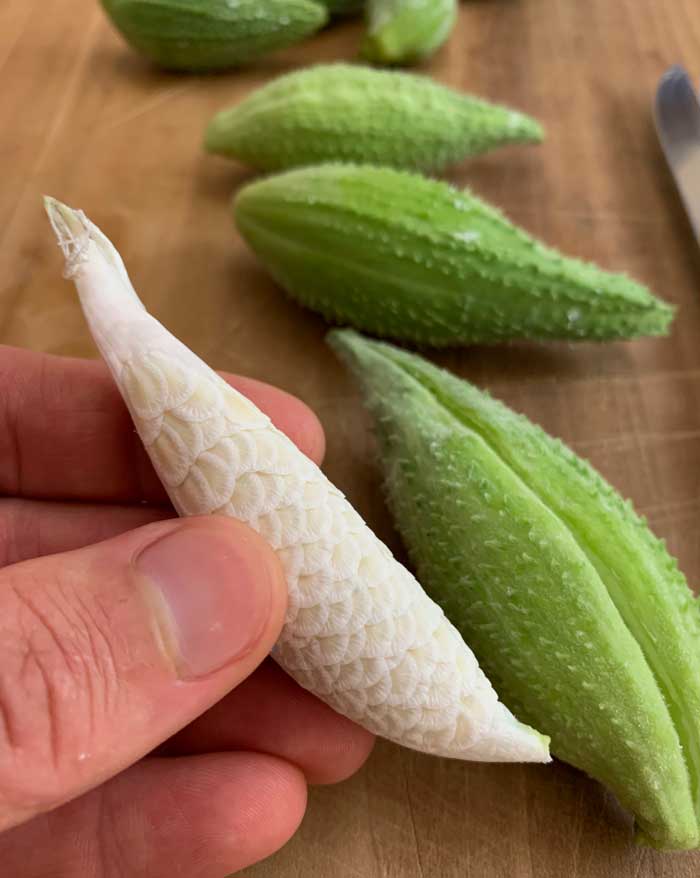
- Under 2″ – If they’re under 2″ in length and firm to the touch, they’re ideal to cook, skin and all.
- Over 2″ – If the pods are 2″ or longer and starting to turn soft to the touch, the green outer skin is likely too fibrous to eat. However, slice the pod open and if the young seed/silk inside is still white, remove it and use it.
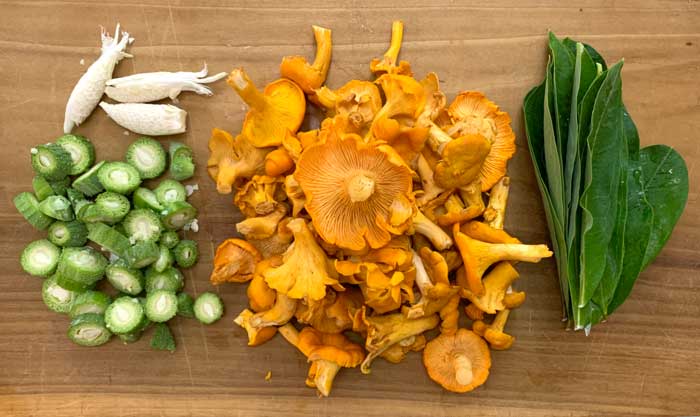
In this recipe we used both whole young Common milkweed pods AND the white immature seeds/silk from slightly older pods. You can do the same.

We also used young, tender leaves growing at the very tops of our milkweed plants, NOT older leaves.
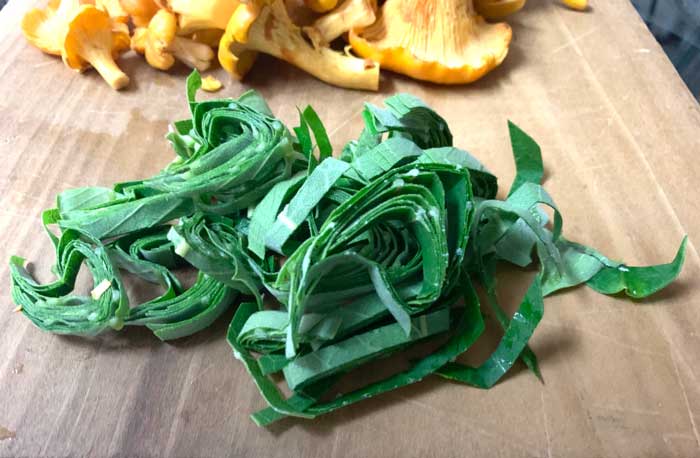
2. How to prep and cook Common milkweed for this recipe.
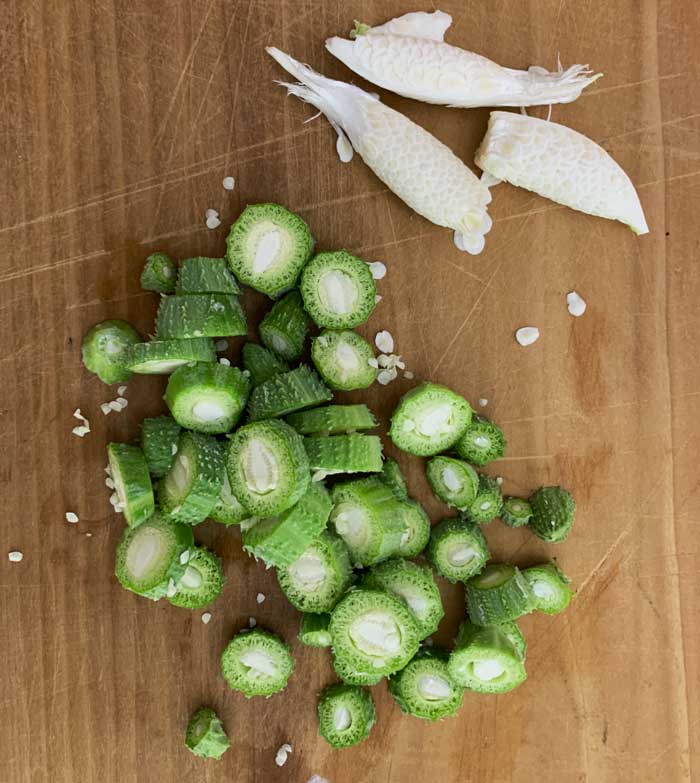
During prep, we sliced our smaller/younger milkweed pods into sections, like you chop okra before frying. However, we left the immature seeds/silk we removed from older pods intact so they’d be more visible in the final meal. The immature seeds are surprisingly cheese-like in texture when cooked.
We also cut our young milkweed leaves into thin slices.
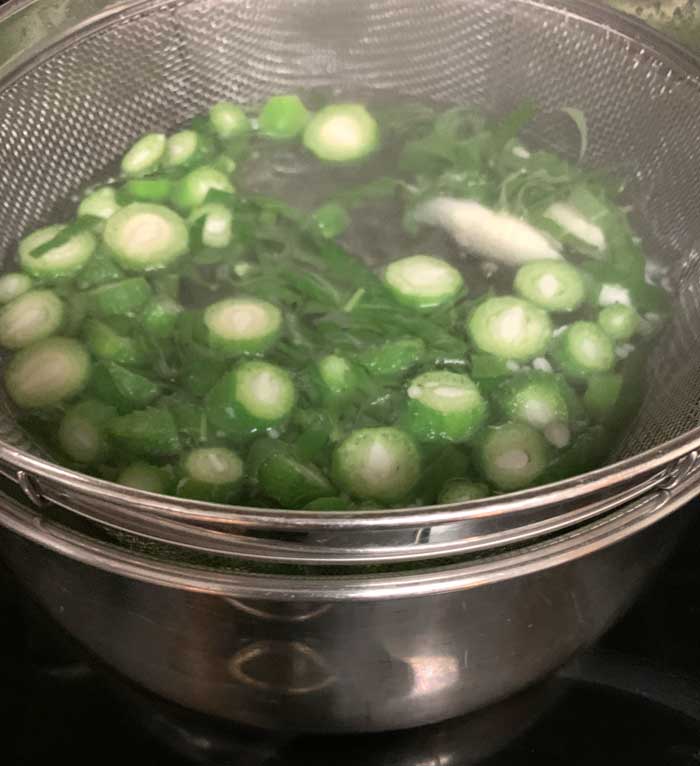
From there, we quickly boiled all these milkweed parts for one minute before straining them. Then we set them aside until it was time to add them to the sautéed mushrooms to cook further.
3. Rinsing chanterelle mushrooms.
Some people say not to rinse chanterelle mushrooms before cooking them because it will wash out their flavor. We disagree.
No matter how careful we are when picking chanterelles, there will still be small amounts of soil and grit on them. It’s not pleasant to bite into gritty food that scrapes your molars when chewing.
That’s why we give our chanterelles a thorough rinsing before we cook them. Does it negatively impact their flavor or texture? We don’t think so.
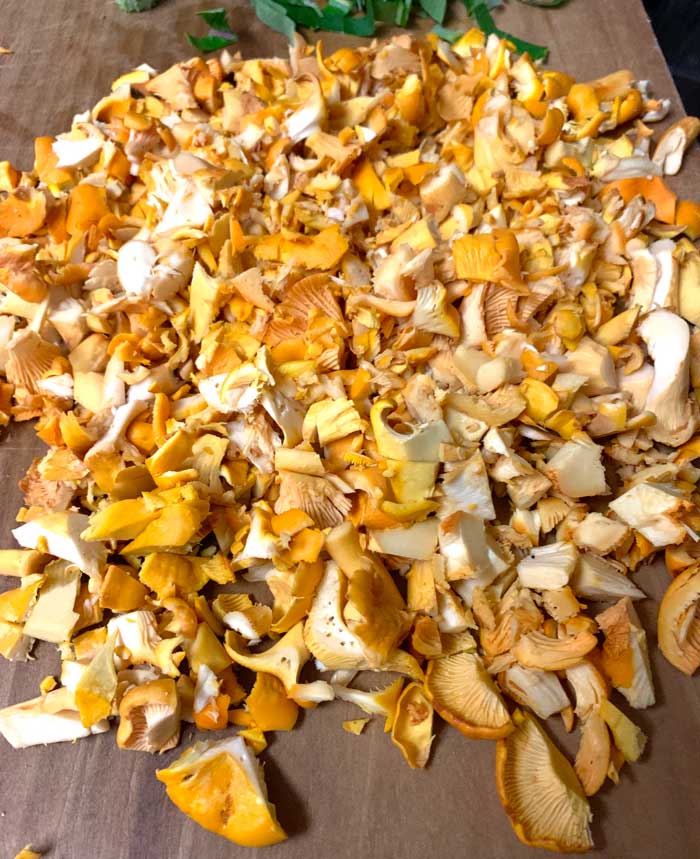
4. Cooking chanterelle mushrooms.
Two other atypical things we do with chanterelles:
A. We cut them into small pieces so they cook more evenly and disperse their flavor more uniformly. While these smaller pieces might not plate as pretty as whole mushrooms, their flavor more evenly infuses a dish and makes them easier to eat.
B. We don’t eat mushrooms raw. Nor do we fast-cook mushrooms. Ever.
Why? Chitin (which gives mushrooms their texture) isn’t easy for your body to digest. Not cooking or under-cooking mushrooms means your body can’t digest all the beneficial compounds mushrooms have to offer. Cooking also kills any pathogens and heat-sensitive toxins that degrade during cooking.
If there’s a more knowledgable mushroom expert than Paul Stamets, we don’t know who it is. You can read his more lengthy explanation of why you should always thoroughly cook mushrooms if you’re interested. (*Note: fermenting mushrooms also breaks down the chitin, kills pathogens, and degrades toxins as well.)
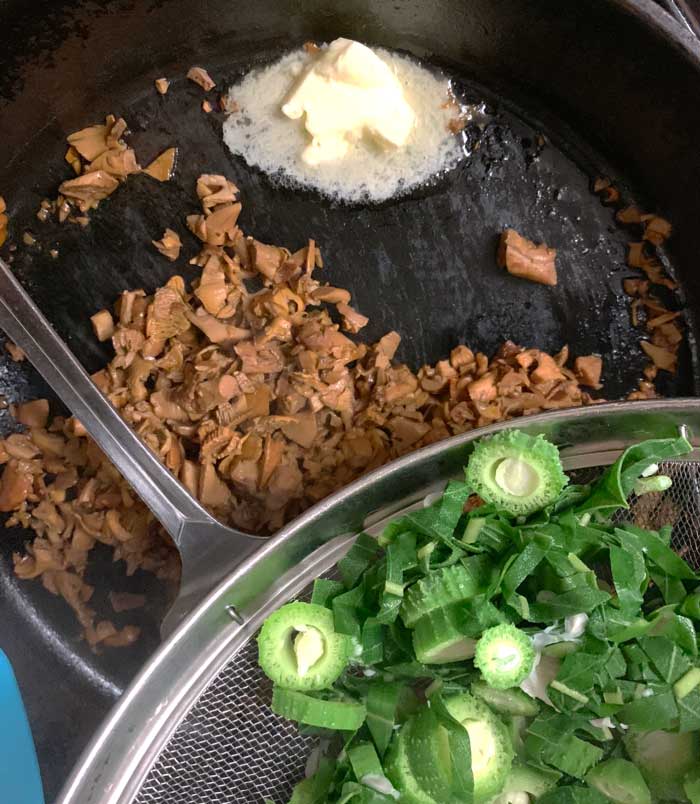
Once our chanterelles were chopped, we put them in a cast iron pan on medium heat (5.5 on our stove). Then we added just enough water to cover them, 1/4 cup of white wine, a pinch of salt, and 2 tablespoons of butter.
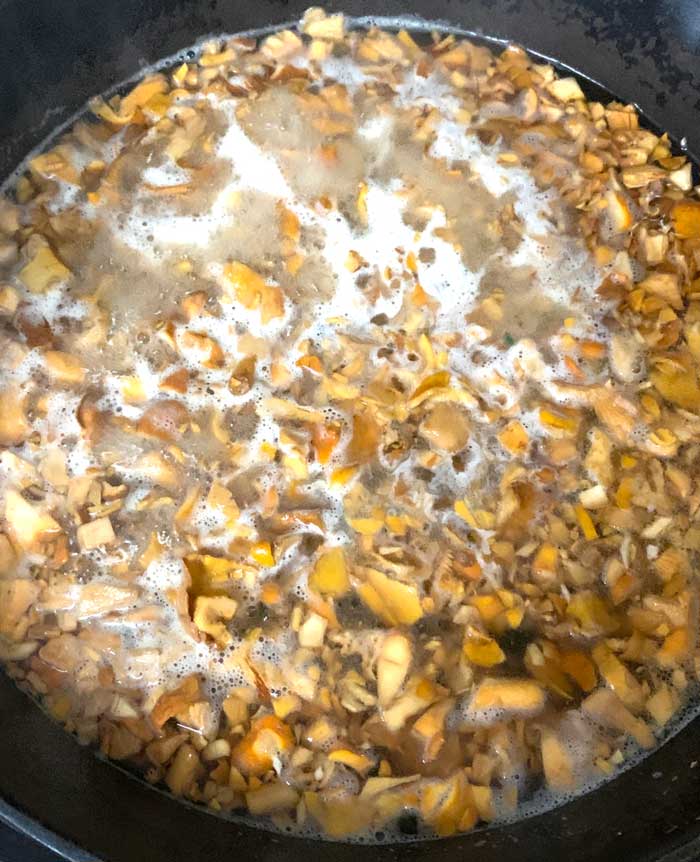
Then we cooked them until all the water was nearly cooked out, which took about 20 minutes. As soon as the water was nearly cooked out, we added our flash-boiled milkweed, a bit more butter, and a bit of extra virgin olive oil.
All the ingredients were then sautéed for another 5 minutes.
4. When and how to add an egg to the orzo.
Once the water in your chanterelles is a few minutes from cooking out, you’ll want to get your orzo in the boiling water. Depending on the orzo brand, size, and whether it’s whole grain or not, orzo may take 7-10 minutes to cook.
Ideally, you can time your orzo and your chanterelle-milkweed mix to finish cooking at about the same time.
Once your orzo is done, quickly strain and dump it back into the pan before it’s fully drained. You want some residual water left on the orzo because you’re now going to bring it back to the same stove burner asap while the orzo is still piping hot.
If you have a gas stove, turn it to the lowest setting. If you have an electric range, you can turn it off and let the residual heat of the stovetop + hot orzo finish things up…
Add another ~1 tablespoon of extra virgin olive oil and give the orzo a quick stir to coat. Then quickly add a raw egg. We recommend duck eggs because they’re superior — and because we’re duck evangelists. As soon as the egg hits the orzo, stir vigorously for 30 seconds.
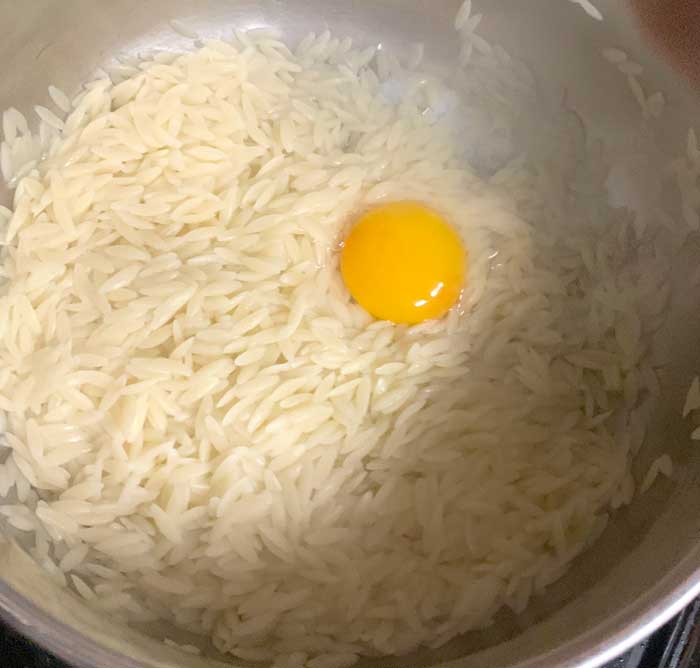
You’re not trying to make scrambled eggs, you’re trying to provide a rich, creamy flavor and texture infusion. (Yes, this is the same technique used when finishing up carbonara.)
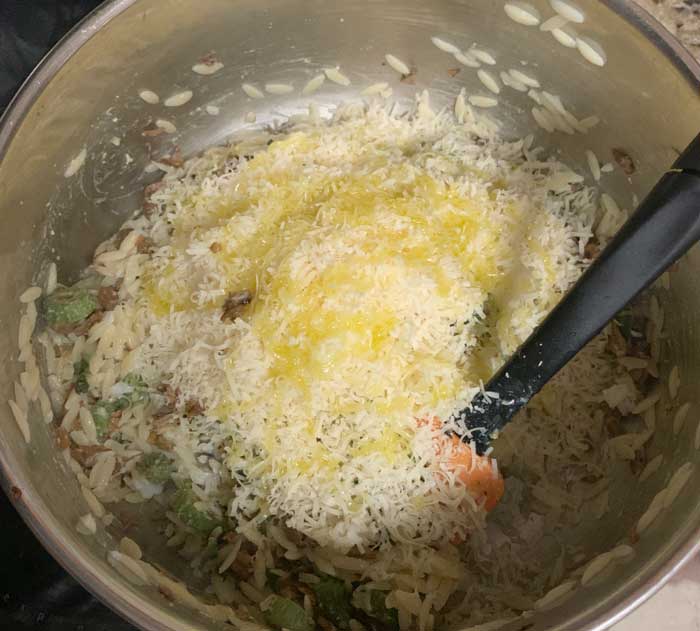
Now add your milkweed and chanterelles. Stir. Then your fresh-grated parm, cracked pepper, and another couple tablespoons of extra virgin olive oil. Stir until evenly mixed.
Plate, then garnish with lemon zest and/or more cracked pepper and enjoy!
Recipe: Orzo with chanterelles and Common milkweed
With the above process photos and notes in mind, you’re now ready to dive into the recipe!


Orzo with chanterelles and Common milkweed
Ingredients
- 1 cup orzo
- 3 cups chanterelle mushrooms (measured after chopping)
- 1 cup diced immature Common milkweed pods and/or immature milkweed seeds
- 1 cup thin-sliced immature Common milkweed leaves
- 2 cups fresh-grated parmesan cheese
- 1 egg (preferably duck egg)
- 1/4 cup white wine
- 2 garlic cloves, diced
- 1/2 tbsp pink sea salt to salt the water used to boil orzo NOT for dish
- 1/4 tsp Himalayan pink sea salt, or to taste for chanterelles and milkweed
- 4 tbsp butter, organic grass-fed
- 6 tbsp extra virgin olive oil, or more if needed at end when combining finished ingredients
- cracked pepper to taste and/or as garnish
- lemon zest as garnish
Instructions
- See process photos and details above in article for reference. You'll be cooking the three primary ingredients (orzo, chanterelles, and Common milkweed) separately. You'll then combine and finish cooking the chanterelles and milkweed together before adding them to the orzo. The chanterelles take the longest to cook, so start there.
- Chop chanterelles into small 1/4" - 1/2" pieces. Place in pan on medium heat (5.5 on our electric stovetop). Add enough water to pan to just cover the mushrooms + 1/4 cup of white wine + 2 tbsp butter + a pinch of salt. You'll be cooking the water out of the mushrooms, which will take 15-20 minutes depending on the size of your pan.
- As chanterelles are cooking, prepare to flash-boil milkweed. Bring water to boil, ideally in pan with strainer insert. Once boiling, add milkweed pieces and boil for about 1 minute, stirring. Strain and set aside. Dump water.
- As the water in the chanterelles is getting close to cooking out, you'll want to start another pot of boiling water for your orzo. Add 1 tablespoon of salt to water (ideally rock salt like pink sea salt with no microplastics). Once water is boiling add orzo and stir every 1-2 minutes.
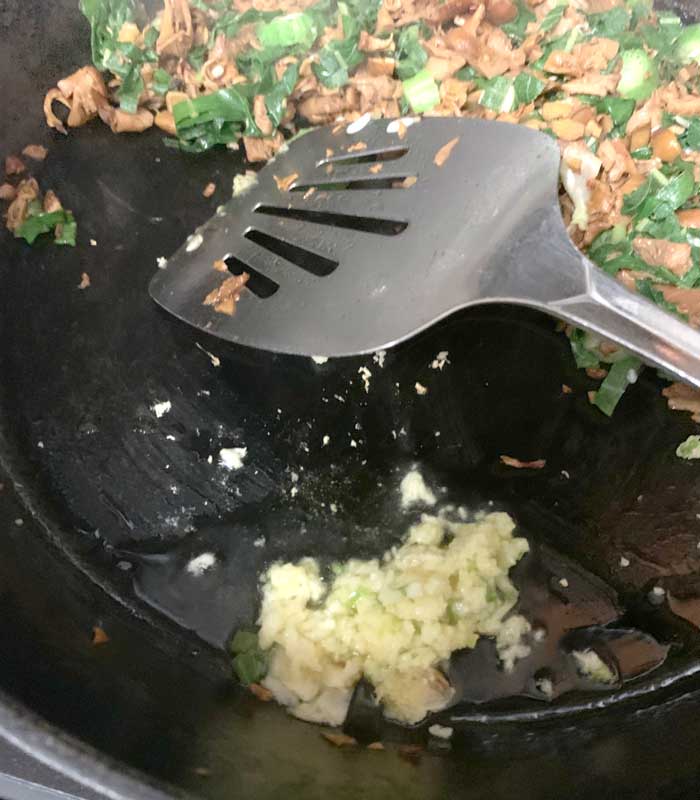
- Once the water in the chanterelles has nearly cooked out, turn temperature down to medium low (3 on our stove). Then add pre-boiled milkweed pieces, 2 tablespoons butter, and ~2 tablespoons extra virgin olive oil (or more if your batch needs it). Stir regularly, especially as the water cooks completely out. Continue cooking until mushrooms are lightly browned. Add garlic at the end. (We scraped mushrooms/milkweed aside and added garlic in an open part of the pan with another tablespoon of olive oil.) Remove cooked ingredients from pan and set aside.
- After 7-10 minutes of cooking the orzo (depending on brand instructions and desired texture), quickly strain orzo, but don't completely drain. Put orzo back in pan and return to warm stovetop. If you have an electric stove: use residual heat from turned off burner. Gas stove: turn temperature to low. Once orzo is back on stovetop, add one raw egg and stir vigorously for 30 seconds to coat orzo. Remove from heat. Then add chanterelle/milkweed, and stir to incorporate. Next, add fresh-grated parmesan, olive oil to desired consistency (~2-5 more tablespoons) and cracked pepper. Stir together, taste, and modify as-needed. Want to brighten the dish a bit more beyond what the white wine adds? Add some fresh-squeezed lemon juice (or a bit more wine).
- Plate and garnish with lemon zest and more black pepper. Plate and serve! Great as a standalone dish or with a side of fish or chicken.

We hope you and yours love this orzo with chanterelle mushrooms and Common milkweed recipe as much as we do!
KIGI,

Bite into these tasty related articles:
- Black trumpet mushroom pasta
- Reishi mushroom & mimosa flower sparkling fermented cordial
- Chicken of the woods mushroom “chicken fingers”
- Corn smut (huitlacoche) soup
- Thai-inspired maitake mushroom soup
- Lion’s mane mushroom chowder
- Lion’s mane mushroom soup with broccoli and potatoes
- Lion’s mane mushroom crabcakes
- Cauliflower mushroom quiche
… and more wildly delicious recipes from Tyrant Farms.