DIY: How to make chestnut flour
Tyrant Farms' articles are created by real people with real experience. Our articles are free and supported by readers like you, which is why there are ads on our site. Please consider buying (or gifting) our books about raising ducks and raising geese. Also, when you buy through links on our site, we may earn an affiliate commission. Learn more
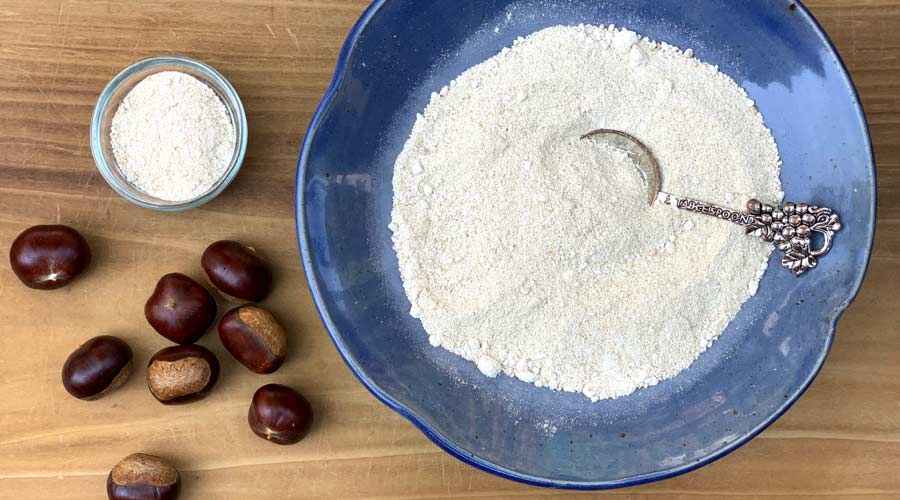
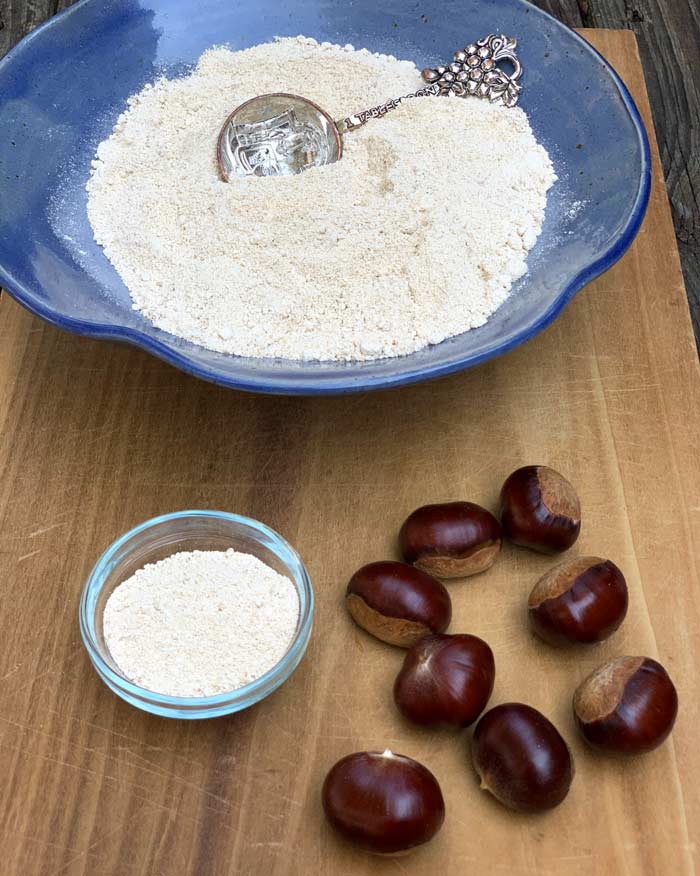
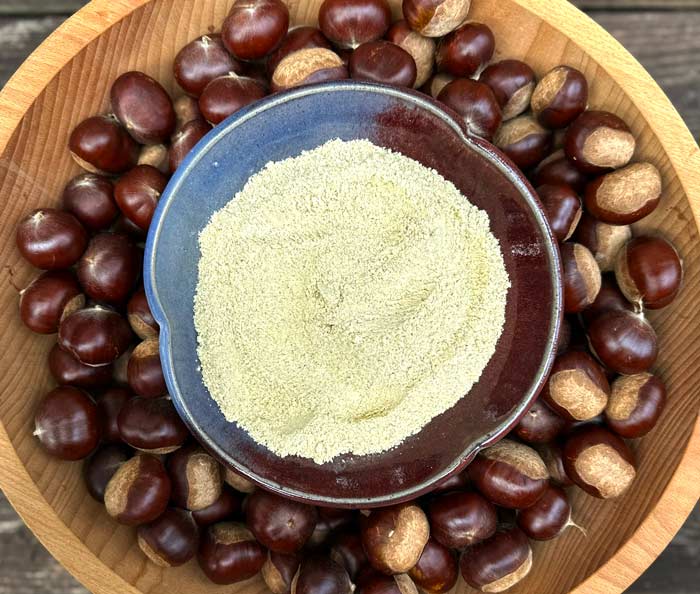
In this article, you’ll find out how to quickly turn fresh chestnuts into chestnut flour! The only tool you’ll need to make this delicious and versatile gluten-free flour is a food processor.
We’ve been making our own chestnut flour from homegrown Chinese chestnuts for a decade. (See: How to grow Chinese chestnuts.)
As such, we’ve figured out lots of little tricks to simplify a process that might otherwise take a long time.
Why make chestnut flour?
If you grow chestnuts or have access to fresh or frozen chestnuts, turning them into chestnut flour allows you to make lots of recipes that you can’t make with the whole nuts. Examples of chestnut flour recipes include:
- chestnut bread,
- puddings,
- breakfast porridge,
- pie crusts,
- cakes,
- crepes,
- mash, and more.
Plus, chestnut flour is a very nutritious complex carbohydrate that’s high in B vitamins, vitamin C, and other nutrients. Due to chestnuts’ low fat content, chestnut flour is also a whole food, unlike most other nut flours which have to have their fat removed during processing. (Example: If you grind whole almonds, you’ll make almond butter, not almond flour.)
Chestnut flour is gluten-free but doesn’t bake like wheat flour
Yes, chestnut flour is gluten-free. So if you have gluten sensitivities, chestnut flour can be a great addition to your diet.
While chestnut flour doesn’t bake like regular flour made from wheat due to the nuts’ lack of gluten, this sweet flour might be the most delicious of all gluten-free flours. We describe the taste of chestnuts and chestnut flour like a cross between sweet potatoes with hints of pecans.
How to make chestnut flour, step by step
The only tool you’ll need to make chestnut flour is a good food processor. While a food processor won’t produce a finely ground chestnut flour (there will be some small chestnut pieces left in), it’s perfectly adequate for doing small batches of flour for anyone on a budget.
However, if you have your own chestnut tree(s) that produce a lot of nuts every year or you want a finely milled flour, you may want to consider getting your own grain mill, like this KitchenAid model. Our instructions for making chestnut flour (below) accommodate either option.
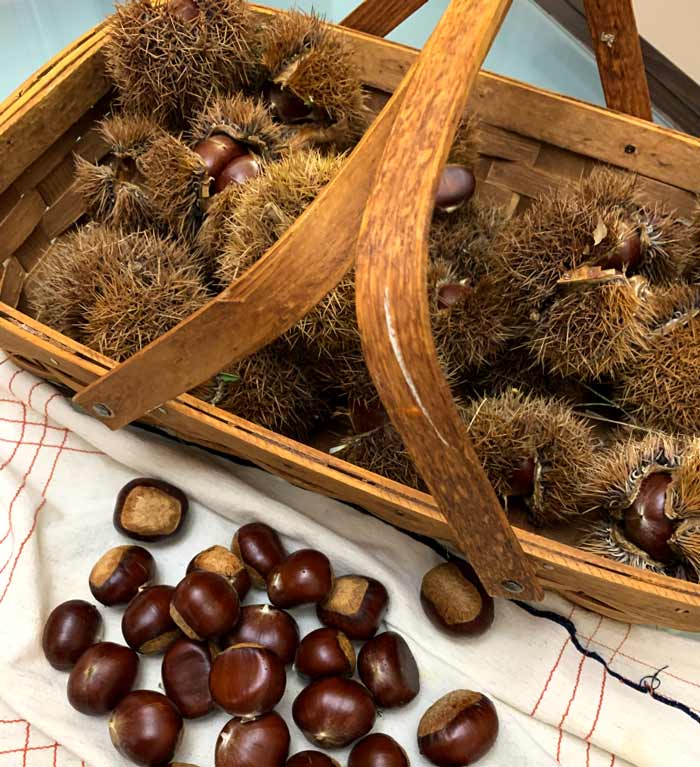
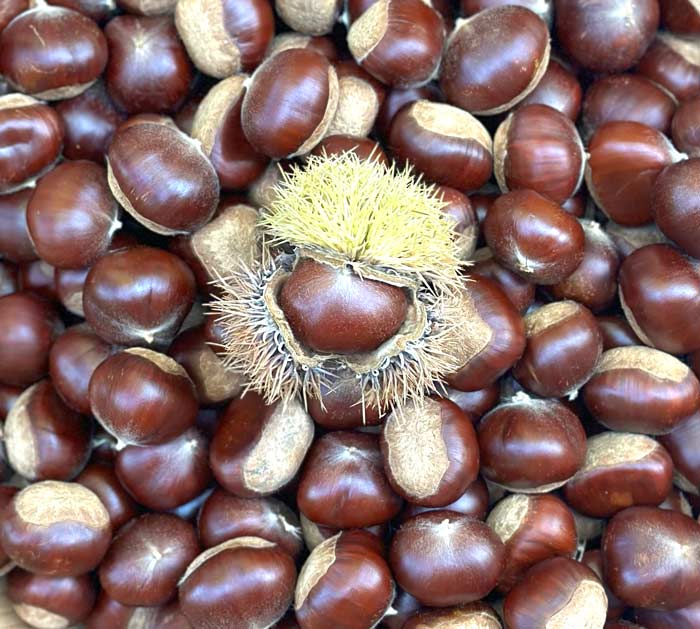
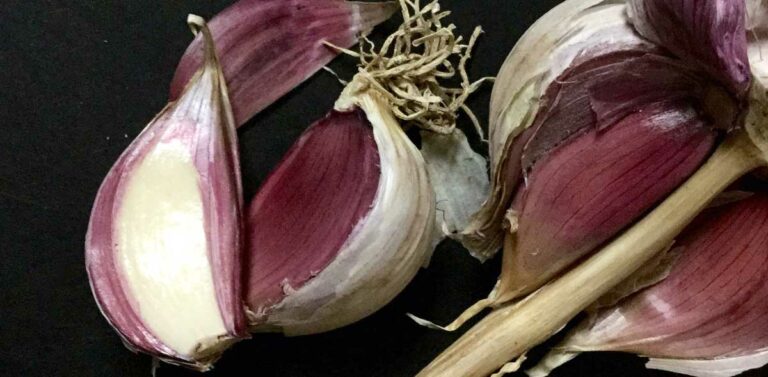
Step 1: Gather chestnuts (remove spiky burrs if necessary).
You can use any species of chestnut to make chestnut flour:
- Sweet chestnuts, aka Spanish or European chestnut (Castanea sativa);
- Chinese chestnuts (C. mollissima), the type we grow; or
- Japanese chestnuts (C. crenata).
Usually but not always, chestnuts will fall out of their spiky protective burrs when ripe. If not, you’ll need to put on heavy leather gloves and remove nuts from the burrs before getting started.
Also, if your chestnuts are dirty, you’ll want to rinse and dry them with a towel before getting started.
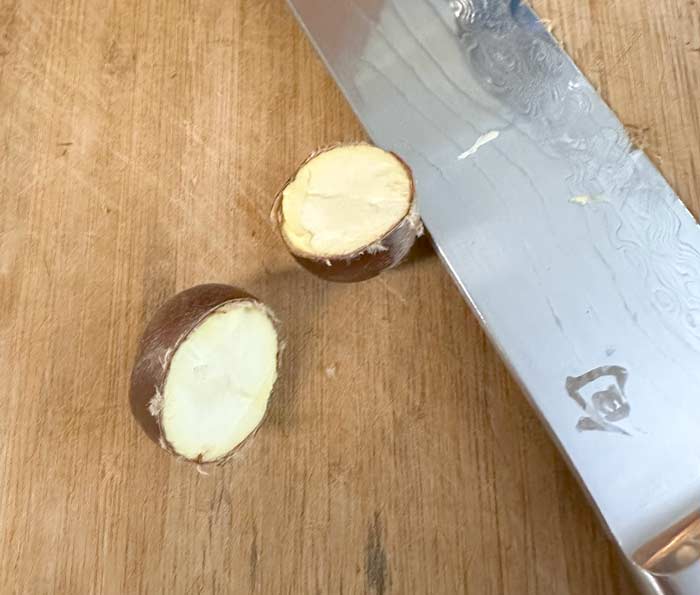
Step 2: Carefully cut whole chestnuts in half with a large kitchen knife.
Next, cut each chestnut in half using a large kitchen knife. Be careful not to remove any fingers in the process!
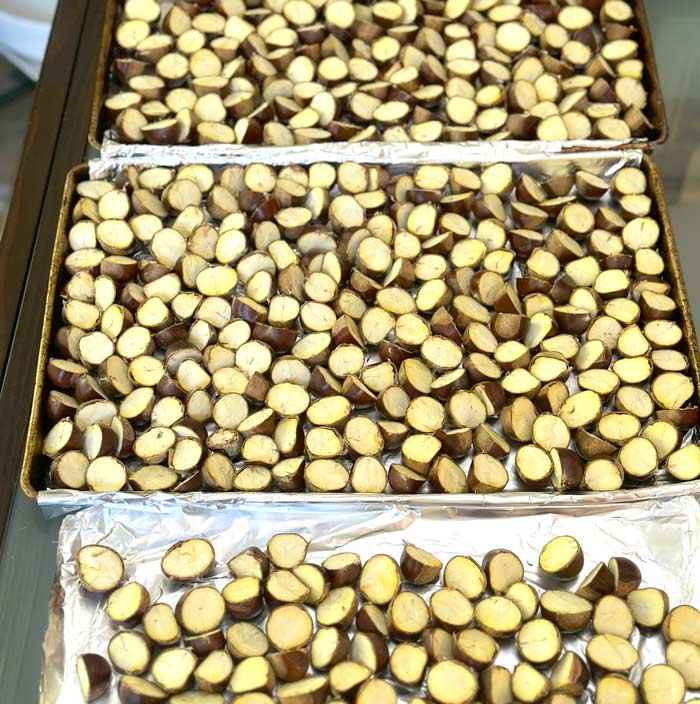
Step 3: Preheat oven and place chestnuts nut-side-up on baking sheets.
Preheat your oven to 350°F (177°C). Cover baking sheets with aluminum foil or parchment. Place cut chestnuts nut-side-up on the baking sheets so that moisture can easily escape as they cook.
Step 4: Bake for 35 minutes, then let cool.
Bake your chestnuts for about 35 minutes on your middle oven racks.
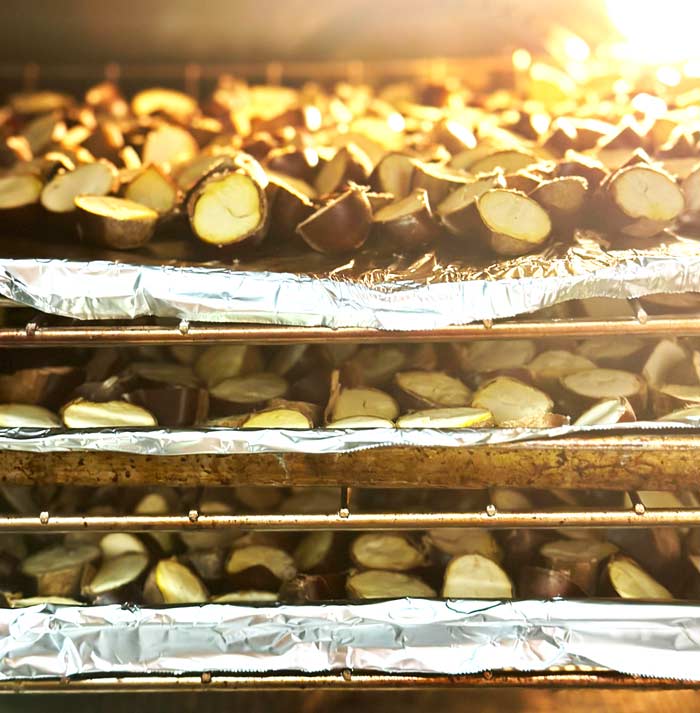
Remove chestnuts from the oven and let them cool to room temperature before handling.
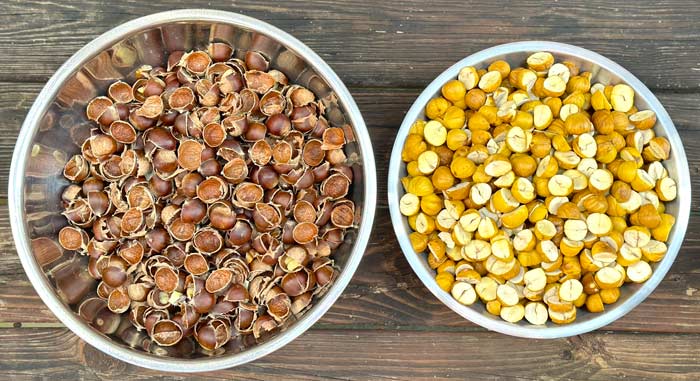
Step 5: Remove shells and papery inner skins (testa).
Once they’re out of the oven, you’ll notice that almost all the nuts have separated from the hard outer shell and the papery inner skin, aka testa. That’s because the nut meat expanded while cooking and then shrank when cooled.
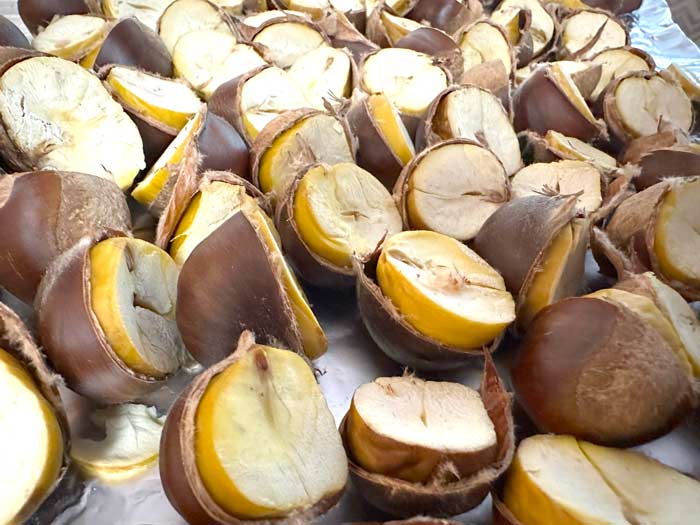
This process makes it infinitely easier to remove chestnut shells and skins before making them into flour. However, you still may have a few chestnuts that have to be removed and scraped by hand with a small knife to remove the testa.
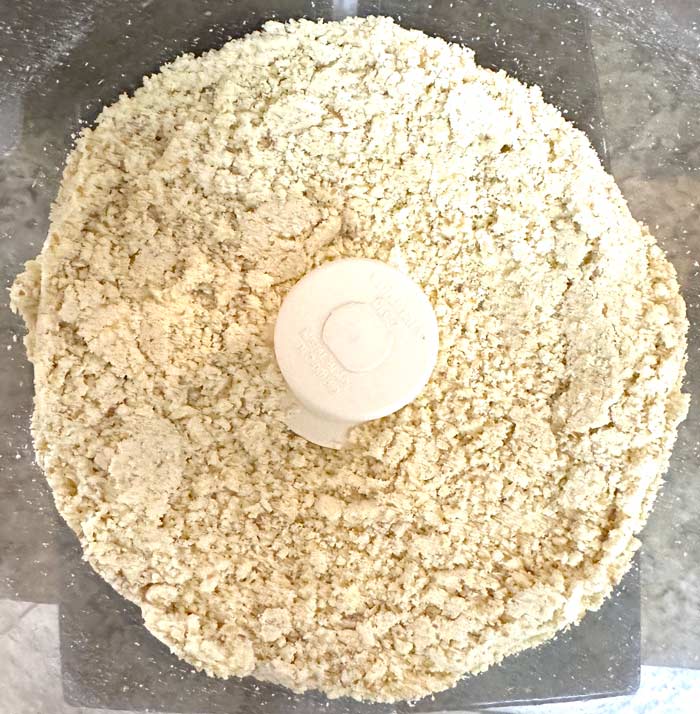
Step 6: Pulse then blend small batches of chestnuts in food processor.
Your chestnuts are now ready for the food processor but there are some important details to pay attention to as you go. If you fill up your food processor with chestnuts and simply turn it to on, your food processor is going to be very loud and angry.
Instead, put small amounts of chestnuts in at a time. Start each batch by using the pulse setting — giving it brief pulses to start breaking the nuts into smaller chunks.

Once the nuts in a batch are broken into smaller bits, you can leave the food processor on for about 1-2 minutes to more finely pulverize them.
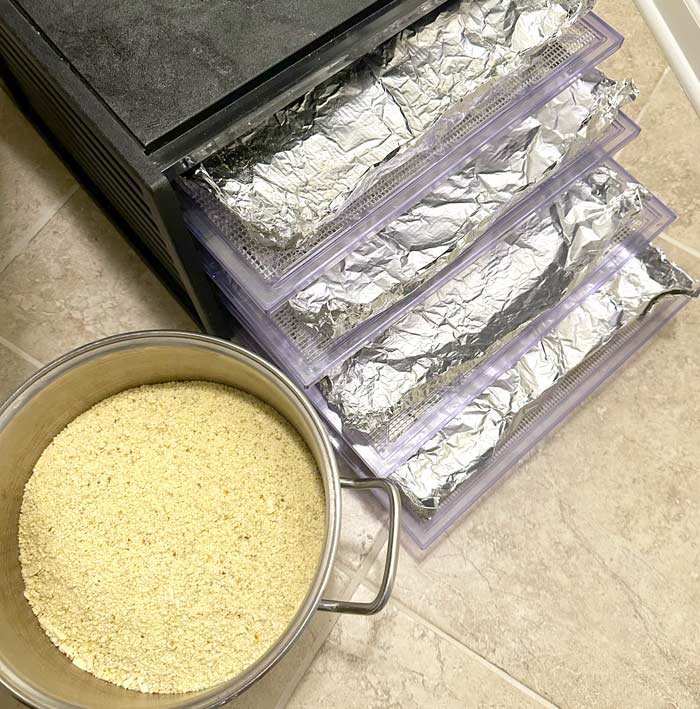
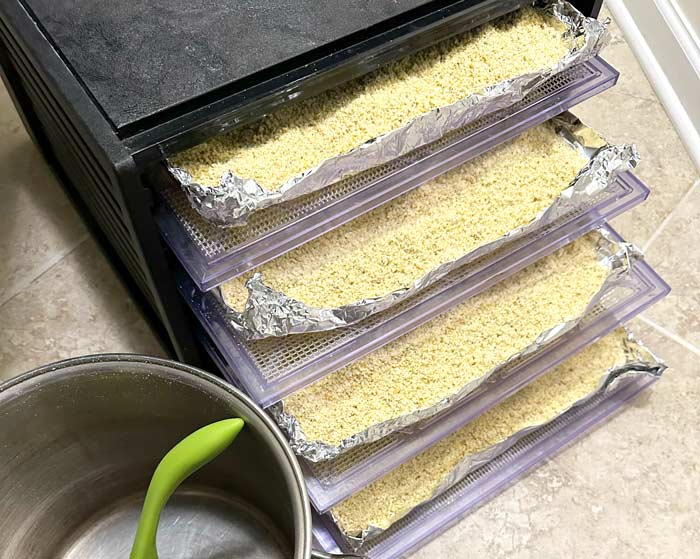
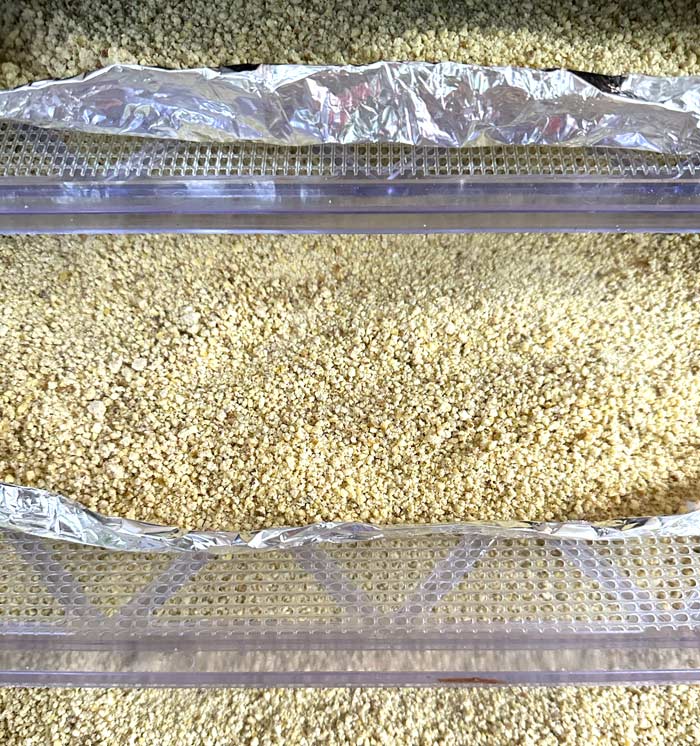
Step 7: Dry pulverized chestnuts.
Once all your chestnuts have been pulverized in a food processor, it’s time to dry the material down. You have a few choices here:
- Food dehydrator – Dehydrate for 24 hours on 125°F (52°C). This is the easiest method, but not everyone has a dehydrator. (We love our Excalibur dehydrator which is now over 20 years old!)
- Oven – Set your oven to the lowest temperature and spread the pulverized chestnuts evenly over baking sheets. Stir and check every hour or so until the pulverized chestnuts are completely dry.
- Open air – It will take a much longer time than the other two methods above, but you could spread out the pulverized chestnuts on a baking tray under a fan in your home or outside in a sunny spot if no rain is in the forecast. If you go this route, stir the chestnuts every 12 hours or so to make sure they dry evenly and don’t get moldy.
For clarity, here are few process photos showing a batch of chestnut flour going through our Excalibur dehydrator:
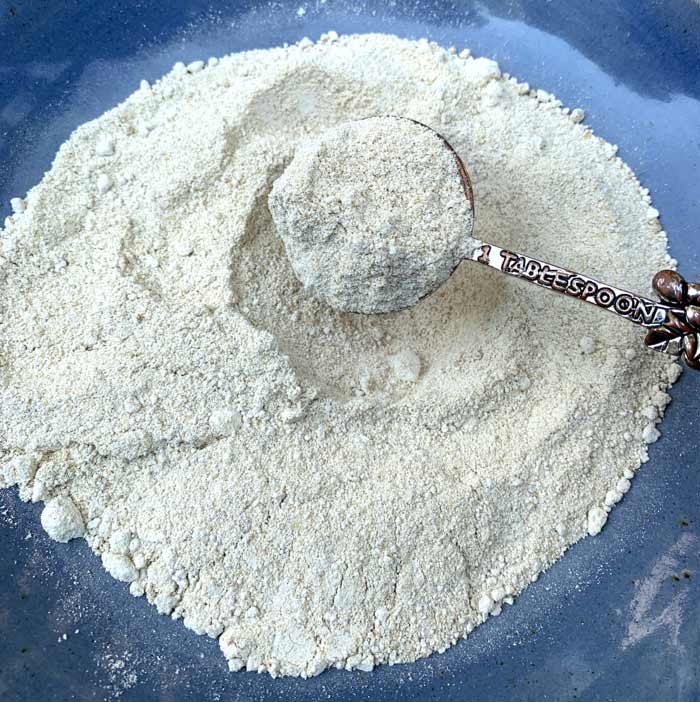
Step 8: Grind flour one more time in a food processor.
If you have a grain mill, now is the time to use it.
No grain mill? To get the finest texture possible, put the chestnut flour back through the food processor one more time, blending for 2-3 minutes. Note that there will still be a few small hard chestnut pieces in your final flour. For the majority of chestnut flour recipes, that’s perfectly fine.
If you need a fine powder-like consistency to your chestnut flour for a certain recipe, you can either use a mortar and pestle or a spice grinder as-needed.
Step 9: Label and store.
Store your finished chestnut flour in an airtight container: ziplock bags, glass jars, etc. Be sure to label the container, including the year made (example: “Chestnut flour 2023”). Future you will thank you.
What’s the shelf life of chestnut flour? It depends where you store it.
- Stored in the freezer, chestnut flour can last for 1-2 years.
- Stored at room temperature (out of sun in a dry place like your pantry), it can last 6-12 months.
Make sure that your final flour is completely dry (e.g. don’t rush through Step 7)! Moisture can cause the flour to mold or turn rancid.
How to make chestnut flour
Equipment
- food processor
- dehydrator alt: oven or baking sheets
Ingredients
- whole chestnuts
Instructions
- Gather chestnuts and remove spiky burrs if necessary. If nuts are dirty, wash and dry them.
- Carefully cut chestnuts in half with a large kitchen knife. Preheat oven to 350°F (177°C) and place chestnuts nut-side-up on baking sheets. Bake for 35 minutes, then let cool. Remove shells and papery inner skins (testa).
- Pulse SMALL batches of chestnuts in food processor until broken into smaller chunks. Then pulverize for 2-3 minutes until you've achieved a fine, damp texture. (See photos in article.) Dry pulverized chestnuts in food dehydrator, oven, or in open air. (See notes in article.) A food dehydrator is easiest. If using dehydrator, dehydrate for 24 hours on 125°F (52°C). Return dried pulverized chestnuts to food processor (in multiple batches depending on volume you're making) and blend for another 2-3 minutes to achieve a finer, flour-like consistency. Alternately, for finest texture, use a grain mill if you have one available or budget allows.
- Store finished chestnut flour in your freezer in freezer bags for longest shelf life (1-2+ years). Alternately, stored in airtight containers at room temp, chestnut flour can last for up to a year.
Chestnut flour frequently asked questions (FAQs)
Answers to common questions about chestnut flour:
What is a substitute for chestnut flour?
There isn’t a great substitute for chestnut flour due to its unique flavor, nutritional profile, and baking characteristics. However, the closest thing to chestnut flour is sweet potato flour.
Can you make chestnut flour with American chestnuts?
Native American chestnuts (Castanea dentata) were a hugely popular food crop up until the early-mid 1900s. However, imported chestnut blight has since rendered chestnut trees throughout North America functionally extinct.
The American Chestnut Foundation and other conservation groups are trying to develop and re-introduce blight-resistant American chestnut trees. So hopefully one day chestnut flour made from native chestnut trees will be available again!
Why is chestnut flour so expensive?
Chestnuts and chestnut flour are very expensive in the United States. That’s because there isn’t much chestnut production in the US, and most chestnut products are imported.
Certified organic chestnuts and chestnut flour are even more expensive since they’re more difficult to produce.
How do you make chestnut flour without a dehydrator?
As we detail in this article, you can make chestnut flour without a dehydrator using either a conventional oven or open air-drying methods. A dehydrator simply makes the process easier and faster.
Is chestnut flour anti-inflammatory?
Chestnut flour contains compounds such as ellagic acid, gallic acid, vitamin C, and polyphenols which are considered to be anti-inflammatory.
Are chestnuts and chestnut flour high in fiber?
Yes. Both chestnuts and chestnut flour are high in dietary fiber, which can help support gut health. 1 cup (143 grams) of chestnuts contains about 7 grams of fiber.
Who should NOT eat chestnuts or chestnut flour?
If you have tree nut allergies, there’s a high likelihood you will be allergic to chestnuts and chestnut flour. If you’re prone to food allergies, only eat a small amount of chestnuts/chestnut flour your first time to see if you’ll have any averse reactions before consuming larger quantities.
What are the cons of chestnut flour?
Since chestnut flour does not contain any binding compounds such as the gluten in wheat flour, it’s more difficult to work with than wheat flours. However, there are countless ways to use chestnut flour that make unique, flavorful, and healthy meals.
How long will chestnut flour last?
We recommend storing your chestnut flour in the fridge to maximize its shelf life. Stored in a ziplock freezer bag in your freezer, chestnut flour can last for at least 1-2 years.
What are traditional chestnut flour recipes?
Since chestnut flour has been made and used for thousands of years by cultures across Europe and Asia, it’s a key ingredient of traditional recipes. Thus, a great way to use your homemade chestnut flour is to look up chestnut flour recipes from cultures or locations around the world that you’re curious about or where your ancestors lived.
For instance, if you’re interested in Italian cuisine, you could make traditional Tuscan chestnut gnocchi (a pasta-like dish) or marocca di casola (a dark bread with crisp edges that also contains some wheat and potato flour).
Can you eat raw chestnut flour?
You should not eat RAW chestnuts or chestnut flour. That’s because raw chestnuts contain tannins that can cause GI distress. The heat from cooking/baking degrades these tannins and makes the chestnuts very easy for human digestion.
Note that our instructions for making chestnut flour call for you to bake the nuts early in the process. Not only does this make it easy to remove the shells and testas from the nuts, it also means you can eat the flour as-is or in minimally cooked recipes.
We’ll be adding our favorite recipes utilizing chestnuts and chestnut flour to the bottom of this article as we create them. So be sure to check back if you’re in search of delicious chestnut recipes!
KIGI,

Enjoy the following recipes made with chestnuts or chestnut flour:
- Cast iron pan-roasted chestnuts on a stovetop
- Chestnut crabapple mash
- One-pot roasted chicken with chestnuts and crabapples (or Granny Smith apples)
- Chestnut flour cake with persimmons and buttermilk
- Chestnut spread infused with spruce needles
- Chestnut flour crepes with beautyberry whipped cream
- Chestnut breakfast porridge with pan-roasted Asian persimmons
- American persimmon pie with chestnut flour pie crust
- Chestnut and shiitake mushroom soup
Also, be sure to check out these related nutty articles as well:

Hi. We had a bag of chestnuts that we forgot about and they all got dried out. I tried roasting them to see if they would be edible, but they’re very very dry. Do you think I can grind these up for flour? Thanks.
If your chestnuts aren’t moldy and they don’t have any off flavors, then they should be fine to make into flour. Keep in mind that, at this point, the nuts are going to be very difficult for a food processor or blender to pulverize. You might end up breaking the machine instead. So, cooking them in water to soften them prior to pulverizing and drying may be necessary. Assuming you don’t have a huge number of chestnuts, another option is to make chestnut mash that you can enjoy immediately: https://www.tyrantfarms.com/chestnut-crabapple-mash/.
*****
Aaron – can you believe that I made 2 cups of flour last year and my wife didn’t use it??!!?? I just threw it away, but I’m cutting up chestnuts now for another attempt – she assures me she’ll use it this time!
There is sometimes a hard white spot in the chestnuts and it looks bad, so I always cut them out, but I was wondering what that was. Do I really need to cut it out or will it harm us if we eat it?
Thanks,
Reggie
Oh no! You need to make sure you use your homemade chestnut flour this time, regardless of whether your wife participates. A simple chestnut flour breakfast porridge is a great way to start and only takes a few minutes to make: https://www.tyrantfarms.com/recipe-chestnut-breakfast-porridge/. Also, if you store it in your freezer, chestnut flour can easily last over a year.
As for white spots, I don’t recall seeing such a thing in our chestnuts, so I can’t say for sure. We always process our chestnuts within a few days of them falling, so they’re quite fresh. You don’t want to use moldy chestnuts, but mold is typically dark in color, not white.
Hi on what temperature do you dry the chestnuts in the excalibur?
Hi Caitlin! Sorry for missing that detail. The exact temp isn’t important since you’re basically just drying the chestnuts long enough for the nutmeat to shrink down and separate from the skin/testa. 110F is good.
Thank you so much for answering so quickly. This is the first time we use the excalibur, can you give some guide lines with checking the puree? How long did yours take untill completely dry? It probably depends on the thickness of the puree, but I really don’t got a clue which time to aim for 🙂 can I watch out for certain changes in structure to know its done? Anyway, thanks a lot, the chestnuts are in the dehydrator now for the first round and I will let you know how things worked out.
With the chestnut puree, you want it to be completely dried out and crunchy. Any moisture left in will cause the chestnut flour to be lumpy and go bad. In your dehydrator, the puree will slightly oxidize on the exposed surfaces and crack – which makes it look sort of like cracked mud in a dried up lakebed when done. (Ha, probably not the most appetizing description!) You can achieve this result faster at a higher temperature or slower at a lower temp. We tend to avoid higher temps in our dehydrator since those can sort of cook the ingredients and alter their flavor profiles. 120F for 24 hours should get you dried chestnut puree. But again, if you detect any moisture in the puree, let it keep dehydrating.
Let us know how yours turns out!
Ok – I’m going to try this – I’m sick of throwing these chinese chestnuts away because I didn’t know what to do with them. They just go bad so fast!
Good for you! Chinese chestnuts are a wonderful food – and making them into flour is a great way to store and use them.
Nice article, thanks. My 1st candidate for your recipe search would undoubtedly be Castagnaccio – a Tuscan pastry dish that is really quite special and for me far and away the best use of chestnut flour. I have tried various chestnut pasta recipes but for me the sweetness is cloying, even when using it for a dessert.
Thanks for the tip, Russell! Castagnaccio sounds fantastic.