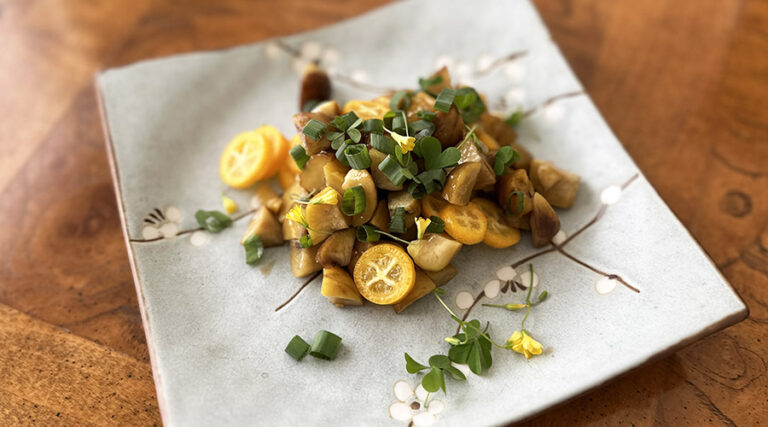
Christmas tree cured egg yolks (made w/ conifer needles)
Tyrant Farms' articles are created by real people with real experience. Our articles are free and supported by readers like you, which is why there are ads on our site. Please consider buying (or gifting) our books about raising ducks and raising geese. Also, when you buy through links on our site, we may earn an affiliate commission. Learn more
Find out how to use conifer needle/Christmas tree salt (or sugar-salt combination) to create Christmas tree cured egg yolks. The result: a beautifully colored, umami and Christmas tree flavoring that can be grated or thin-sliced on to sweet and savory dishes alike.
Our flock of Welsh Harlequin ducks aren’t laying eggs now that we’ve reached November. Low sunlight levels plus our curtailing their protein intake means their “egg makers” turn off.
Duck eggs (and yolks) are larger, richer, and more nutrient-dense than chicken eggs. (See: Duck eggs vs chicken eggs.) Since we eat a LOT of eggs, we have to buy quality chicken eggs this time of year to satisfy our egg needs.
One thing we like to have around: cured egg yolks, which add exquisite color and umami flavor to a wide variety of dishes, both savory and sweet. If you’ve never had them before, cured egg yolks are akin to an orange-colored parmesan cheese that’s so easy to make anyone can do it.
We’ll also show you how to modify our cured egg yolk recipe to make them better for sweet or savory dishes depending on your preferences. In our opinion, duck eggs make the best cured egg yolks, but other types of poultry eggs work great, too. So go with whatever type of eggs you have available.
Upgrade: curing egg yolks in conifer needle salt and sugar
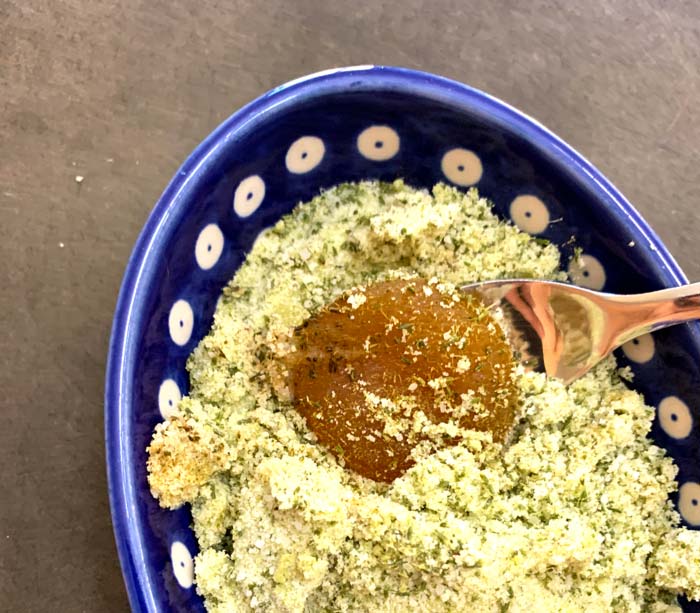
This year, we’ve upgraded our cured egg yolk game by using Christmas tree salt and Christmas tree sugar during the curing process. These simple conifer-flavored ingredients are best made in a spice grinder (which eviscerates the needles), but can also be made reasonably well in a multi-bladed blender.
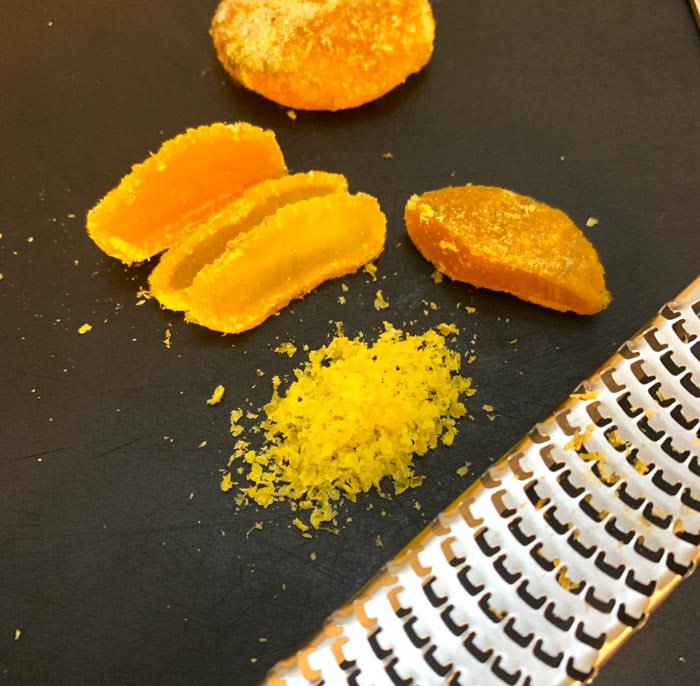
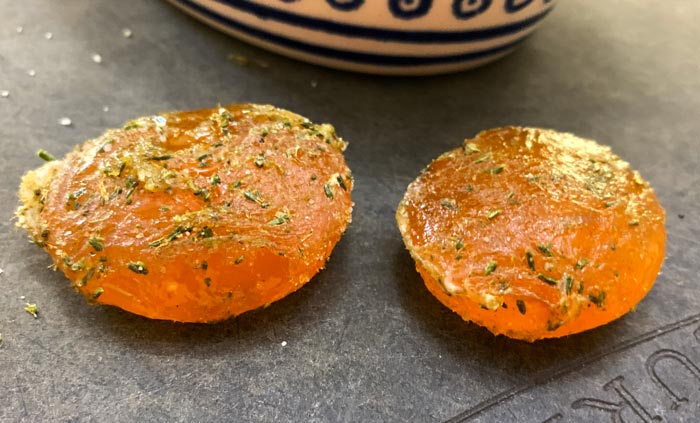
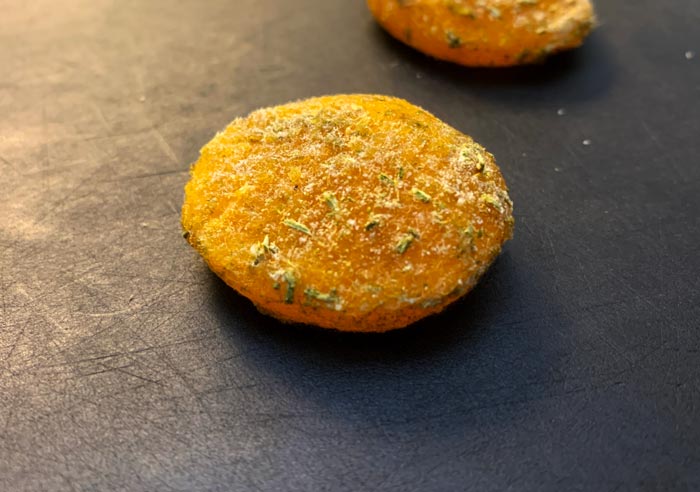
Christmas tree cured egg yolks have all the wonderful umami flavor and color of regular cured egg yolks, but they pack a subtle yet distinct rosemary-citrus flavor of edible conifer needles.
Using conifer needles in the egg yolk curing process
Before tossing needles from your Christmas tree in a blender, please be sure to read our Edible Christmas Tree Guide, which includes safety warnings and a simple conifer needle identification guide. We’d also strongly encourage you to learn to forage your own conifer needles rather than relying on commercial Christmas trees.
For the salt and/or sugar portion of this recipe, any of the following types of conifer needles will work:
- spruces (Picea spp.)
- firs (Abies spp.)
- Douglass-fir, which is not a true fir (Pseudotsuga menziesii)
- hemlocks (Tsuga spp.)
- pines (Pinus spp.).
Salt vs sugar: which is best for making cured egg yolks?
You have to use some salt (at least 50% ratio) to cure egg yolks. However, you can also add in up to 50% sugar for a final 50% salt: 50% sugar ratio.
Not to state the obvious, but adding sugar makes the cured egg yolks sweeter whereas a pure salt cure makes them saltier. Which is better? It totally depends on how you intend to use them…
Think of a salt-cured egg yolk as pure umami, more akin to parmesan cheese. Possible uses for a purely Christmas tree salt cured egg yolk:
- grated to finish a pasta, salad, soup, etc;
- shaved or grated over steamed/cooked veggies;
- sliced thin and added on a charcuterie board.
A 50/50 salt-sugar cured egg yolk would also be perfectly suitable for a charcuterie board, but is ideal for dessert garnishes. Grate or shave it atop puddings, pies, whipped toppings, etc.
Step-by-step: how to make Christmas tree cured egg yolks
Here’s how to get this recipe perfect on your first attempt:
Step 1: Make conifer needle salt (and possibly sugar) + figure out quantities.
Decide whether you want:
a) savory, or
b) sweet & savory cured egg yolks.
If savory only, you just need Christmas tree salt. If you want sweet & savory cured egg yolks, you’ll also need to make Christmas tree sugar.
How much salt/sugar do you need to cure egg yolks? It depends on how many egg yolks you want to cure. We’d recommend doing a small batch your first time out, say 3-5 yolks. Then ramp up production as you see fit.
Regardless of how many egg yolks you cure, you’ll need a MINIMUM of 1/3 cup of Christmas tree salt per yolk (or 1/6 cup salt + 1/6 cup sugar if you’re doing a sweet & savory cure). That’s because you’ll be laying each yolk on a bed of salt/sugar that’s about 1/2″ deep, then burying the yolk surface in another 1/4″+ layer of salt/sugar.
Note: You can reuse the salt and sugar you use to make cured egg yolks (within reason), but it’s a good idea to keep it refrigerated if you do.
Step 2: Prepare the curing “bed.”
The curing bed is the salt or salt/sugar foundation upon which you’ll soon be laying your egg yolks. We’d recommend using a ceramic or glass baking dish for your curing bed.
Here’s how to prepare the curing bed for your egg yolks:
a. Make sure you have enough room in your dish to accommodate all of your yolks leaving at least 1/3″ between each yolk.
b. Put at least 1/2″ Christmas tree salt or salt/sugar mix in the base.
c. Use a spoon to make a small divot in the salt/sugar where each yolk will be placed.
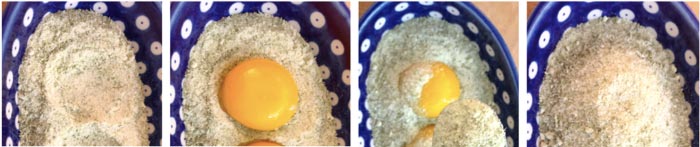
Step 3: Separate egg yolks from whites then put yolks in divots on salt/sugar bed.
Next, it’s time to separate the egg yolks from the whites. You can buy a fancy kitchen gadget for this process, but all you need to do is crack an egg in half while holding it over a bowl, then carefully pass the yolk back and forth between each half of the shell until all the whites fall into the bowl below.
Put each yolk in a divot in the curing bed. Finally, pour or spoon Christmas tree salt or salt/sugar over the top of each yolk, covering them about 1/4″ or deeper.
Step 4: Cover and cure yolks in the fridge for 10-14 days.
Cover the baking dish with a lid or saran wrap then put it in your fridge for curing.
How long does it take for the egg yolk to cure? When using Christmas tree salt/sugar (which has a lower salt content due to the presence of conifer needles), it will take a minimum of 10-14 days for the yolks to cure.
Also, yolk size matters:
- With relatively small chicken egg yolks, you can get away with a minimum of 10 days, but we’d recommend a bit longer so the yolks aren’t as tacky.
- With larger duck egg yolks, you’re definitely going to want them to cure for 14 days or even 1-2 days more.
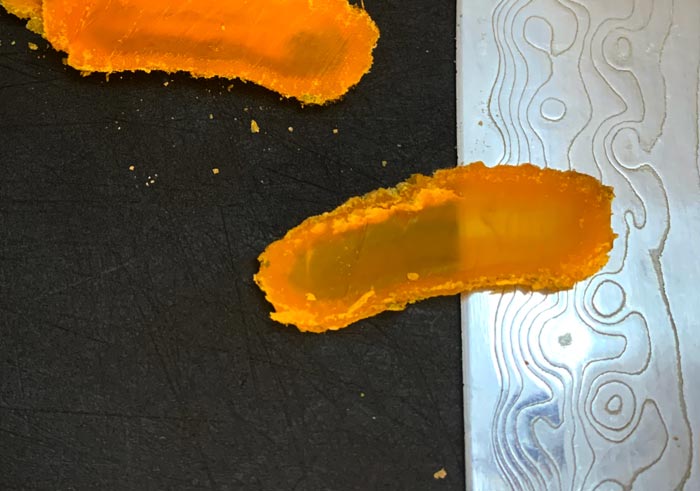
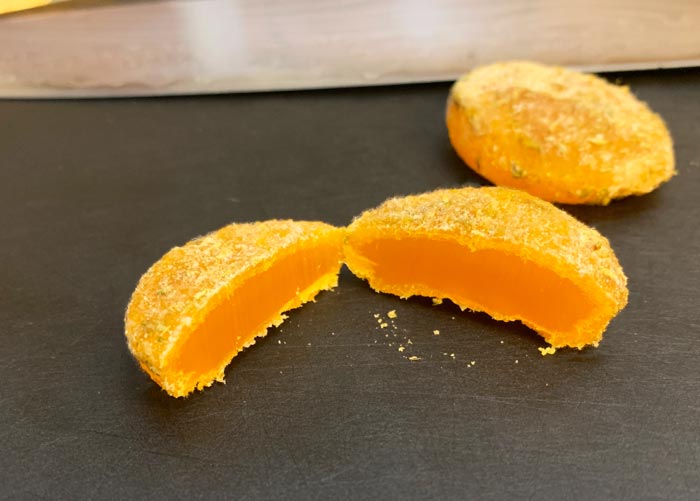
When your yolks are done curing, they shouldn’t be rock hard. They still should have some moisture content and an almost rubbery texture to them.
On that note, we’ve heard some people describe egg yolk curing as a fermentation process. We don’t think that’s the case, nor do we consider cured egg yolks to be a probiotic food like sauerkraut.
During the curing process, the salt or salt/sugar draws moisture content out of the yolks. This means both good and bad microorganisms (various species of bacteria and yeast), can’t proliferate. Curing egg yolks is a dehydration process akin to making beef jerky, not a fermentation process.
Step 5: Remove salt/sugar from yolk surface then fast or slow-dry them.
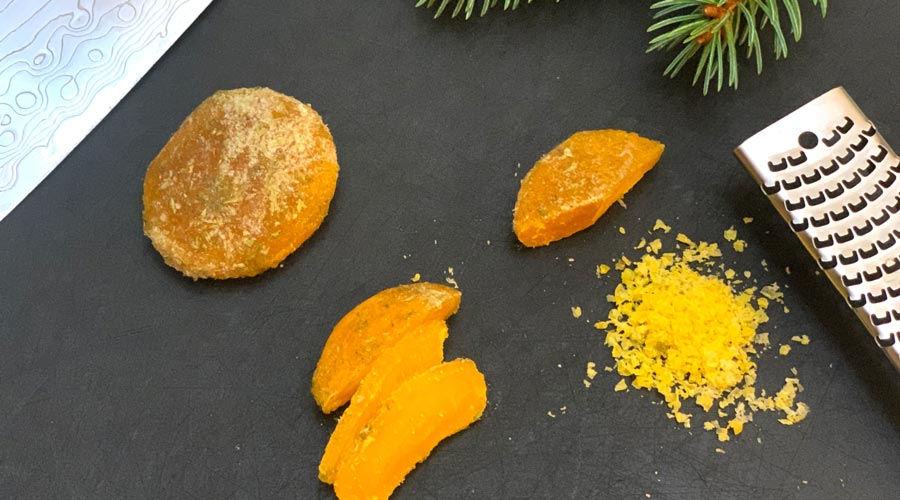
Now that your egg yolks are cured, take them out of their salt or salt/sugar bed. Brush off excess salt/sugar on the yolk surface with your fingers.
If you want a “cleaner” look to your yolks, you can use a lightly dampened cloth to clean the yolk surface. If you do, let them air dry on a cooling rack before wrapping them with cheesecloth if you go the slow-dry route (see below).
Now, it’s time to finish drying out your egg yolks. Here, you have two options:
Option 1: Slow-dry yolks in fridge for 8-10 day.
Got time and want a more traditional curing method? Slow-dry your cured yolks in the fridge for 8-10 days. (Chicken egg yolks = 8 days; Duck egg yolks = 10 days drying time.)
Before sticking your cured egg yolks in the fridge, you’ll want to:
- wrap them in breathable cloth,
- use a string to tie off the sections between each yolk so they don’t stick together.
Cheesecloth and twine are the ideal materials for this process. If you’re like us, you’ve completely emptied your lower cabinets and lost/misplaced most of your kitchen items due to a rampaging, hyper-curious toddler, so you’ll have to use organic cotton mushroom foraging bags you found in your closet instead!
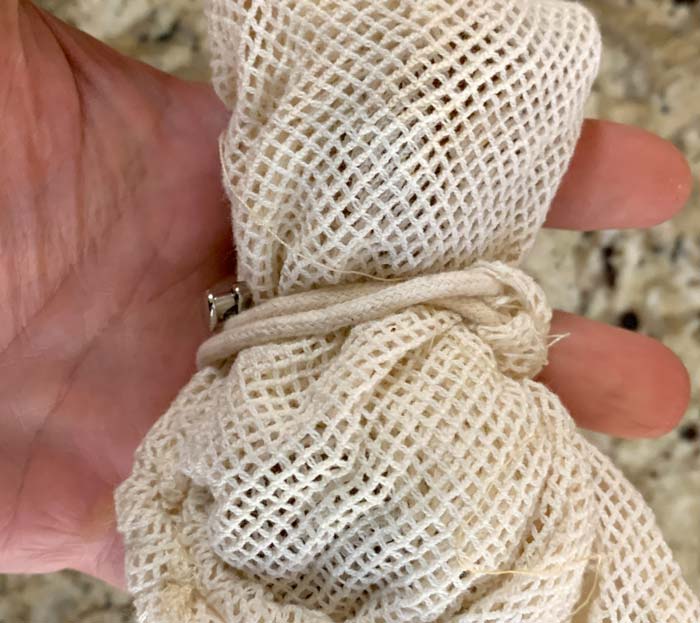
Don’t bury your cloth-covered egg yolks in the produce drawer. Put them in the main area so they get airflow. (We laid ours across jar tops in the back top of our fridge.)
Could you slow-dry your cured egg yolks outside the fridge? Yes, if you have a cold, dry indoor spot. However, we like the fridge because you don’t have to worry about temperature fluctuations or varying your curing/drying time each time you make cured egg yolks.
Option 2: Fast-dry yolks in the oven for 45-60 minutes.
If you’ve waited ~2 weeks to cure egg yolks, you’re probably not in a rush to finish them. However, if you are in a hurry, you can finish the drying process quickly in your oven.
Here’s how:
- Preheat your oven to 175°F (79°C).
- Place yolks on a metal baking/cooling wrack over a baking sheet.
- If using chicken egg yolks, remove from oven at 45 minutes. Duck egg yolks, remove at 60 minutes.
Remove them from oven at the appointed time, let them come to room temperature, and you’re done!
Step 6: Store your cured egg yolks in an airtight container in the fridge.
Now that your cured egg yolks are dried and finished, store them in the fridge until you’re ready to use them. We store ours in covered glass containers, but you can use jars, ziplock bags, etc.
How long will cured egg yolks last in your fridge? At least a month, but we’ve used older ones.
The flavor and texture of cured egg yolks are indeed best within a one month window. Over time, they continue to lose moisture and become more brittle. The Christmas tree flavor in this recipe may fade with time too, so use them up and don’t be stingy!
Recipe: Christmas tree cured egg yolks
Christmas tree cured egg yolks (made w/ conifer needles)
Ingredients
- 3 egg yolks (We prefer duck egg yolks to chicken egg yolks.)
- 1 cup Option 1: 100% Christmas tree salt, or Option 2: Christmas tree salt/sugar combination up to 1:1 ratio. (See notes in article.)
Instructions
- Select a glass or ceramic dish with just enough space to accommodate your yolks once spaced 1/3" apart. Then put 1/2" deep bed of Christmas tree salt or salt/sugar combination in the bottom of dish. Make a small divot with a spoon where each yolk will sit.
- Crack eggs, and separate yolks from whites. Pour each yolk into a divot. Cover dish and store in fridge. If using chicken egg yolks, cure for 10 days. If duck egg yolks, cure for 14 days.
- Once cured, remove from fridge. Brush off excess salt/sugar on the yolk surface with your fingers. For "cleaner” look, use a lightly dampened cloth to wipe yolk surface, but let dry on rack for an hour before wrapping them in cheesecloth at next step.
- Next, you'll need to either slow-dry or fast-dry your egg yolks to finish them: Option 1: Slow-dry yolks in an open area of your fridge (not a drawer) for 8-10 days by wrapping yolks in a cheesecloth roll with string tied between each yolk to maintain separation and airflow. Dry 8 days for chicken egg yolks, 10 days for duck egg yolks. Option 2: Fast-dry yolks in 175°F (79°C) degree oven for 45-60. Place yolks on metal baking/cooling wracks. If using chicken egg yolks, oven-dry for 45 minutes; 60 minutes for duck egg yolks.
- Store cured egg yolks in airtight container in fridge and use within a month for best texture, flavor, and color.
Let us know how you use your Christmas tree cured egg yolks! Enjoy!
KIGI,

Want to dig your fork deeper into edible conifers?
Start here: Tyrant Farms’ Edible Christmas Tree Guide
Base recipes:
- Christmas tree sugar
- Christmas tree salt
- Christmas tree cream or milk
- Christmas tree oil
- Christmas tree butter
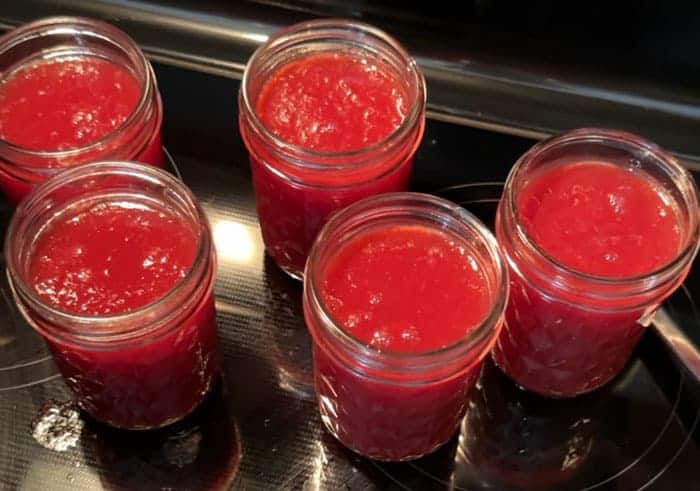
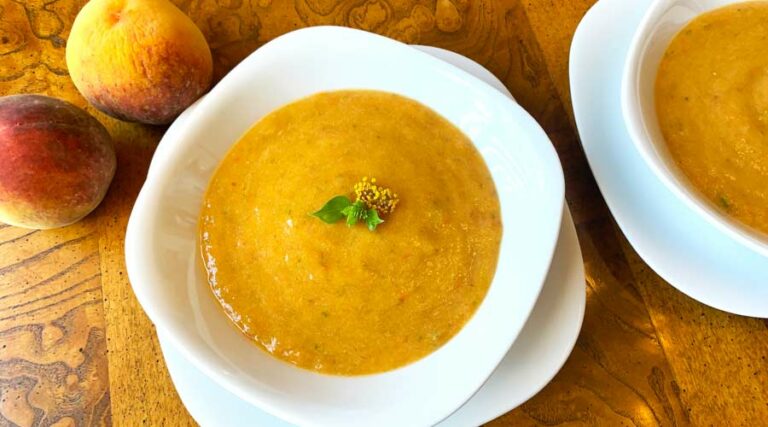
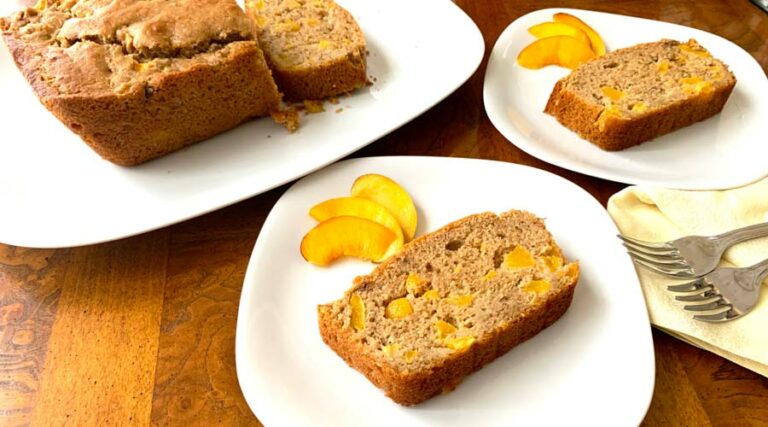
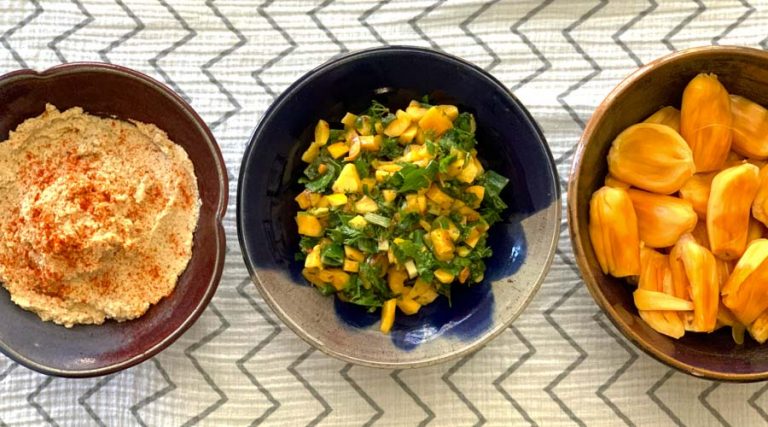
Additional Christmas tree/edible conifer recipes:
We’d also like to recommend two books for other Christmas tree eaters and food explorers; each contains delicious recipes you can make with your Christmas tree:
- How to eat your Christmas tree by Julia Geogallis, and
- Forage, Harvest, Feast by Marie Viljoen.