Recipe: Cast iron corn on the cob with lacto-fermented fruit rub
Tyrant Farms' articles are created by real people with real experience. Our articles are free and supported by readers like you, which is why there are ads on our site. Please consider buying (or gifting) our books about raising ducks and raising geese. Also, when you buy through links on our site, we may earn an affiliate commission. Learn more
In this article, we’ll show you exactly how to make corn on the cob on your stovetop in a cast iron skillet! And if you want to take your cast iron corn on the cob game to the next level, use a lacto-fermented fruit rub before serving.
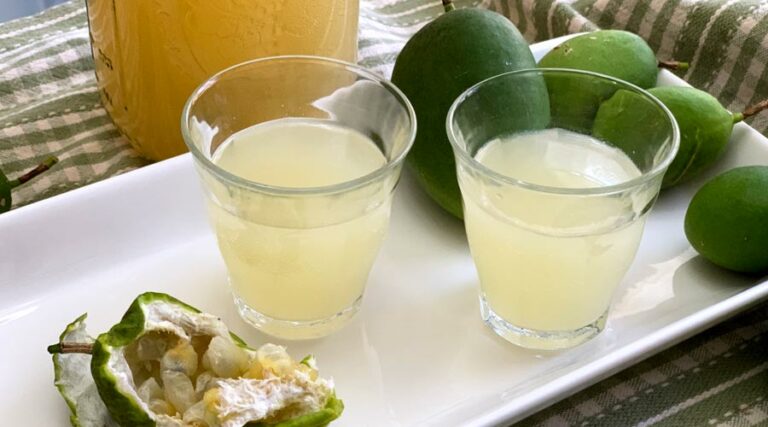
In our previous article, we wrote about how to lacto-ferment various fruits to produce delicious culinary creations used by the world’s top restaurants.
One great way to use lacto-fermented fruits is to blend them into a sauce to be used as fruit rubs. The resulting rubs are very versatile and can be used on virtually anything you make, from meats to veggies to desserts.
One of the very best uses of lacto-fermented fruit rubs we’ve found thus far is applying them to corn on the cob. We wish we’d thought of this idea ourselves, but inspiration came via the book The Noma Guide to Fermentation.

There are lots of ways to make corn on the cob. When it’s scorching hot outside, you may be less inclined to want to stand over a hot outdoor grill cooking — even though corn on the cob made over a flame has amazing flavor and visual appeal.
Thankfully, there’s a way to make delicious, picture-perfect corn on the cob inside your air conditioned house on your stovetop…
How to make corn on the cob on your stovetop in a cast iron skillet
If you don’t have cast iron pans in your kitchen, do yourself and your family a favor and get them. (If you don’t want to buy them new, you can find antique cast iron cookware to restore at most flea markets.)
Cast iron pans work better than other pans because they hold and distributes heat so well. The same is true when making corn on the cob on your stovetop: you’ll get much better results if you use a cast iron pan/skillet versus other types of pans.
And with a few simple techniques, you can make cast iron corn on the cob that will rival anything you can make over an open fire.
Here’s our step-by-step recommendations for making the world’s most delicious corn on the cob:
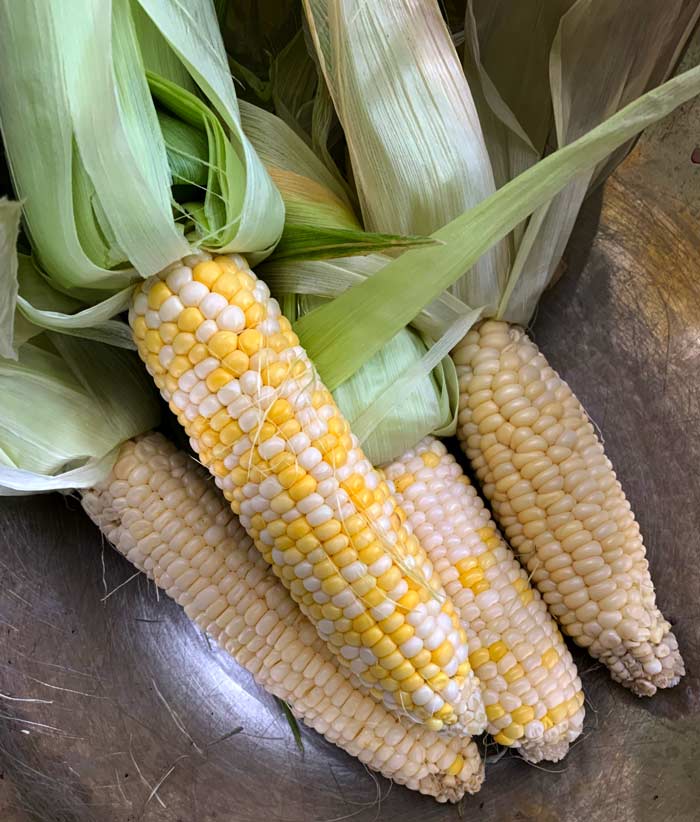
Step 1: Grow your own corn.
*In pretty much any country outside the US, “corn” is a generic term that refers to various types of grain crops. What we call “corn” in the US is typically called “maize” elsewhere. So if you’re reading this from outside the US, sorry for any confusion!
We like a sweet corn that has flavor nuance, not just high sugar content. Many modern sweet corn varieties were bred with the sole aim of bumping the sugar content sky high without additional flavor complexity in mind.
For example, two nuanced sweet-ish corn varieties that we like and recommend:
- ‘Xanadoo‘ (the bicolor corn used in photos for this article),
- ‘Who Gets Kissed‘.
Pick your homegrown corn the day you cook it. It’s pretty hard to beat fresh-from-the-garden, organically grown corn — both for flavor and gratification!
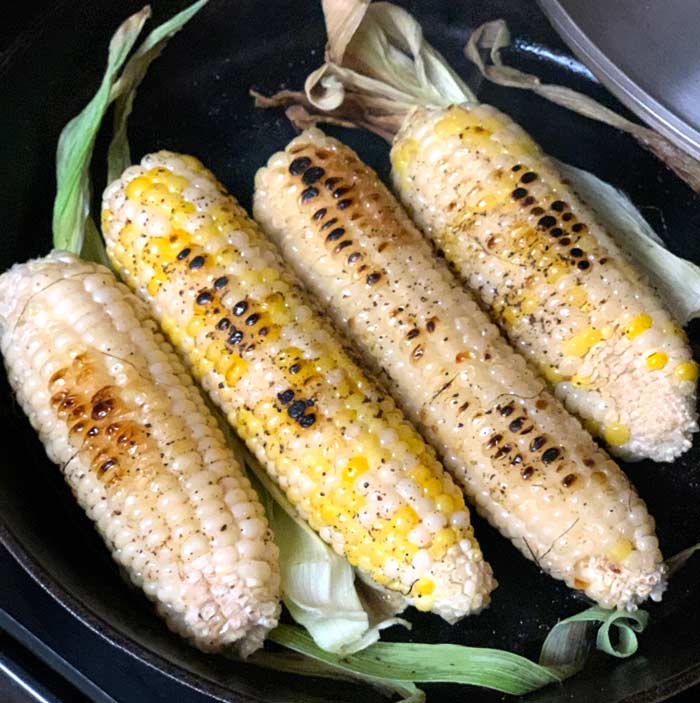
Step 2: Break out the cast iron skillet.
Here are tips and tricks for making the perfect cast iron corn on the cob:
a. When you shuck your corn, save some of the green husk. You’ll see why below.
b. Pre-heat your cast iron pan to medium low heat (about 3.5 on our stovetop).
c. Once the pan is hot, add a few tablespoons of grass-fed butter to the pan. If you’re a vegetarian or vegan, use the butter alternative of your choice.
d. Place your corn closely together in the pan and put pieces of corn husk on both sides of the corn. This holds the row of corn in place and will soon add some nice smokey aromas to your corn as the husks brown.
e. Cover with a lid and cook for about 2 minutes 15 seconds on the first side (or until browned – time may vary by stove). The lid is very important because it traps heat and helps the corn cook evenly.
After 2 mins 15 seconds, remove lid, slightly rotate corn, rub butter on the corn’s surface, and grind some fresh black pepper on top.
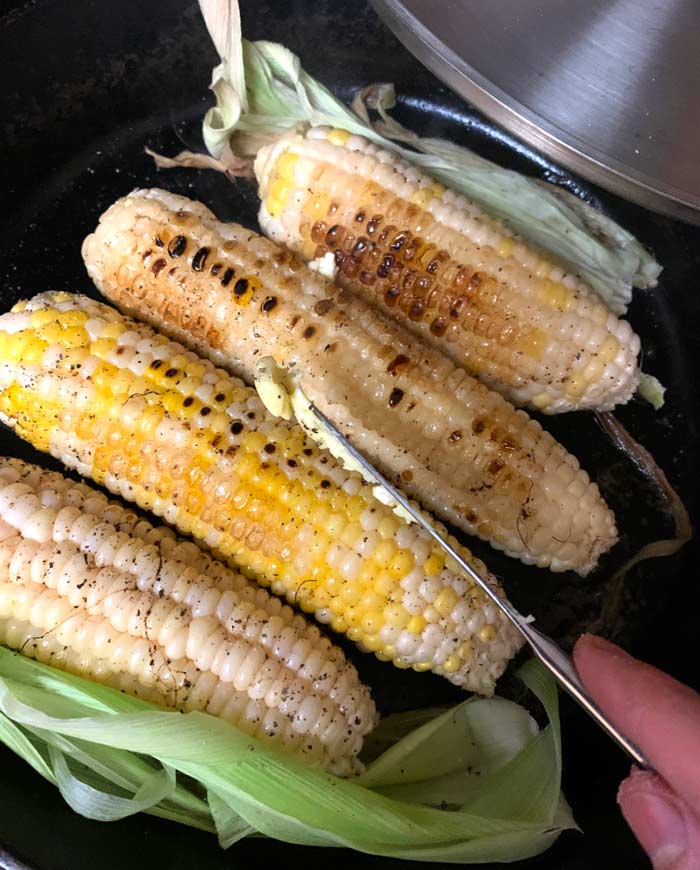
If you’re NOT planning to put a lacto-fermented fruit rub (which is salty) on your corn, you’ll also want to sprinkle on some salt each time you turn. If you are going to use a lacto-fermented fruit rub, don’t apply any additional salt as you cook your corn.
After each turn of the corn, place the lid back on and repeat this process until all sides of your corn are evenly cooked with a nice char on the surface.
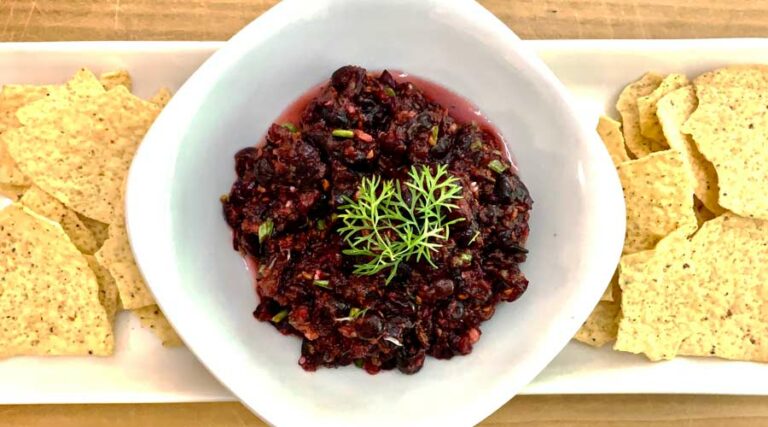
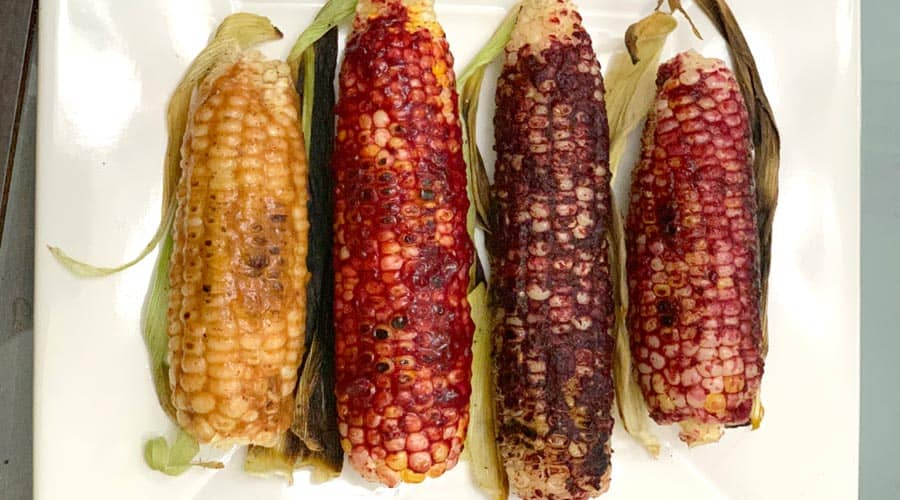
Step 3. Brush on lacto-fermented fruit rubs.
Your cast iron-cooked corn on the cob will already taste amazing at this point. But if you want to elevate your corn on the cob game to the next level, baste on a nice coat of lacto-fermented fruit rub prior to serving.
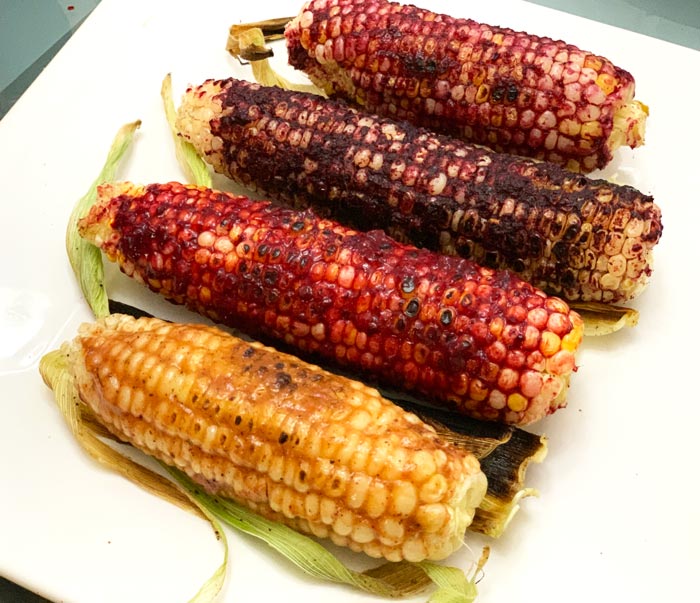
My personal favorite corn on the cob rub we’ve made thus far is lacto-fermented peach, purple basil, and honey; the Tyrant’s favorite was lacto-fermented black cherry. The complexity and nuance of the resulting flavor combinations when used as a corn rub is off-the-charts delicious.
Here’s our recipe to make four ears of cast iron corn as above:
Recipe: Cast iron corn on the cob with lacto-fermented fruit rub
Ingredients
- 4 ears of corn
- 4 tbsp grass-fed butter
- 3/4 cup lacto-fermented fruit rub
- 1 tsp ground pepper, or to taste
Instructions
- *See more detailed instructions with photos above.
- Pre-heat cast iron pan to medium low heat (about 3.5 on our stovetop). Once hot, put 2 tablespoons butter into pan. Place corn ears closely together in pan and put pieces of corn husk on both sides of the row of corn to hold the row in place and add smokey flavor as husks brown. Place lid over pan and cook for about 2 mins 15 seconds on first side. Remove lid, slightly turn each ear, then rub on extra butter (~2 extra tbsp by completion) + cracked peppercorns to exposed corn surface. Sprinkle salt on only if you're NOT planning to use lacto-fruit rub. Place lid back on, and repeat process until all sides of corn are evenly cooked.
- Apply lacto-fermented fruit rub prior to serving and use charred corn husks as plate decoration.
We hope you enjoy this cast iron corn on the cob recipe with lacto-fermented fruit rub from the comfort of your air conditioned home!
KIGI,

Similar articles you’ll love:
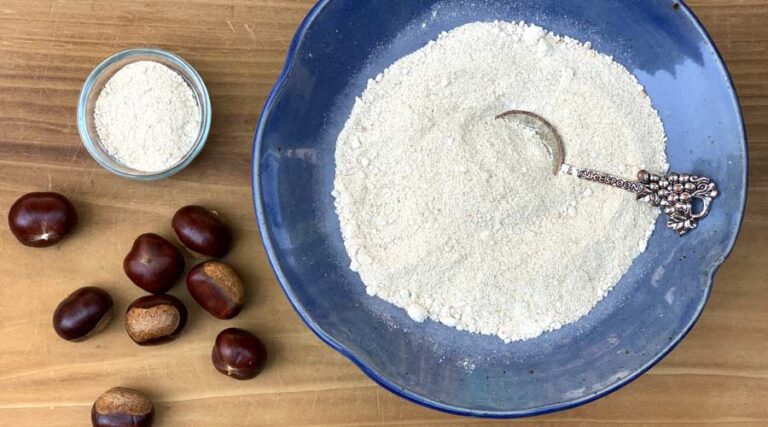
- Recipe: How to make cast iron pan roasted chestnuts
- Corn smut (huitlacoche): the strange and delicious corn fungus
- How to make lacto-fermented fruit (with lacto peach-purple basil-honey recipe)