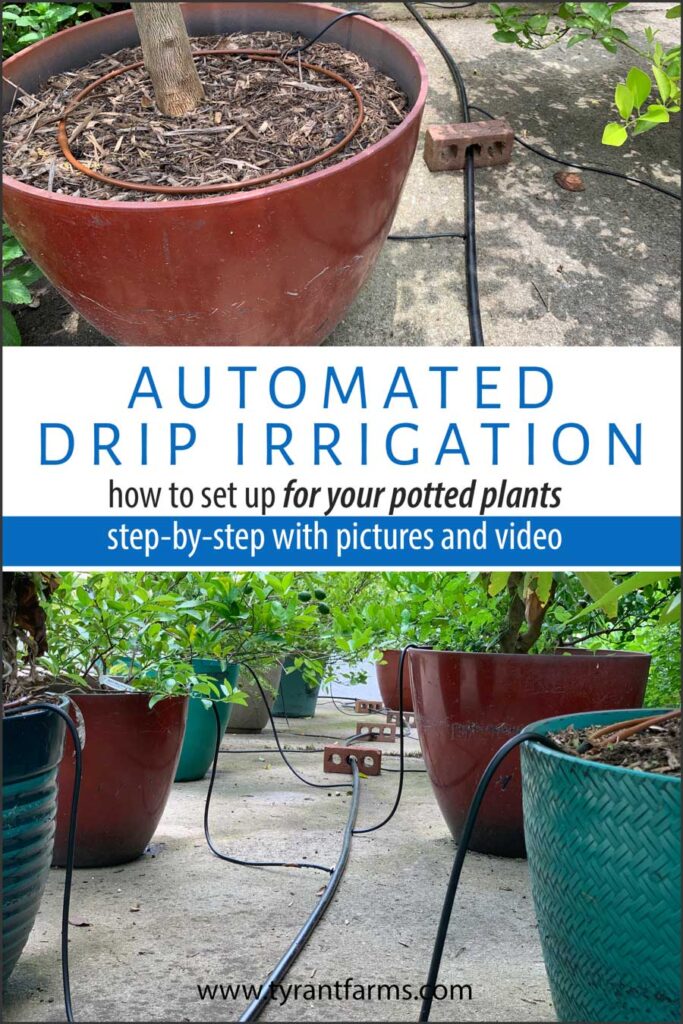
How to set up automated drip irrigation for potted plants
Tyrant Farms' articles are created by real people with real experience. Our articles are free and supported by readers like you, which is why there are ads on our site. Please consider buying (or gifting) our books about raising ducks and raising geese. Also, when you buy through links on our site, we may earn an affiliate commission. Learn more
Whether you have two potted plants or twenty, this article (and video) will help you figure out how to set up an easy, automated drip irrigation system for your potted plants.
We don’t live in the tropics; we live on the outskirts of Greenville, SC (Zone 7b). However, we grow over a dozen varieties of citrus, plus papayas, guavas, bananas, and avocados.
Growing these cold-sensitive plants requires large pots, so we can move them in and out of a heated garage with our specialized pot mover on cold winter days and nights. Since the plants aren’t in-ground, we also have to regularly water and fertilize them.
Losing time due to hand-watering plants
On hot, dry summer days, we have to water our potted fruit trees twice each day or the plants will get stressed and potentially drop their fruit. Hand-watering that many potted plants in the summer takes about 20 minutes each session, so a minimum of 40 minutes per day is spent watering potted fruit trees.
We try to overlap plant watering with times when we’re outside letting our toddler run loose, so we don’t feel like we’re wasting precious minutes. However, we’d still rather have that time back in our pockets to do other things.
The other big challenge: leaving town. We hire a duck sitter whenever we go on vacation, and that person is also tasked with plant-sitting, which primarily involves watering our potted plants.
Despite providing crystal clear instructions and having “plant people” watching our plants while we leave town, we’ve still had incidents where we come back from vacation to find stressed plants that are dropping their fruit. This loss means an entire year of effort is for naught when it comes to fruit trees like citrus. Quite frustrating.
What to do? Since we’ll be taking our toddler on multiple family vacations this summer, we finally realized that now is the time to get a simple, automated drip irrigation system for our potted plants.
After a bit of research, discussions with irrigation professionals, and trial-and-error, we’ve been pleasantly surprised by how easy and relatively inexpensive it is to get drip irrigation set up for our potted fruit trees. Frankly, we’d probably pay a plant sitter more over the course of a week than we paid for the drip irrigation system for our 20 fruit trees — not bad!
If drip irrigation seems daunting and complicated to your from the outside, not to worry! We knew next to nothing about drip irrigation when we got started so we’ll try to make our instructions as simple and easy to follow as possible…
How to set up an automated drip irrigation system for potted plants
There are some really good drip irrigation kits for potted plants that you can buy to make things simple. The best thing about buying a kit? You don’t have to spend time figuring out everything you need and tracking down each piece.
The downside of buying a kit?
- It may or may not have everything you need for your specific circumstances.
- It will almost certainly have less OR more materials than you need. (A kit designed for 20 plants isn’t ideal if you have either 10 or 30 potted plants.)
That means you’ll either have to buy some extra equipment or you’ll be paying for extra equipment that you don’t actually need.
Before you decide whether to buy a drip irrigation kit or individual components for your own customized system, we’d recommend you take a few minutes to understand the basics of a potted plant drip irrigation system so you can figure out which option is best for you.
For us, a hybrid approach worked best. We purchased a kit, but we also bought some additional parts and pieces to fill the gaps between what the kit included and what we wanted for our unique setup.
Hopefully, the information, video, and product recommendations below will help you figure out exactly what you need to set up your own potted plant drip irrigation system!
Part I. Potted plant drip irrigation parts explained
Let’s start with a list of the parts (some of which are optional) you’ll need to have for an automated drip irrigation system for your potted plants and a brief explanation of what each part is/does. (This list is ordered chronologically, starting at a spigot.)
Potted plant irrigation parts explained, from A to Z:
a. Hose splitter (optional, but recommended)
We like having a dedicated spigot for our drip irrigation system. However, we frequently need to use the same spigot our irrigation system is on to get water for other purposes (such as running a garden sprinkler, watering seedlings, etc.).
Rather than having to regularly unscrew and reconnect our drip irrigation system each time, a simple hose splitter attached to the spigot solves this problem.
- Quantity needed: 1 per system | purchase link
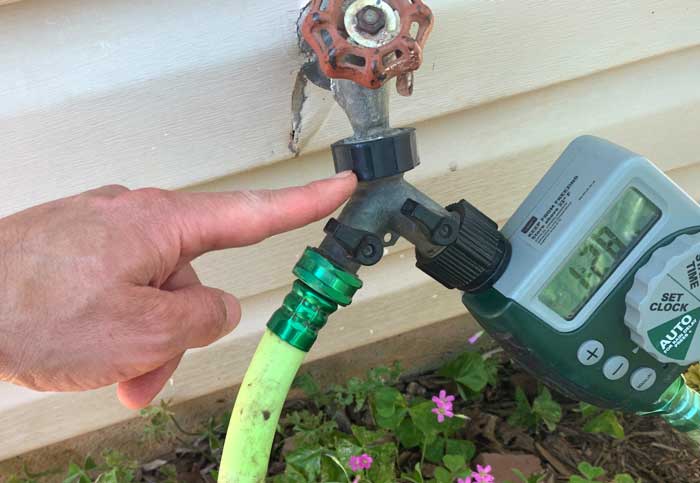
b. Timer (optional, but highly recommended)
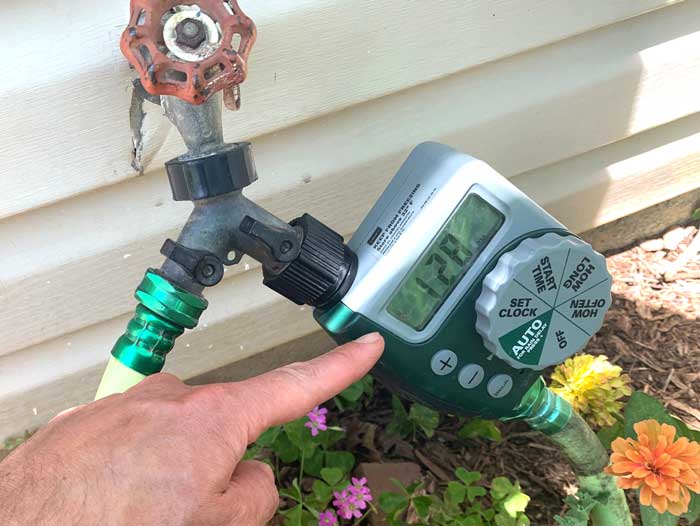
If you want to completely automate your irrigation system to run at set times each day rather than manually turning your water on and off, you’ll want to get a timer. Note: If you get a drip irrigation kit, a timer may or may not be included.
In our setup where our pots are pretty far away from the spigot, the order is spigot > timer > hose > irrigation system (see below).
- Quantity needed: 1 per system | purchase link
c. Drinking-safe water hose (optional)
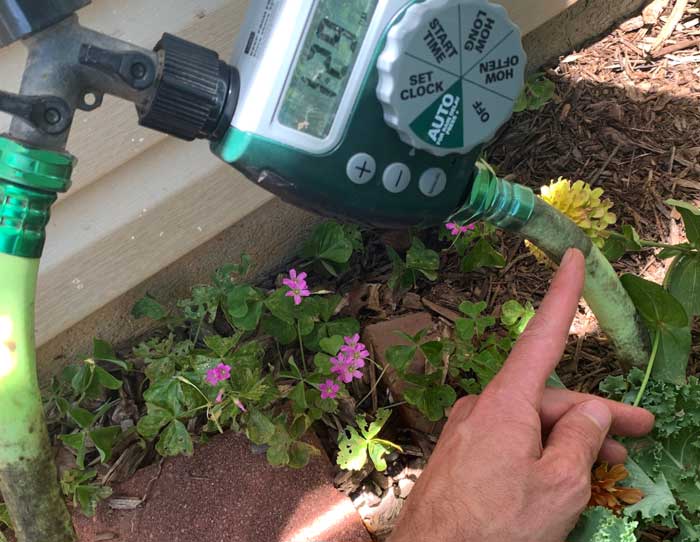
There’s a 20 yard span between the water spigot on our house and the area in our driveway where our potted plants start. We used one of our old Flexzilla drinking-safe water hoses to bridge the gap. Our irrigation timer is hooked up to the spigot which then ties to the hose which then ties into the drip system via the backflow prevention valve.
- Quantity needed: Measure the distance between your spigot and where your irrigation system will start and get a hose sized accordingly. Again, this is optional – you’ll only need a hose if you’re NOT hooking your irrigation system directly to a spigot. | purchase link
d. backflow prevention valve + e. 25 PSI pressure regulator + f. 150 mesh screen filter
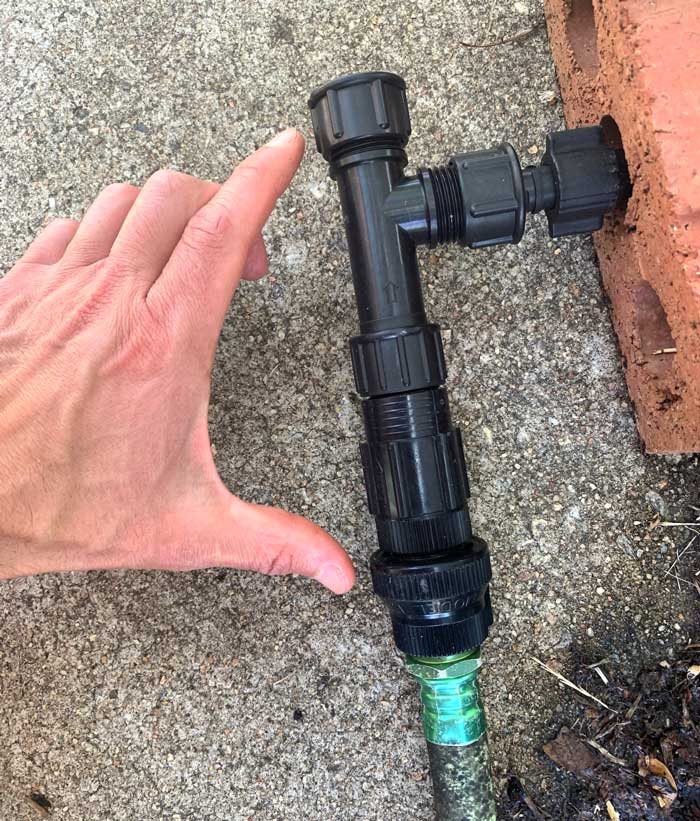
These are technically three separate items, but they can be purchased as an all-in-one. If you get a kit, they often come together, with some assembly required.
- Quantity needed: one of each part per system | All-in-one purchase link (*this product already includes item g. below, which ties from standard 3/4″ male faucet/hose to 1/2″ poly tubing)
Descriptions:
- As the name implies, a backflow prevention valve prevents water from your irrigation system from going back into your home’s water supply. This part should be provided if you get a kit.
- A 25 PSI pressure regulator keeps water pressure in your irrigation system at optimal levels to prevent blowouts while helping ensure even water distribution throughout the system at each watering. You won’t need or want to go higher than 25 PSI (pounds per square inch) for an irrigation system for your potted plants.
- 150 mesh screen filter helps prevent debris from getting into your system or your drippers/sprayers from getting clogged.
g. 1/2″ poly faucet fitting
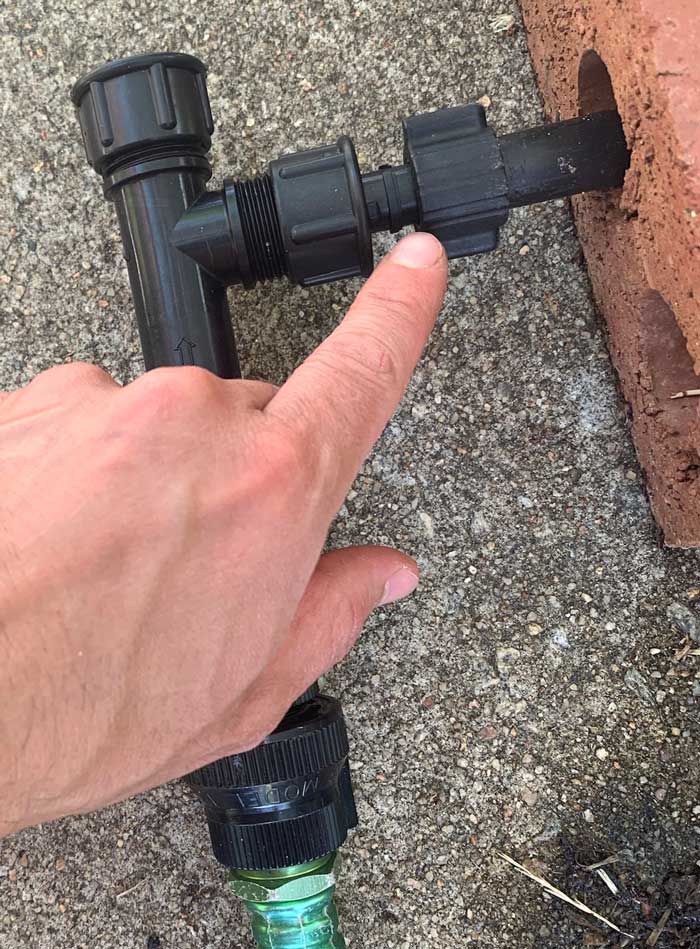
This part links the faucet system to your primary 1/2″ poly tubing. These fittings are sometimes built into the backflow prevention valve/pressure regulator, but sometimes not.
- Quantity needed: 1 per system
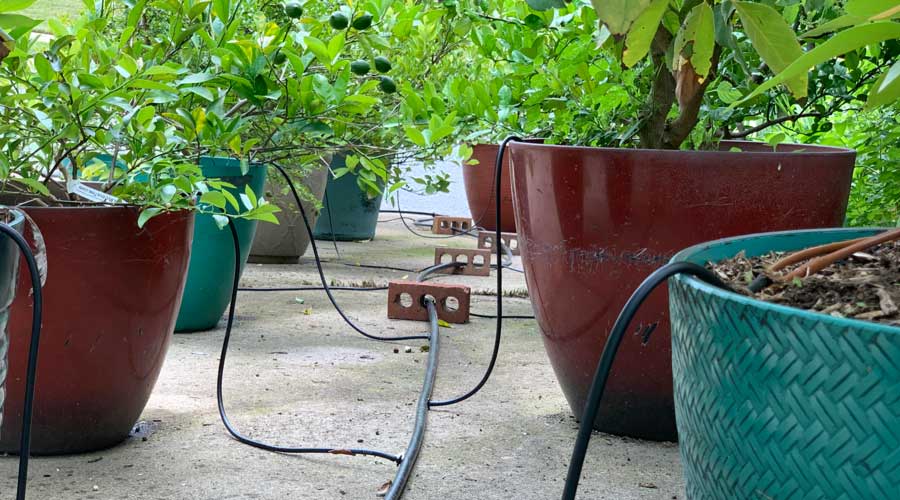
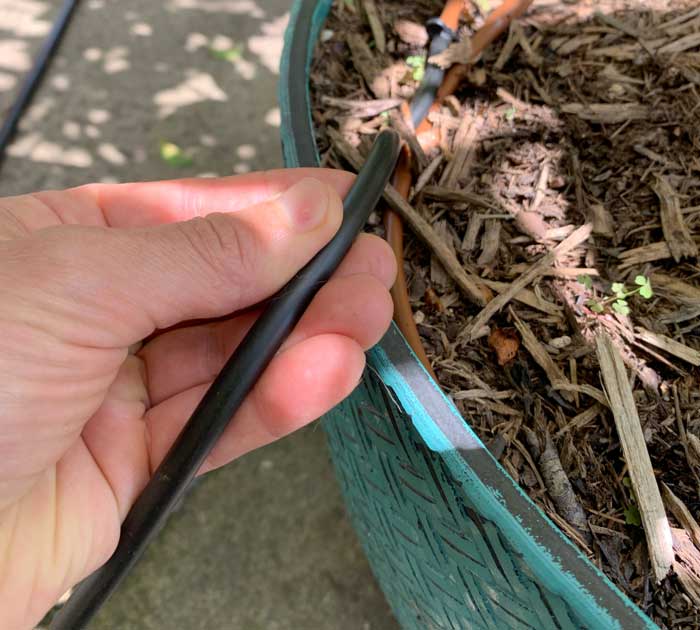
h. 1/2″ poly tubing
The 1/2″ poly tubing is the main water supply line for your drip irrigation system. It’s firm but flexible with the consistency of a thick milk carton.
Irrigation systems for small potted plants (or for fewer potted plants) have 1/4″ tubing that goes all the way into the pots. Given our larger number of plants (20) and large size of our plants/pots, 1/4″ would be inadequate.
Poly tubing is included in kits, but make sure it’s 1/2″ (or at least 3/8″) if you have larger/more plants like we do.
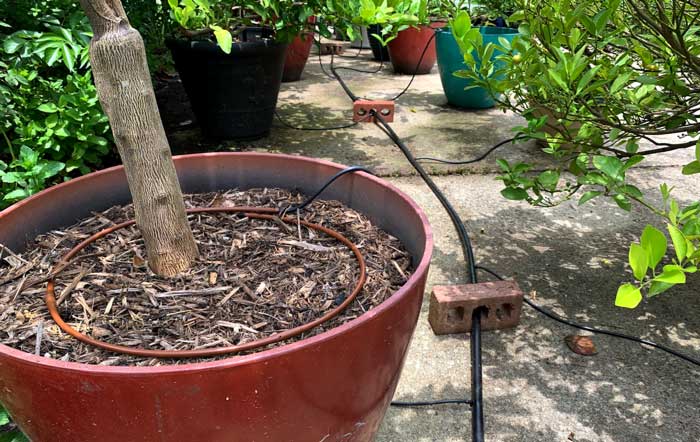
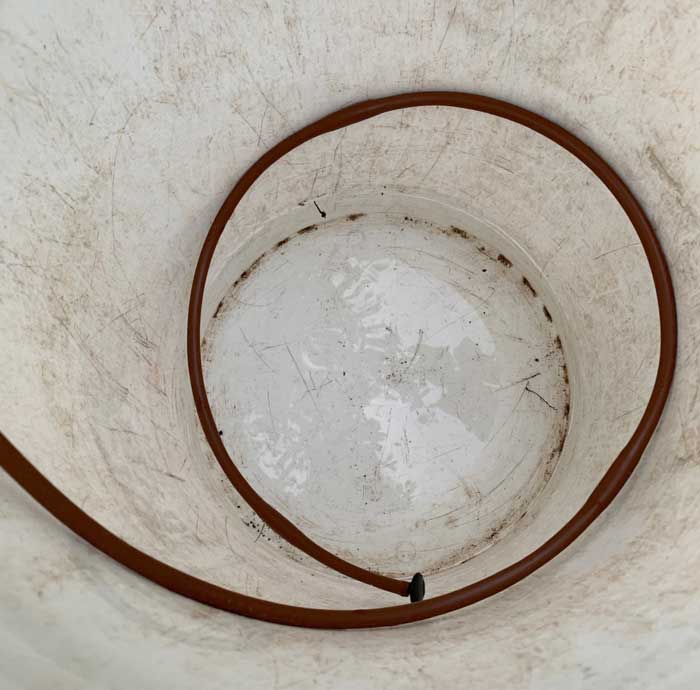
Kits also include stakes to pin the tubing to the ground. Since our pots are on concrete, we couldn’t use stakes, which is why we ran our 1/2″ tubing through brick holes to hold it in place (as you can see in our video and photos).
- Quantity needed: Measure the distance your potted plants go, from first plant to last. Take into account whether you’re going to be attaching your system directly to a spigot or running a hose between your spigot and your irrigation system. Example: We run a drinking-safe hose between our spigot and our irrigation system/potted plants, and our 20 potted plants stretch about 50′ down our driveway. That means we need a minimum of 50′ of 1/2″ poly tubing (it’s always good to have extra on hand). | purchase link
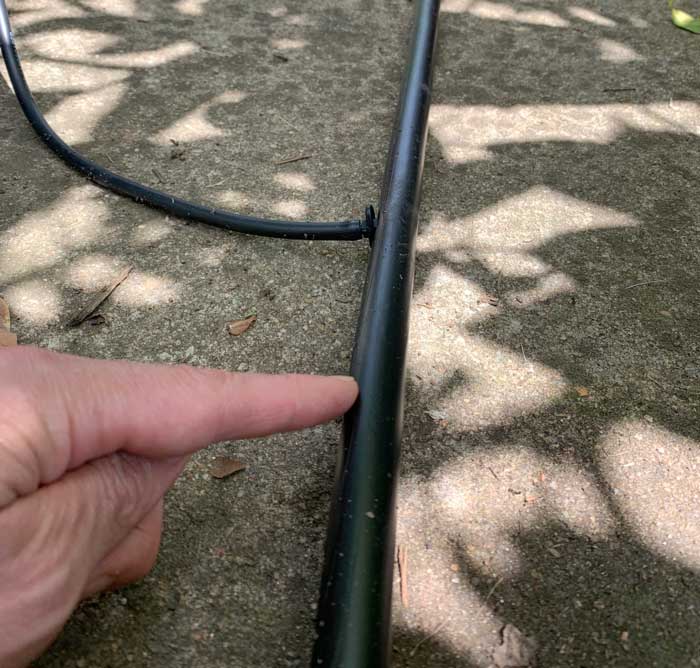
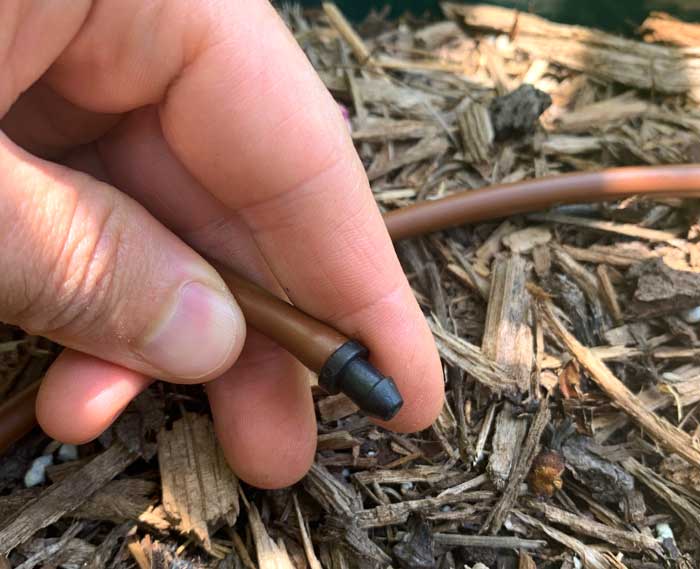
i. 1/4″ couplers
Couplers are the small plastic pieces that connect between your 1/2″ poly tubing and your 1/4″ vinyl tubing. These are included in kits. However, a kit may not have as many couplers as you need depending on how many plants you have.
- Quantity needed: 2 per plant if you mirror our system. (These are the same couplers used in item l. below, which is why we use 2 per plant/pot.) | purchase link for 100 pack or 25 pack
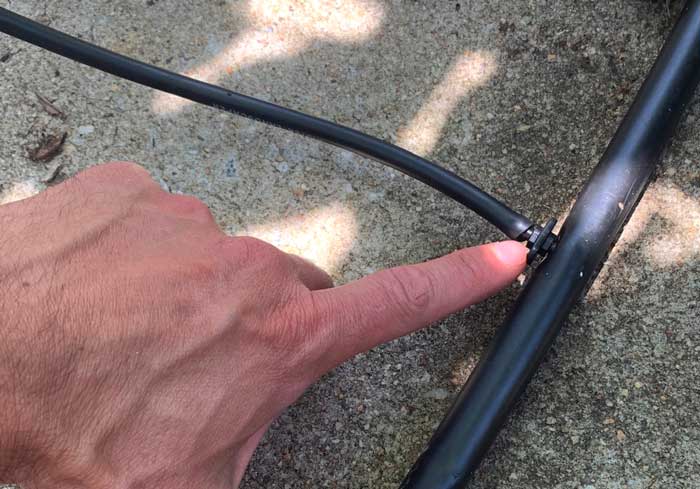
j. 1/4″ hole punch tool
This is the tool you need to punch holes in the 1/2″ poly tubing in order to insert your 1/4″ couplers. These are included in kits.
- Quantity needed: 1 | purchase link
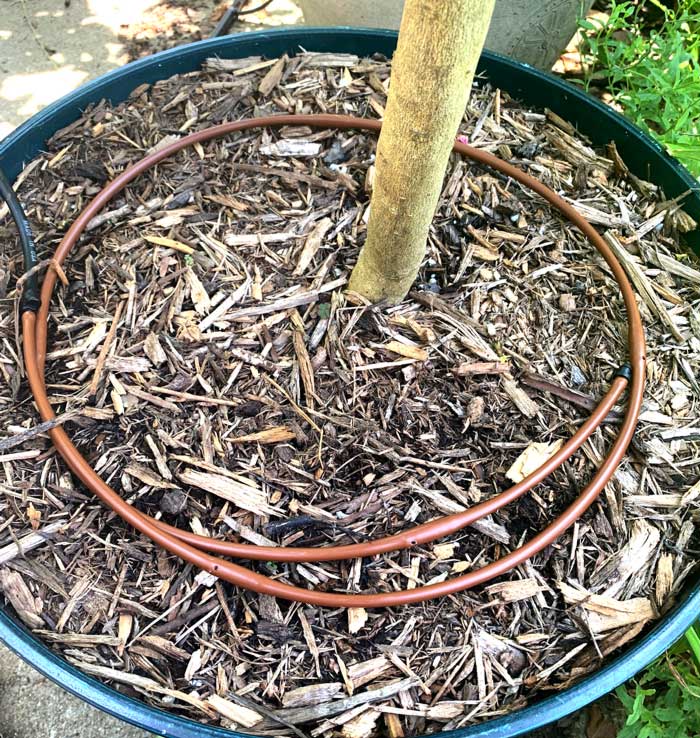
k. 1/4″ vinyl tubing
A soft, flexible tubing that transports water from your 1/2″ poly tubing up to your potted plants.
- Quantity needed: Measure the distance between your 1/2″ main poly tubing line and your potted plants, allowing for slack. Example: We have 20 plants that require about 30″ of vinyl tubing per plant/pot, so we needed a minimum of 50′ of vinyl tubing. (It’s always better to get more than you think you need!) | purchase link for 50′ or for 100′
l. More 1/4″ couplers OR 1/4″ vari-flow valves
If you think you’ll want to: a) turn irrigation off to some of your potted plants but not others, or b) slow the flow rate on some plants but not others, then you’ll want to get 1/4″ vari-flow valves. We plan to water all of our potted plants uniformly each day, so we just use more 1/4″ couplers. These parts connect between your 1/4″ vinyl tubing and your 1/4″ drip tubing.
- Quantity needed: 2 per plant if using couplers OR as many needed for pots you want variable/lower irrigation rates for. (Couplers are same part listed in item i. above, just used in a different spot in your system.) | purchase standard couplers in item i. above or 1/4″ vari-flow valves
m. 1/4″ drip tubing
Drip tubing is how water exits your irrigation system and enters your pot. We chose drip tubing rather than sprayers because: 1) we like its simplicity, and 2) we figured the tubing would be far less enticing than sprayers to our toddler.
However, you could choose to use small sprayers in each of your pots if you want. If you plan to use drip tubing like we do, you’ll want to make sure: 1) you use plenty of it in each pot to ensure a wide distribution of irrigation points around the circumference of the pot, and 2) not to put the drip holes right next to the tree trunk to minimize the chance of causing the tree to rot.
For our large 20″ diameter x 20″ deep pots, we used 5′ of drip tubing with 5 holes per pot.
- Quantity needed: | purchase link for 50′
n. goof plugs
You insert goof plugs into the end of your cut pieces of drip tubing. This allows pressure to build up so water goes out of each drip hole and into the pot.
- Quantity needed: 1 per pot | purchase link for 50 or for 30
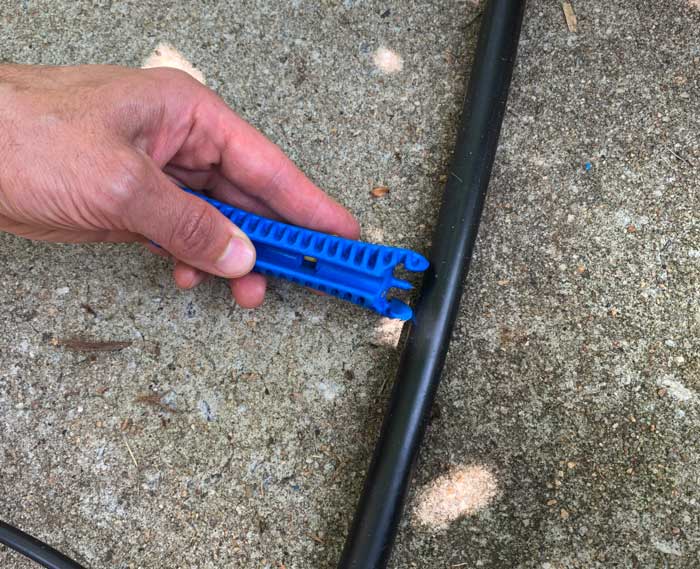
o. end crimper for 1/2″ poly tubing
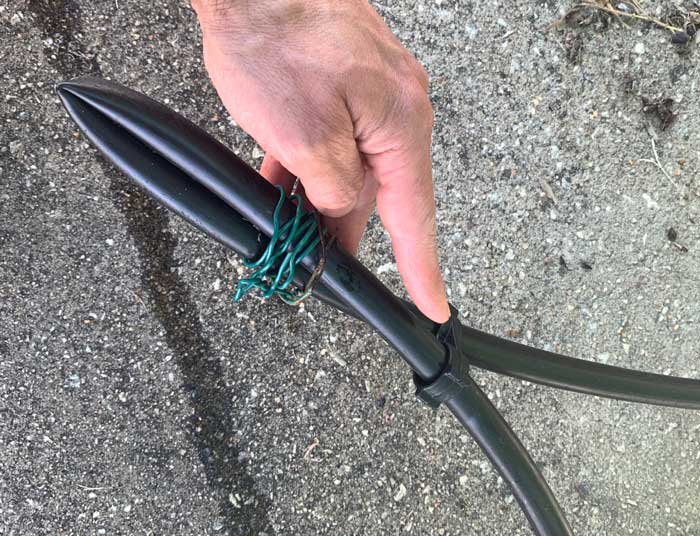
Your main 1/2″ poly tubing needs to be crimped (folded back) and held in a crimped position for the whole system to be pressurized, hence the end crimper.
- Quantity needed: 1 per system | purchase link
p. Garden u-hooks/spikes
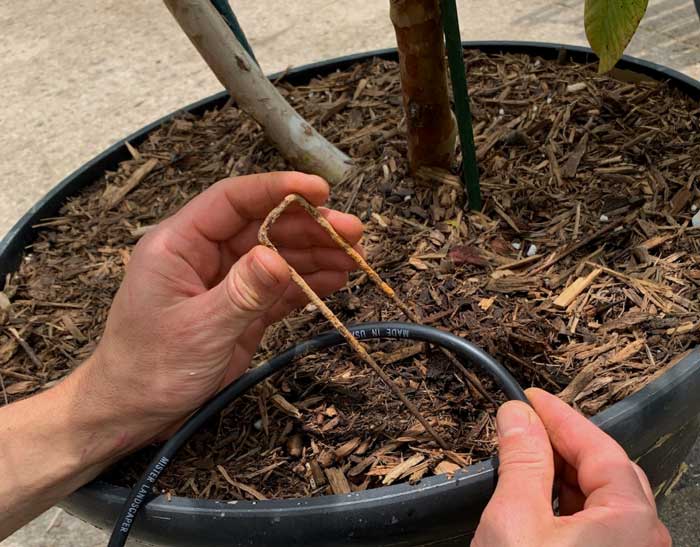
Push these spikes into the soil in your pots to hold your 1/4″ vinyl and drip tubing in place, unless enough/adequate spikes are provided in a kit you purchase. You can also use these to hold your 1/2″ poly tubing in place if your potted plants are on the ground rather than concrete like our pots.
We also use these spikes in our garden for other purposes, and they last for years. The ones we used are over 10 years old, which is why they’re a bit rusted!
- Quantity needed: 1 or 2 per pot – more if you’re using them to hold 1/2″ tubing in place / purchase link for 50-pack
The only other things you’ll need to install your potted plant irrigation system are:
- good sharp cutters for your vinyl and drip tubing (we used garden snips),
- batteries for your timer.
Part II. Video tour: watch drip irrigation system in potted plants
Now you’ve been introduced to each part you might need to set up your own automated drip irrigation system for your potted plants. Want to see them all together in action?
Here’s a quick video to help you see exactly how the various parts and pieces of our recommended potted plant drip irrigation system connect and work:
Note: Video not displaying or playing? You may need to temporarily disable your ad blocking software and try again. Ads help us keep the lights on and keep our site free, so thanks for your support!
Part III. Which drip irrigation system should you get for your potted plants?
It’s important to note that there isn’t a one-size-fits-all solution when it comes to getting an automated irrigation system for your potted plants. If you have small 5-gallon potted plants, your setup will be different than someone like us with 20 large potted plants.
If you want to customize your own potted plant irrigation system, use the information and purchase links in Part 2 above to get exactly what you need. If you’d rather purchase a pre-assembled kit to keep things simple, here are a few good options for different scenarios:
- Raindrip R560DP Automatic Watering Kit – Ideal for up to 20 SMALL potted plants or hanging baskets; excellent company with excellent customer ratings.
- Vermida drip kit – Ideal for up to 12 LARGE potted plants. 3/8″ tubing (not quite 1/2″) but still adequate if you have larger potted plants like we do. This system has adjustable sprayers, not drip line.
- Or browse other potted plant irrigation kits to see if something else works better for your setup.
Part IV. Additional tips for your potted plant drip irrigation system
1. Stagger your pots.
If you have two rows of potted plants like we do, you’ll want to stagger/offset each pot rather than lining them up directly next to each other. That way the holes + coupler tie-ins to your 1/2″ poly tubing are also staggered which reduces the potential for blow-outs while helping provide even water pressure/distribution.
Staggering your potted plants will also help each one get more optimal sun exposure.
2. Carefully consider number of drip holes and placement in each pot.
We use large 20″ tall x 20″ diameter pots for our potted fruit trees. In each pot, we use about 5′ of drip line with five holes/pot. We also make sure to evenly distribute the drip holes around the circumference of the pot and to put them about halfway between the outside of the pot and the trunk.
Side note: we used drip lines instead of sprayers in each pot to make our irrigation system less enticing to our toddler who LOVES water. We also didn’t want spray/mist to go outside of our pots and we felt we could get more even moisture distribution with drip lines.
That doesn’t mean sprayers can’t or don’t work in a pot – it just means drip lines were our personal preference.
3. Don’t bury your drip lines in mulch.
We highly recommend using about 2-3″ of mulch in your potted plants. However, when putting in drip irrigation, be sure NOT to bury your drip lines under the mulch.
Burying your drip line in mulch could either cause the drip holes to clog and/or prevent you from seeing any time a clog happens.
4. Regularly monitor your drip irrigation system.
Turn it on and forget it? Probably not a great idea for a drip irrigation system.
Instead, you may want to set a recurring calendar reminder to periodically check your new potted plant irrigation system to make sure everything is working. Since our pots are on concrete, we can see that a small amount of water has dripped out of the bottom of the containers after the system runs. That makes it easier for us to check that every pot is getting watered.
If your potted plants are on mulch, grass, or another type of permeable surface, you’ll probably want to check each pot while the water is on to make sure water is coming out of each drip line and hole. How frequently? That’s up to you.
We plan to check our drip irrigation system at least once per week, primarily because we have a toddler who could pull something out or break something without us noticing.
5. Shorter, more frequent waterings are better than longer, less frequent waterings.
It’s better to water multiple times per day for shorter periods than it is to water once per day for a longer period. (Another reason to use an irrigation system for your potted plants!) This scenario allows for more even water distribution in the soil and greater water retention.
What quantity of water does each of our potted plants get per day?
When it’s over 90°F, we set our system to water every 6 hours for 15 minutes each. If it’s under 90°F, we water every 6 hours for 10 minutes each. A small amount of water should exit the base of the pot after each watering.
With our system and water pressure, a 15 minute irrigation session = 0.375 gallons of water, which means each of our large potted fruit trees receives about 1.5 gallons of water over a 24 hour period on a hot, 90°F+ summer day.
If we have heavy rain/thunderstorms, we can just flip the switch on our hose splitter to turn the water off for a period to make sure our plants don’t get too much water.
How can you test the volume of water your system produces?
A simple way to test the amount of water each of your potted plants are getting via your automated irrigation system? Put a drip line section from one of your pots into a bucket during a watering session and measure the amount of water at the end of the cycle.
We hope the information in this article helps you easily set up the perfect automated drip irrigation system for your potted plants! We wish we’d set our system up years earlier, so we could have all the time we spent hand-watering back in our pockets and more fruit due to consistently well-watered trees.
Happy gardening!
KIGI,

Great and informative website, Thank YOU for that…
Can I use this system on a lawn sprinkler zone valve instead of a water spigot? So I am planning to hook up the 1/2 Poly tubing to a removed sprinkler head if this is correct?
TY
Sure, I don’t see why not so long as they you have a way to tie or thread them together cleanly. Worst case is you might have to go to a hardware store and get some sort of small adapter piece.