5 steps: how to raise & harvest mealworms
Tyrant Farms' articles are created by real people with real experience. Our articles are free and supported by readers like you, which is why there are ads on our site. Please consider buying (or gifting) our books about raising ducks and raising geese. Also, when you buy through links on our site, we may earn an affiliate commission. Learn more
Raising mealworms is an easy way to produce a high-protein food for your poultry (or for adventuresome humans). Mealworms also turn food scraps into a nutrient-rich fertilizer that’s great for your garden or potted plants. In this article, you’ll find out how to easily & affordably raise your own mealworms!
We’ve been raising mealworms for over five years. Without question, of all the plants and animals we raise, mealworms are by far the easiest life form to maintain.
In fact, there are periods where we get so busy that we forget about tending to our mealworms for weeks at a time. Then we panic, rush to check on them, and find they’re still plugging along — albeit a little hungrier with a less populated home. That’s our kind of critter!
What are mealworms?
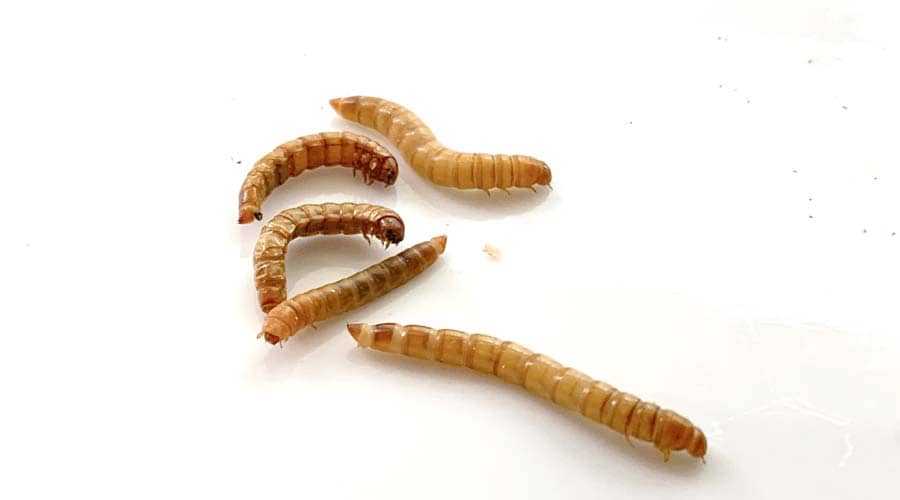
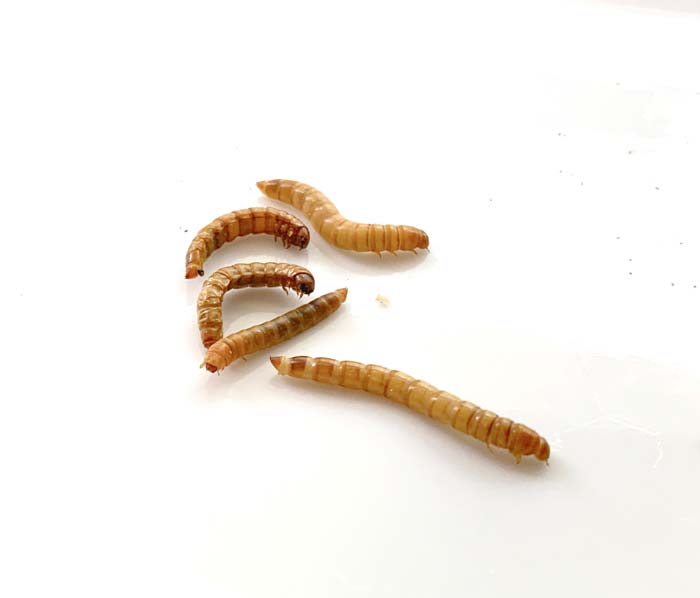
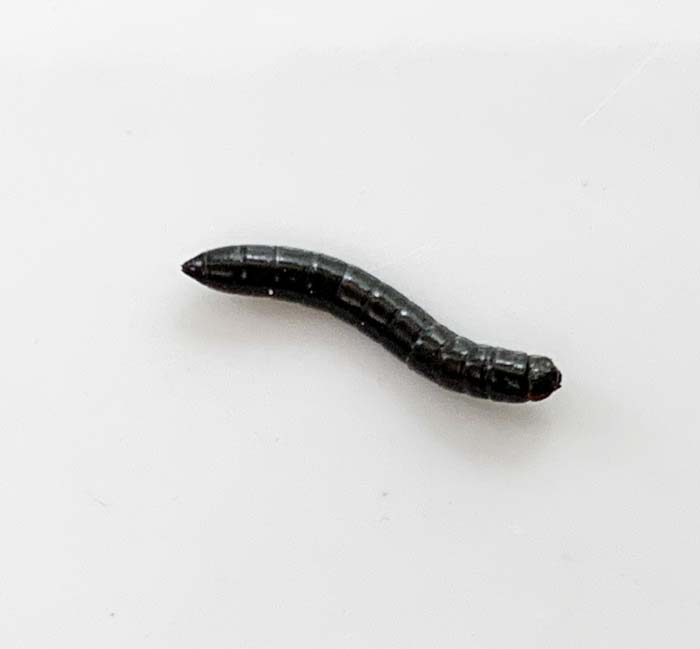
In case you’ve never heard of them, mealworms aren’t actually worms, they’re insects. They’re actually the larval stage of mealworm beetles (Tenebrio molitor), a species of Darkling beetle.

Why do we bother to raise mealworms? What do we use them for? And — perhaps most importantly — how can you raise your own mealworms?
Let’s jump in and get answers to all your mealworm questions!
Why raise mealworms?
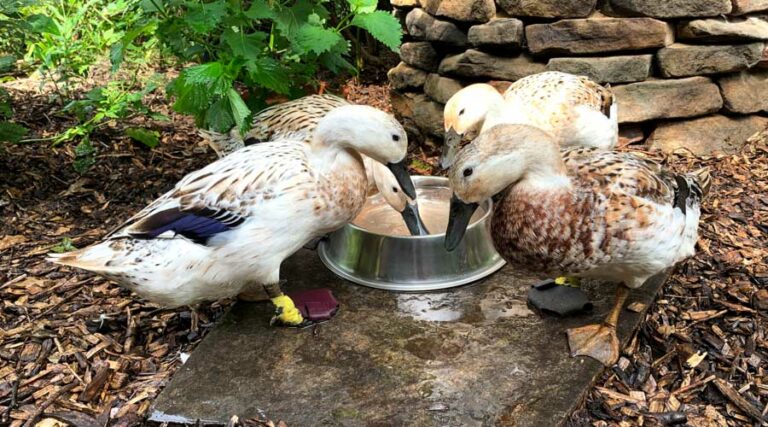
When we first got our Welsh Harlequin ducks, we wanted to have healthy treats on hand to feed them beyond their regular daily feed. In addition to having a dedicated duck garden with our ducks’ favorite plants, dried mealworms quickly moved to the top of the “favorite duck treats” list.
After a year of raising ducks, we realized we’d spent an obscene amount of money on bags of ‘Happy Hen’ dried mealworms. One day, we were visiting a pet store and saw live mealworms for sale. Hmm…
We bought the critters and set out to learn how to grow our own mealworms. Since then, we’ve come to fully realize their many benefits…
Top 5 reasons to raise mealworms
Here are five reasons why you should consider raising mealworms:
1. Mealworms are highly nutritious.
Mealworms are loaded with good macro and micronutrients. Commercially raised mealworms are likely fed the cheapest possible diet, but you can give your home-raised mealworms a healthier, more varied diet to increase their nutrition even further.
Also, if you’re raising mealworms for your ducks, chickens, or other poultry, you can feed them LIVE mealworms, rather than dried mealworms, further increasing their nutrition.
What’s the nutritional content of live mealworms?
According to Grubco live mealworms feature the following nutritional profile:
- 62% moisture
- 20% protein
- 13% fat
- 2% fiber
- 2% ash (micronutrients)
Mealworms are also very high in calcium, magnesium, phosphorus, potassium, and other micronutrients that will benefit your pampered poultry.
2. Raising your own mealworms can save you a lot of money.
Mealworms will help you provide your flock with a nutritional boost that aids their health, potentially lowering health/vet costs. Since mealworms eat food scraps (read about mealworm diet below), you can grow an endless supply of mealworms without spending another penny.
Since a bag of decent quality dried mealworms costs over $5/lb, that means you can also save quite a bit of money each year by growing your own endless supply of mealworms.
3. Mealworms are ridiculously easy to raise.
We’ve already touched on this point, but mealworms are ridiculously easy to raise. A dry, moderately warm environment, a plastic tub, and a bit of food is all they need to thrive.
4. Mealworm “frass” is an awesome plant fertilizer.
Reduce food waste? Check. Supplement the diet of your spoiled poultry? Check. Grow your own plant fertilizer? Yes!
Mealworm “frass” is the polite word for the tiny pellets of dry manure that accumulate in your mealworm bin. Don’t worry, it doesn’t smell. However, some people do have allergies to mealworms and/or mealworm frass so you’ll want to be in a well-ventilated outdoor area wearing a mask when you remove the frass.
Our mealworm frass feeds our potted citrus plants and we also use it as a soil amendment in our garden. In fact, mealworm frass is such a good fertilizer that lots of companies sell it online!
5. Mealworm have other unsung benefits as well…
i. Mealworms can decompose styrofoam?
Styrofoam has created a terrible pollution problem the world over and can take up to 1 million years to decompose in a landfill. One possible solution: mealworms.
Researchers at Stanford University have shown that mealworms can eat styrofoam and other forms of polystyrene. Specialized bacteria in their guts then biodegrade the styrofoam.
2021 update: Followup research out of Stanford showed that although no harmful chemicals built up in the bodies of mealworms that ate styrofoam, their excrement/frass still contained hexabromocyclododecane (HBCD). That means you could potentially (and safely) feed styrofoam-fed mealworms to poultry, but you wouldn’t want to use the frass as a garden fertilizer.
ii. Yes, people can eat mealworms too.
As you may have noticed from our other articles, we’re rather adventuresome in our eating habits…
Are mealworms edible to humans? Yes.
Mealworms have rightfully earned a reputation as being a good-tasting and highly nutritious food for people, not just poulry. As such, when we had similarly-adventurous friends over for dinner once, we all decided to saute some mealworms to try as a side dish.
Everyone who tried mealworms that night found them to be surprisingly yummy. What do mealworms taste like? Cooked mealworms (don’t eat them raw) have a pleasantly crunchy texture like tiny potato chips and a mild nutty flavor.
Grossed out? Everything you eat is pretty weird if you really stop and think about it. So why not intentionally incorporate some insects into your diet alongside ground cow flesh (hamburgers), brassica genitals (broccoli), and all the other strange stuff you eat?
5 steps: How to raise & harvest mealworms
Now you know why you should raise mealworms. Next comes the how-to part of the equation.
Here’s a step-by-step guide to producing your own home-grown mealworms:
Step 1. Get your mealworm bin ready.
We use a shallow, clear plastic tote to house our mealworms. It’s lightweight, easy to clean, and allows us to see the layers of food and frass inside to determine if cleaning or feeding is necessary.
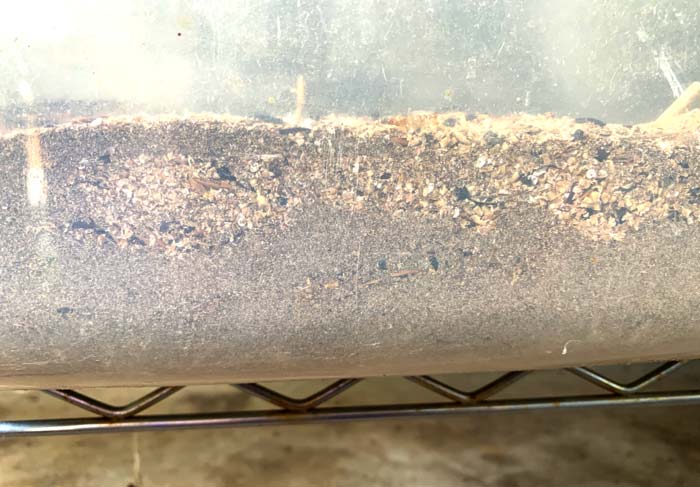
Do NOT seal the top of your tote/container on or you’ll deprive your mealworms of oxygen and potentially end up with mold inside that could kill your colony. The easiest thing to do is generously drill holes in the top of your plastic tote. This lets air in and keeps critters out (such as mice, lizards, etc that might eat your mealworms or their food).
Step 2: Make sure you provide ideal living conditions for your mealworms.
What living conditions to mealworms’ need? Your mealworms will need the following light, temperature and moisture conditions:
a. Mealworm LIGHT requirements:
Keep your mealworms out of direct sunlight. They’ll be perfectly happy in full shade or even a dark closet.
b. Mealworm TEMPERATURE requirements:
- 70-80°F is the ideal temperature range for active mealworm breeding and larvae production.
- 62°F of below will slow mealworm reproduction.
- 40°F (like in your fridge) will make mealworms go dormant. You can store excess mealworms in wheat germ in your fridge this way for up to a year.
- Freezing temperatures will kill mealworms within 15 minutes.
c. Mealworm MOISTURE requirements:
Humidity around 70% is ideal for mealworms.
You don’t want to feed your mealworms sopping wet foods or you’ll create moldy conditions. However, chunks of veggie and fruit waste is fine so long as you don’t overdo it. For reference, we might add one chunk of fruit/veggie scrap the size of an apple core in our mealworm bin during a feeding.
Broccoli stem cuttings, kale stems, apple cores, potato skins, etc. all make perfect mealworm food in moderation. (See recommended mealworm feeding regimen below.)
We keep our mealworms in our garage, which is naturally warm in summer and heated in the winter since we put our potted citrus in at night.)
Step 3. Order your live mealworms.
Once you have a mealworm setup figured out and ready to go, it’s time to order your live mealworms!
How many mealworms should you order to start growing your own?
You’ll want to order at least 1,500 mealworms to get a good robust colony going quickly.
Our two recommendations for where to get your mealworms:
Once your mealworms arrive, you’ll want to get them eating in their new home asap. Put down a 2-3″ layer of dried food for them and drop them in.
What do mealworms eat?
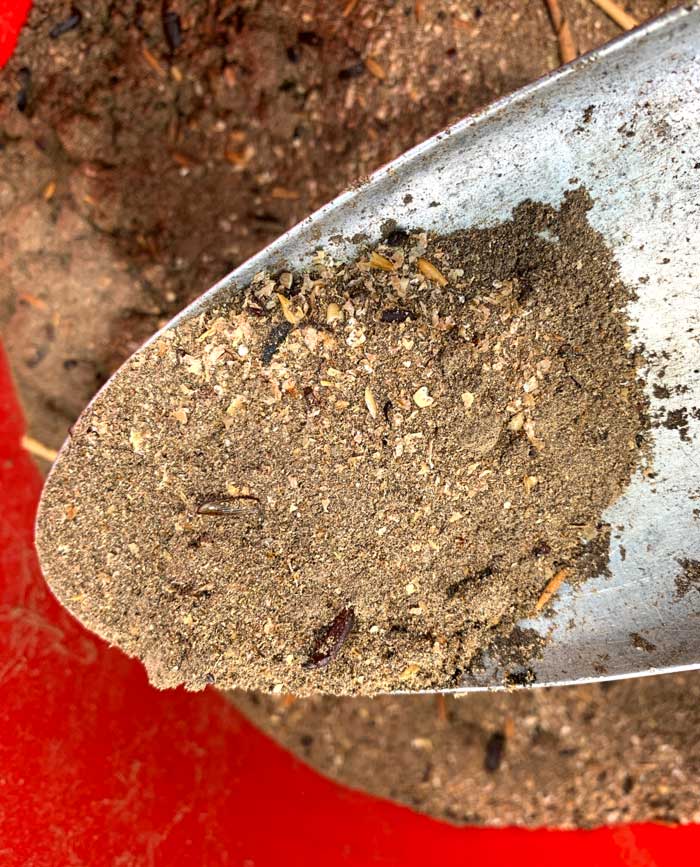
The primary food source for your mealworms can be any combination of the following:
- wheat germ,
- oats,
- flour,
- stale cereal/crackers,
- pet kibble (we feed stale cat food that our cat rejects to our mealworms), or
- other dry grains,
- small quantities of fruit/veggie scraps (as detailed previously in moisture section).
How often should you feed your mealworms? Add new food to your mealworm bin about once every 2-3 weeks.
As the colony increases in size, they’ll need more frequent feedings or you’ll need to harvest some of your mealworms. It’s pretty simple to tell if mealworms need more food: if they’ve broken down all the food you’ve provided, add more.
Mealworm lifecycle:
Now, you might be wondering: how long does it take mealworms to go through their lifecycle?
- eggs: 4-14 days
- larvae: 10 weeks (this is the stage they arrive in and the stage you give to your poultry)
- pupae: 1-3 weeks
- adult mealworm beetle: 8-12 weeks
Female mealworm beetles start laying eggs about 2 weeks after reaching the adult stage of their lifecycle. They’ll continue laying eggs for 2-3 months before dying. Under ideal conditions, each female can lay up to 40 eggs per day.
Step 4. Maintain your mealworms.
As we’ve mentioned repeatedly, mealworms are very easy to maintain. Basically, keep them warm, dry, protected, and fed.
Soon you’ll have all the mealworms you need to give your poultry regular treats.
Aside from the above, the main thing you’ll need to do is occasionally clean out your mealworm bin. Frankly, we’re horrible at this. We once went more than a year without cleaning our mealworm bin!
Ideally, you ‘ll be more responsible mealworm parents than we are and clean out your mealworm bin on a quarterly basis.
How to clean a mealworm bin:
a. Take your mealworm bin outside to a well-ventilated, shady location.
b. Wear a mask so you don’t breathe in mealworm frass. Some people are allergic to mealworm frass — or can develop allergies with repeat exposure.
c. Use a scoop and sifter (like a metal pasta strainer) to scoop out the mealworm larvae, pupae, adults, and remaining food. Sift the frass into one container and the mealworms and food into another container.
d. Wash and dry your mealworm bin, add fresh food, and put your mealworms back in.
e. Use the frass as fertilizer on your garden plants or potted plants.
Step 5. Harvest your mealworms.
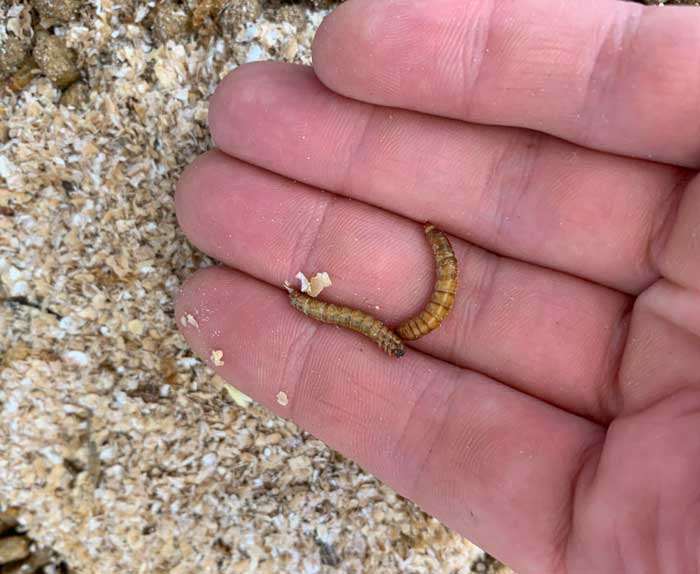
You can harvest mealworms (the larvae) whenever you want once your colony is established after a few months. The easiest way to harvest them is to scoop and strain (like when you’re cleaning) then pick them out of the strainer by hand.
Since mealworms are most reproductively active in warmer temperatures, we get the most mealworms out of our garage-raised mealworms in the summer. If you want to store a bunch of extra mealworms for later use, simply put them in a container in your fridge with some wheat germ. The cold temperatures will make them go dormant, but they’ll stay alive for as long as a year.
Your poultry will LOVE getting a regular supply of fresh, living mealworms. If you’re a more adventuresome eater, you may also enjoy having an alternative protein source you can grow from your own food waste.
KIGI,


This article facinated me. I wanted to know more so I went to the link from Stanford that you provided. The study was done in 2015, so I was curious if there was a follow up, or more newer information. Turns out that there was another study and report dated 2019 which found that toxic chemicles in the polystyrene that are added as flame retardants are excreated by the meal worm without being broken down. So while the mealworm takes care of the polystyrene, and seperates out the toxic chemicals that were once together, it’s frass might not be so great to put on your plants. I thought you would want to know. Here is where I found this information. https://news.stanford.edu/2019/12/19/mealworms-provide-plastic-solution/
Thanks for your blog. I am learning a lot.
Thanks much, Wendy! That’s good to know. Thankfully, the mealworm frass we’ve used on our plants has always been from digested foodscraps not styrofoam. We’ll definitely update the article with the information you’ve shared here.