Recipe: Duck egg stinging nettle pasta with white whole wheat flour
Tyrant Farms' articles are created by real people with real experience. Our articles are free and supported by readers like you, which is why there are ads on our site. Please consider buying (or gifting) our books about raising ducks and raising geese. Also, when you buy through links on our site, we may earn an affiliate commission. Learn more
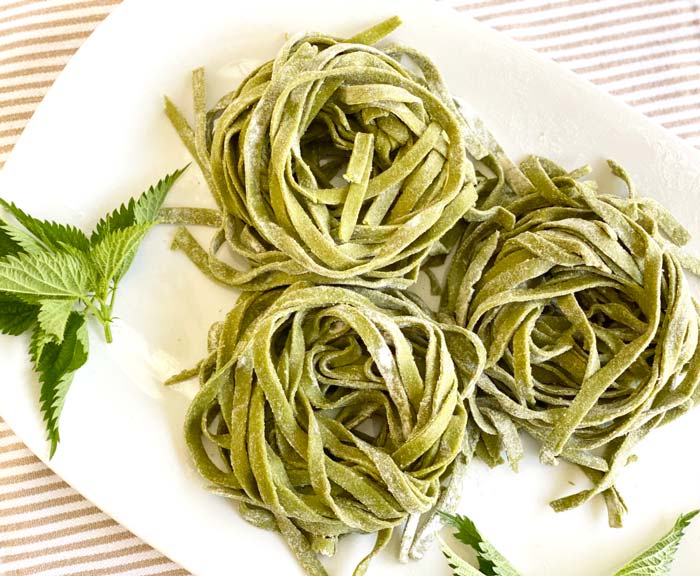
Find out how to make a colorful, outrageously delicious, and wholesome pasta recipe: duck egg stinging nettle noodles with organic white whole wheat flour!
Ingredients matter
This pasta recipe isn’t just delicious, it’s also nutritious. We’re going to dive into the how-to’s in a moment, but first let us say that the quality of the ingredients you use are just as important as the process when it comes to getting this recipe just right.
The three primary ingredients are:
1. Stinging nettle leaves

Ideally, you can get freshly harvested stinging nettle from your garden, wild foraging, or a local market. For this recipe, we used the tender young spring leaves of the plant, not the stems.
Stinging nettle is a high-protein, nutrient-dense perennial vegetable with huge culinary potential. Don’t worry, various preparation techniques (including cooking) completely neutralize its stinging potential!
(Read: Why you should grow & use stinging nettle.)
Substitution: Don’t have stinging nettle? You could substitute spinach for stinging nettle 1:1, but the flavor and nutritional profile of your pasta will be different.
2. Duck egg yolks
Duck eggs (including the yolks) are larger and more nutritious than chicken eggs. Their higher fat content and creamier flavor also make duck egg yolks ideal for pasta making.
Ideally, you can get eggs from ducks you raised yourself and/or humanely raised ducks from a local farming operation.
(Read: Duck eggs vs chicken eggs – how do they compare?)
Substitution: If you don’t have duck eggs, you can substitute chicken eggs. Instead of 6 duck egg yolks, use 8 chicken egg yolks. (We detail exact weights below.)
3. Organic white whole wheat flour
Most pasta is made from refined semolina flour, which is not a whole grain flour. This recipe is made with King Arthur’s organic white whole wheat flour.
This is a whole wheat flour (made from hard white spring wheat) with a taste and texture very similar to more refined flours. We can attest to the fact that it makes excellent pasta as well!
Substitution: If you don’t have organic white whole wheat flour, you can use a semolina/durum pasta flour, but exact ratios may vary.
Good pasta roller a must-have
Also important: having a good hand-cranked pasta machine. Yes, you could use a rolling pin and knife, but this will take MUCH longer and not yield good, consistent results like a pasta machine.
Step-by-step: how to make stinging nettle pasta
Here are important notes and photos to help you get this stinging nettle pasta recipe just right:
Step 1: Harvest and prep stinging nettle leaves
a. Best stinging nettle leaves: late winter through spring.
In our area, stinging nettle breaks dormancy in late winter. From then through around early May the young leaves/growth tips at the top of each stalk are ideal for harvest.
As summer approaches, the leaves get tougher and more fibrous. So, this stinging nettle pasta recipe is best made with early-season, tender stinging nettle.
To avoid painful stings, harvest with gloves on unless you’re familiar with how to harvest gloveless!
b. Remove leaves from stems and get the right quantity.
You will only want to use the stinging nettle leaves and growth tips, not the more fibrous stems. Using kitchen scissors, cut the lower two leaves off the growth tips and snip the tender tops as shown below:
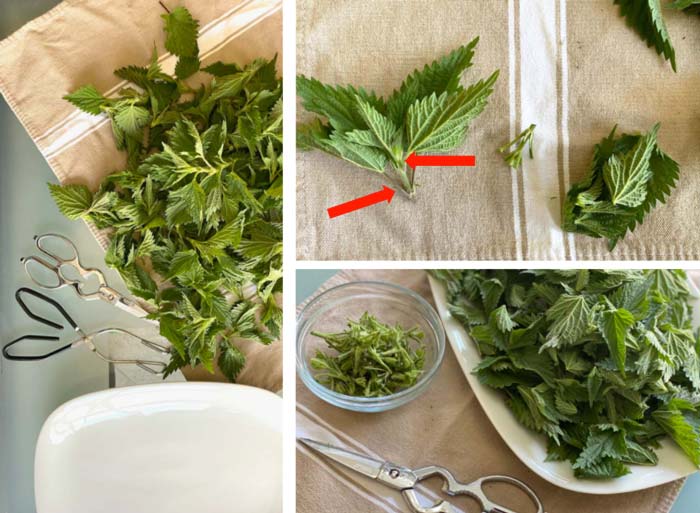
How much stinging nettle do you need for this recipe?
- If you’re buying or harvesting stinging nettle with stems on, you want about 100 grams (or 3.5oz) of tender growth tips; if you’re buying / harvesting nettle with long stems you’ll probably want to get double that to be safe.
- Once de-stemmed, you’ll have about 4 packed cups of raw nettle leaves. (weight: 78 gm or 2.7oz)
- Once blanched and pureed (with a small amount of water added), you want about 1.5 cups of nettle puree.
c. Blanch then ice bath to preserve most leaf color and texture.
Next, you’re going to flash boil/blanch your de-stemmed nettle leaves in salted water (~1 tsp salt) for 1.5-2 minutes.
Immediately transfer blanched nettles to an ice bath. Shocking greens after you cook them (going hot to ice) helps retain their color and texture by quickly halting the cooking process.
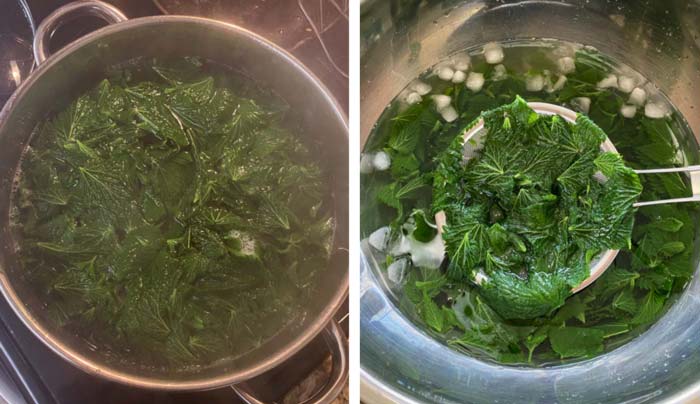
Stir leaves in ice bath for about 1-2 minutes to hasten cooling, then remove and strain. Lightly wring out nettle leaves by hand over bowl to remove excess water. Save this water in case you need a bit to help puree during next step.
d. Puree nettle leaves.
Next, puree the cooked stinging nettle leaves in a food processor. If necessary, add in a bit of the wrung-out nettle water, only using as much as needed to blend.
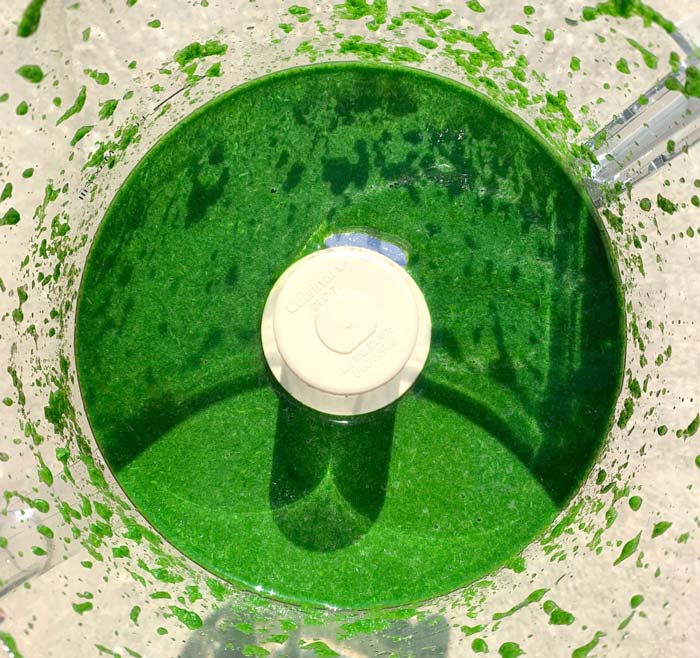
You want as little water as possible, enough to make a smooth puree, but no unnecessary water.
Step 2: Make the pasta dough
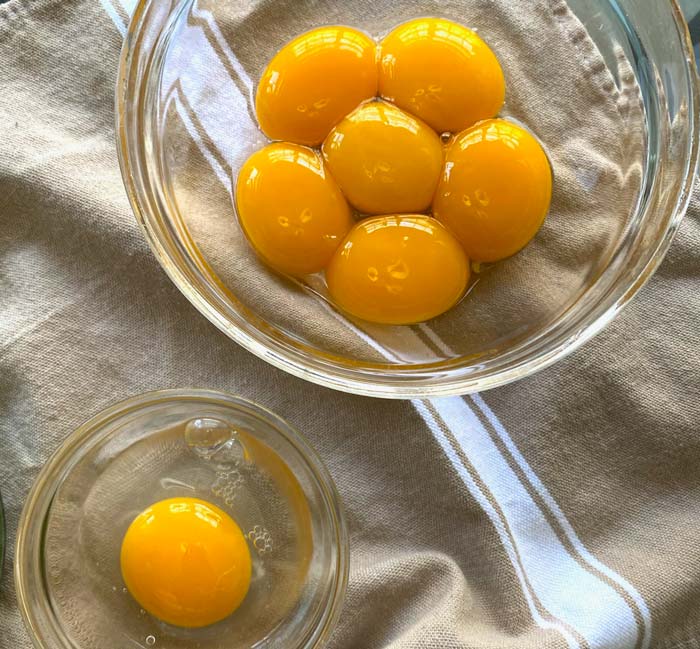
a. Separate egg yolks and whites.
Separate your egg yolks from the whites by passing the yolk back and forth between each half of the cracked shell and letting the whites drip into a bowl below.
We used 6 egg yolks from our Welsh Harlequin duck eggs, total weight 160g. Again, you can substitute ~8 chicken yolks, but consider measuring to 160 grams to keep ideal ratios.
You’ll also be using an additional one whole duck egg, including the whites.
b. Make a flour volcano (with part of flour).
In a large mixing bowl, make a “flour volcano” (large hill with a center indentation) using 600gm (~4 cup) of flour. Reserve the rest of the flour from the recipe.
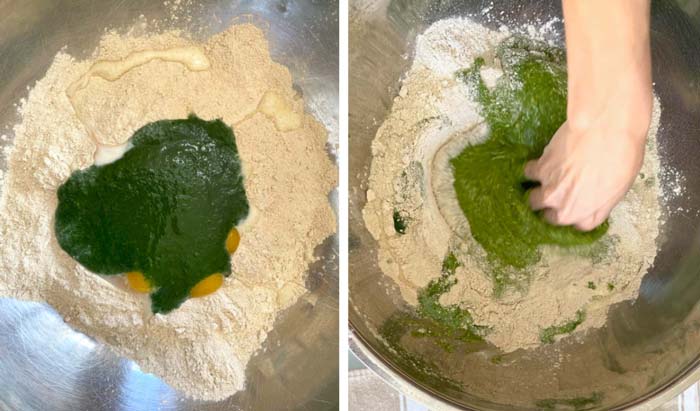
Add all remaining ingredients into the volcano (unbeaten egg yolks, extra whole egg, milk, salt, and nettle puree) and stir the wet ingredients in with your fingers to gradually incorporate.
c. Mix by hand then form into a smooth ball (adding more flour).
Continue mixing dough by hand, using the remaining flour as-needed. Your aim is to form the dough into a smooth ball with a moisture level/consistency that pulls cleanly from your hands.

d. Let dough rest in bag for 5-6 hours.
Place the ball of dough into an airtight bag or wrap it in saran wrap.
Side note: we recently stopped using plastic ziplocks and instead use Stasher silicone bags which are washable and will last forever. They can also be used for fermentation and don’t leach plastic compounds into your food.
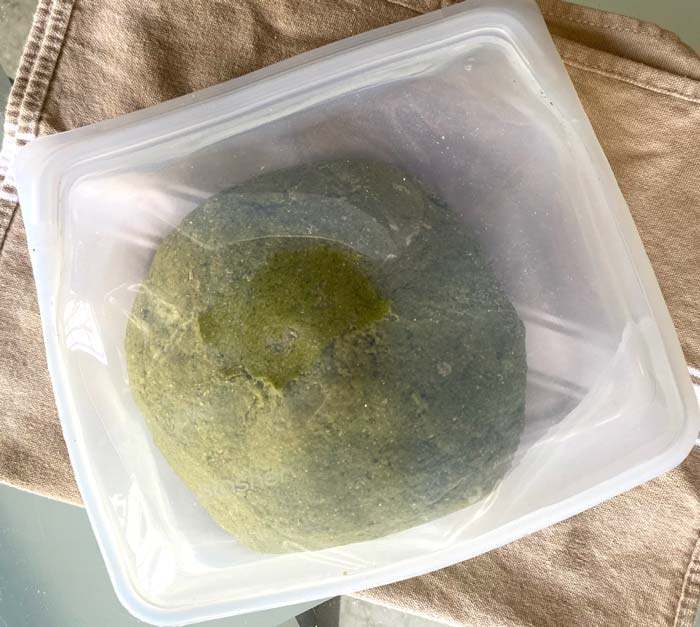
Let the dough sit for *4-5 hours at room temperature (inside bag) so the gluten in the dough has time to relax.
*This is for dough you’re planning to make into pasta the same day. If you’re NOT planning to make the dough into pasta within 5 hours, fresh pasta dough can last up to 2 days in the refrigerator or 1 month in the freezer.
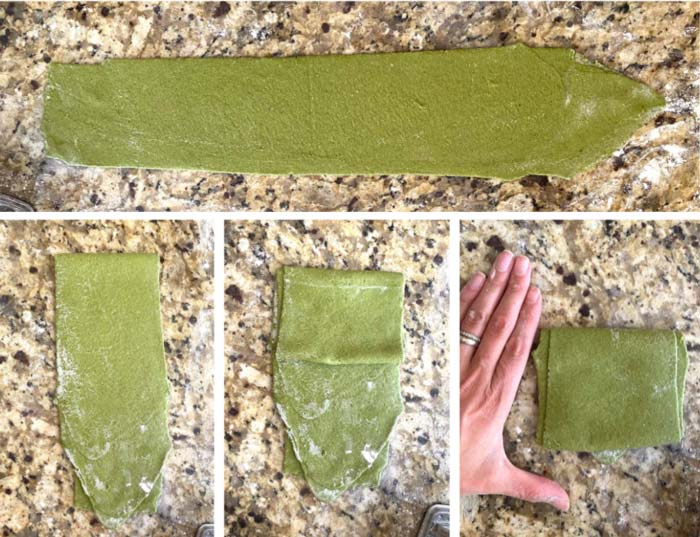
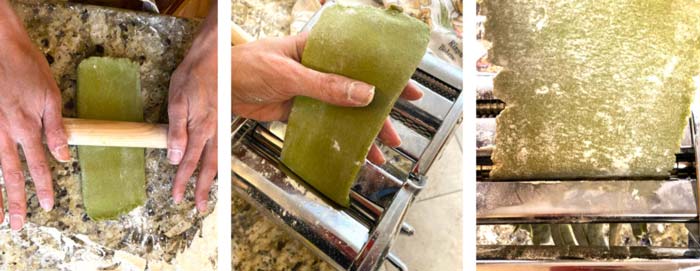
Step 3: Get perfect consistency by repeatedly folding and flattening strips of pasta dough.
When you’re ready to make pasta noodles, cut your ball of dough into 10-12 equal size chunks. You want them to be about the same size as the palm of your hand. Flour a counter surface adjacent to your pasta maker and have a rolling pin and pasta maker at the ready.
Starting with one chunk of your dough, dust the dough surface in flour and roll it with a pin to a thickness that it will fit into the flattening setting on your pasta maker. Then slowly run it through the pasta roller on the thickest setting.
(Important note: This recipe is best made into a thicker Fettuccine-style noodle.)
You’ll want to run each piece of dough through the pasta roller multiple times (5-10). After each pass we dust with flour as-needed, and fold the dough until it’s a flat piece of dough roughly the size of the palm of your hand (see image below). Repeat until the texture of the dough is silky smooth and perfect. This is where intuition and experience come in hand – there’s no exact way to tell you when the dough is “ready,” it just is.
*Your first time making pasta (or this recipe), we highly recommend taking notes and doing a test-run all the way through cooking on one chunk of your dough, then making adjustments (more/less flour or more/less runs through the roller) before continuing on with the other chunks of dough.
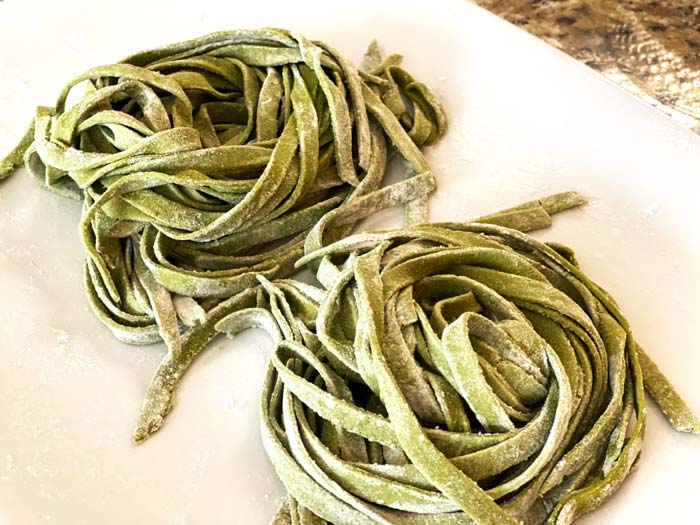
Step 4: Cut the noodles then use or store.
Next, use the cutter setting/attachment on your pasta maker to make your finished noodles.
What length should your noodles be? Your call, but we recommend no shorter than 12″ and no longer than 24″. As you flatten each piece of dough in prep for cutting, keep your desired noodle length in mind.
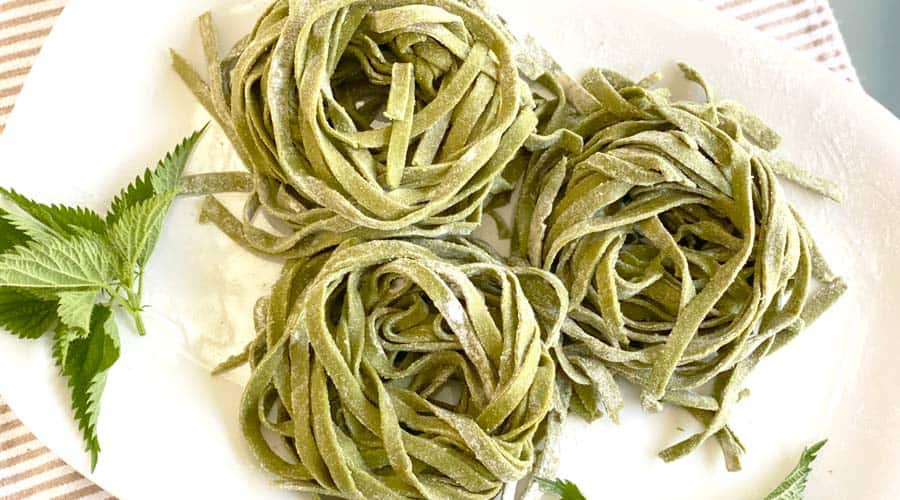
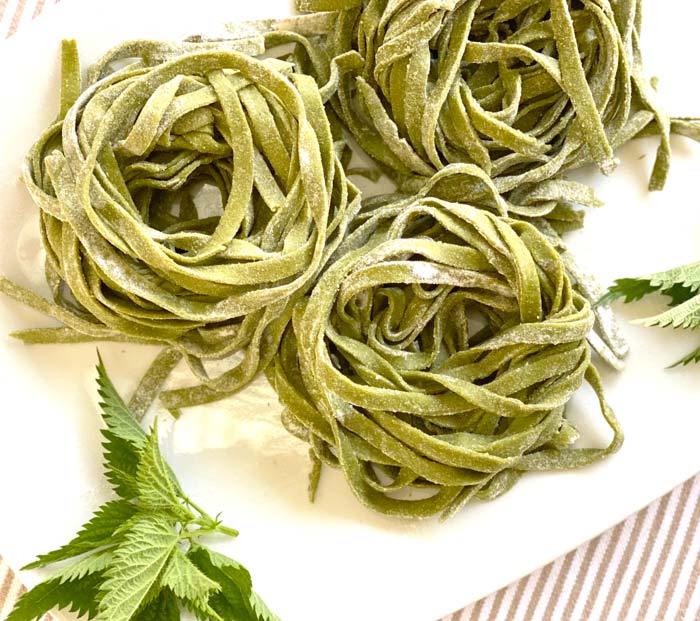
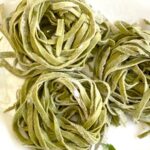
Dust just-cut noodles in flour to prevent sticking. Then twist each round of finished noodles into a pasta nest and cover with a tea towel or saran wrap so they don’t dry out. (Alternatively, you can hang the noodles on a pasta drying rack which is especially helpful if making lasagna-style noodles.)
You can immediately cook your noodles, which will yield a relatively short cook time, varying by thickness. (Ours took ~10 minutes.)
You can store your finished noodles in a bag in your fridge for up to 2 days or a freezer (ideally in a vacuum-sealed freezer bag to prevent freezer burn) for 6 months or longer. Dried and/or frozen noodles will take longer than fresh noodles to cook.
Also, if you don’t have time to turn all your dough into noodles immediately, you can:
- fridge – store it in your fridge (bagged or wrapped) for up to 48 hours, let it come to room temp then make it into noodles, or
- freezer – store it in your freezer (vacuum sealed freezer/silicone bag) for several months, let it thaw to room temp, then make it into noodles.
Step 5. Cooking and eating tips.
These duck egg stinging nettle pasta noodles are so delicious that it doesn’t take much to bring them to life. However, here are a few tips:
a. If your noodle nest has been sitting on the counter or the fridge for a while before cooking, they may stick together a bit. If so, simply pull them apart before putting them in the boiling water.
b. Salt your boiling water! We can’t say this enough: heavily salt your water before boiling and adding your noodles. We usually use at least a couple of teaspoons of salt in our pasta water.
Only a small amount of salt will penetrate your cooking noodles, but it makes them much better in the end. A chef friend taught us this simple trick years ago.
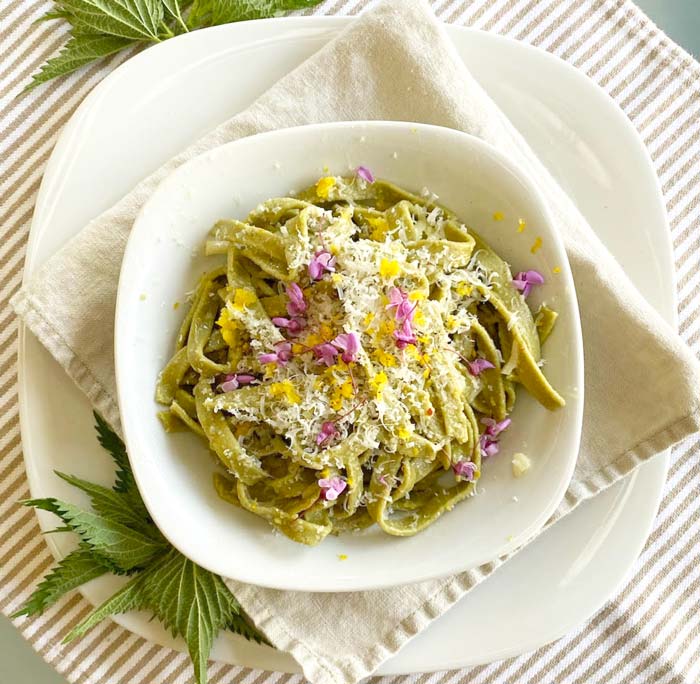
c. The first time we tried our noodles we simply put a bit of high quality extra virgin olive on them. Simple. Delicious.
The second time, we used truffle oil, a dusting of parmesan and fontina cheese, fresh Meyer lemon zest, and redbud flowers. Amazing.
The third time we upped our game with morel mushrooms in a seasonal recipe that is one of the best things we’ve ever eaten: morel mushrooms with stinging nettle pasta, redbud flowers, and poached duck eggs.
Main takeaway here: you don’t have to do much to these noodles to turn them into a delicious meal.
Recipe: Duck egg stinging nettle pasta with organic white whole wheat flour
Duck egg stinging nettle pasta with white whole wheat flour
Equipment
- pasta machine/roller
- large silicone or ziplock bag
Ingredients
- 6 duck egg yolks (160g) (or 8 chicken egg yolks)
- 1 whole duck egg, whites and yolk
- 700 gm King Arthur's organic white whole wheat flour (about 4.75 cups)
- 30 gm whole grass-fed organic milk (about 2 tablespoons)
- 8 gm salt (about 1 heaping teaspoon)
- 1.5 cups stinging nettle leaf puree (see article notes - you'll start with about 4 packed cups of raw nettle leaves; weight: 78gm or 2.7oz)
Instructions
- Flash-boil stinging nettle leaves then shock in ice bath as detailed in article & photos. Strain and puree. You want about 1.5 cups of stinging nettle puree.
- Separate six duck egg yolks and whites. Make "flour volcano" with 600gm (~4 cup) of flour. Pour all other ingredients into crater, then swirl in with fingers to incorporate. Form dough into smooth ball, adding more flour as needed.
- Put dough ball into airtight bag or wrap with saran wrap. Let rest for 5-6 hours at room temp giving the gluten time to relax, creating ideal consistency for noodles.
- Remove dough from bag. Flour counter surface and set up pasta machine. You'll also want a rolling pin handy. Cut the ball of dough into 10-12 equal-sized pieces, each about the size of the palm of your hand. Dust the first piece with flour and use rolling pin to roll it into a thin enough strip to fit into the flattening attachment of your pasta maker. Lay the flattened dough strip on the floured counter surface, fold, and repeat about 5-6 times. See photos and notes in article.
- Once the piece is silky smooth and has the perfect consistency, dust it with flour and run it through the pasta noodle cutter part of your pasta machine to make a fettuccine-style noodle. (Or you could leave as-is for a lasagna-style noodle).
- Do final flour dusting (to prevent noodles sticking together where cut), then twist each round of cut noodles into a nest or hang noodles from rack to dry. You can cook them immediately (they take about 10 minutes to cook when raw and unfrozen). Or you can dry and freeze them for later use.
We hope you enjoy this seasonal recipe as much as we do. Let us know how you use your duck egg stinging nettle pasta in the comments!
KIGI,