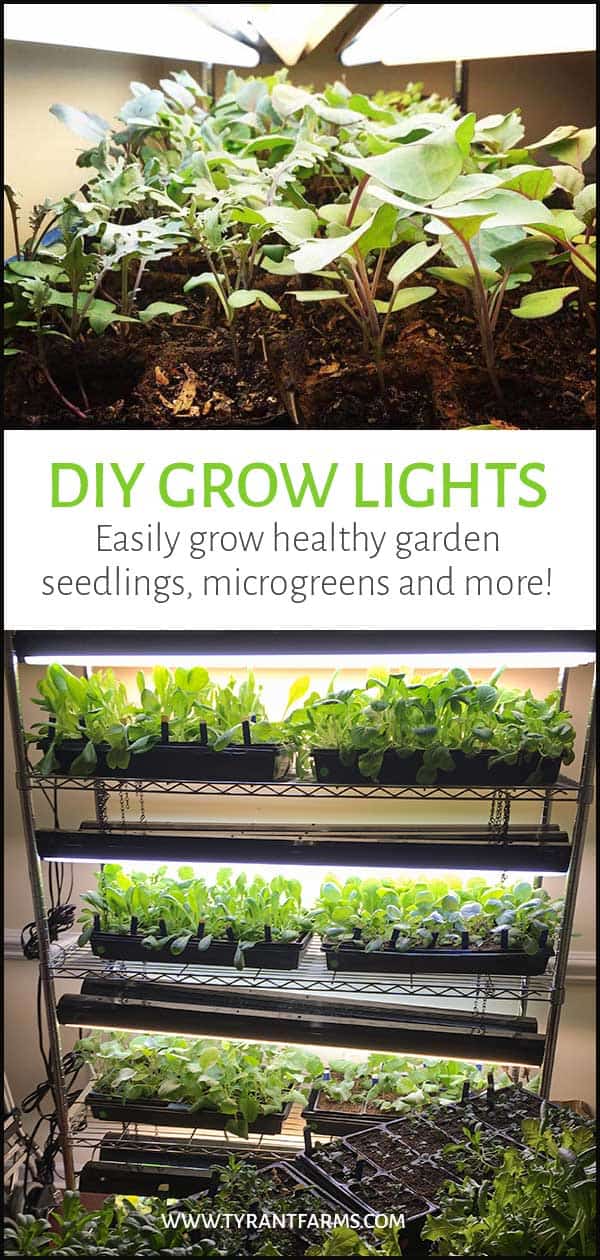
DIY grow lights: easily grow garden seedlings, microgreens, and more

Tyrant Farms' articles are created by real people with real experience. Our articles are free and supported by readers like you, which is why there are ads on our site. Please consider buying (or gifting) our books about raising ducks and raising geese. Also, when you buy through links on our site, we may earn an affiliate commission. Learn more
Want your own affordable DIY grow lights that can grow thousands of dollars worth of garden seedlings or microgreens every year? We’ll show you how!
We’ve been gardening for over a decade. Each year we learn a little more and get a little better at growing our own organic food using no-till methods.
We can point to a few key techniques and technologies that have made the biggest difference in our gardening success. It’s sort of like the 80-20 rule, wherein 20% of what you do, yields 80% of the results.
At the top of the list of where we get the most bang for our buck:
- using no-till organic growing methods; and
- using indoor grow lights.
4 reasons to use your own indoor DIY grow lights
There are quite a few benefits to having your own grow light system. Here are our top four reasons:
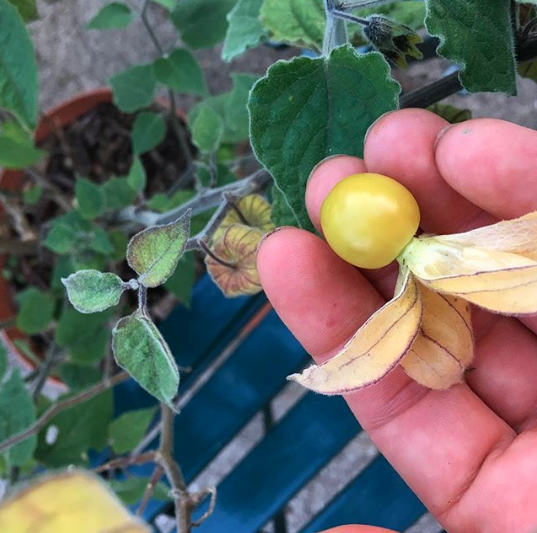
1. When you have grow lights, you can grow any plant variety you want.
Prior to having our DIY grow light system, we had to buy whatever seedlings happened to be available at the garden center (usually “vanilla” varieties that weren’t very interesting). Now we can grow the varieties we love or unusual varieties that we want to try — almost none of which would ever be at a garden center.
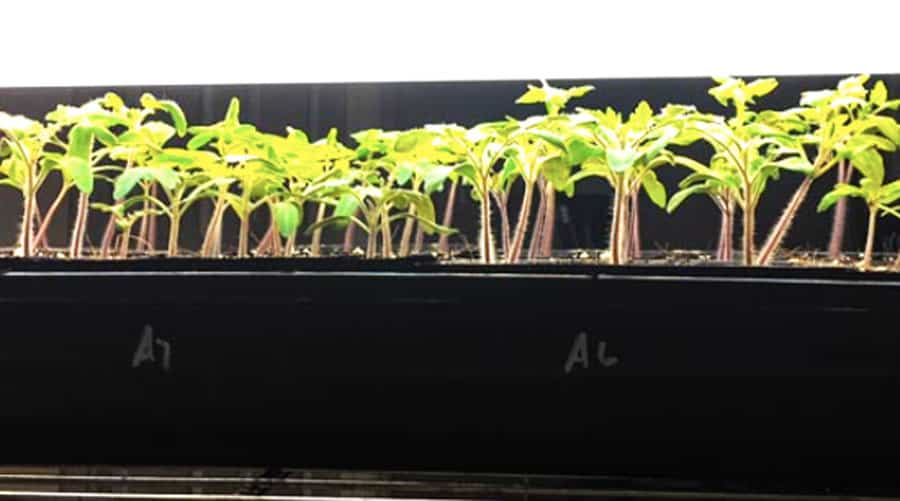
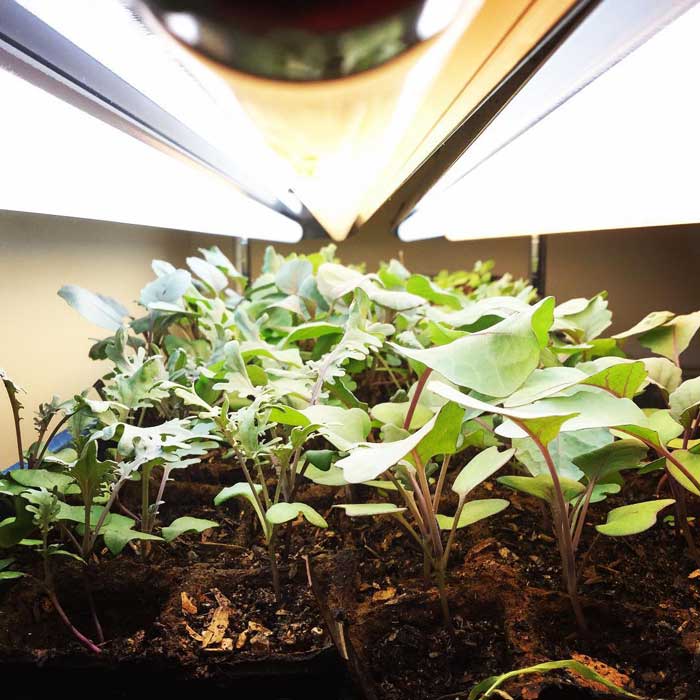
2. Grow lights allow you to easily grow healthy seedlings indoors.
Prior to having our own DIY grow lights, we’d also try to start our seedlings indoors in front of the sunniest window in our house. We’d do our best to take our seed trays outdoors whenever the weather permitted, which is hard if you’re not home and heartbreaking if a bad storm happens to hit while you’re away.
Since we don’t have very sunny, south-facing windows in our home AND our sunniest windows are UV coated to make them more energy efficient, this often caused leggy, unhealthy seedlings due to inadequate light.
Our DIY grow light system ensures that our seedlings get ideal amounts of light indoors, even when it’s freezing, stormy, or cloudy outside.

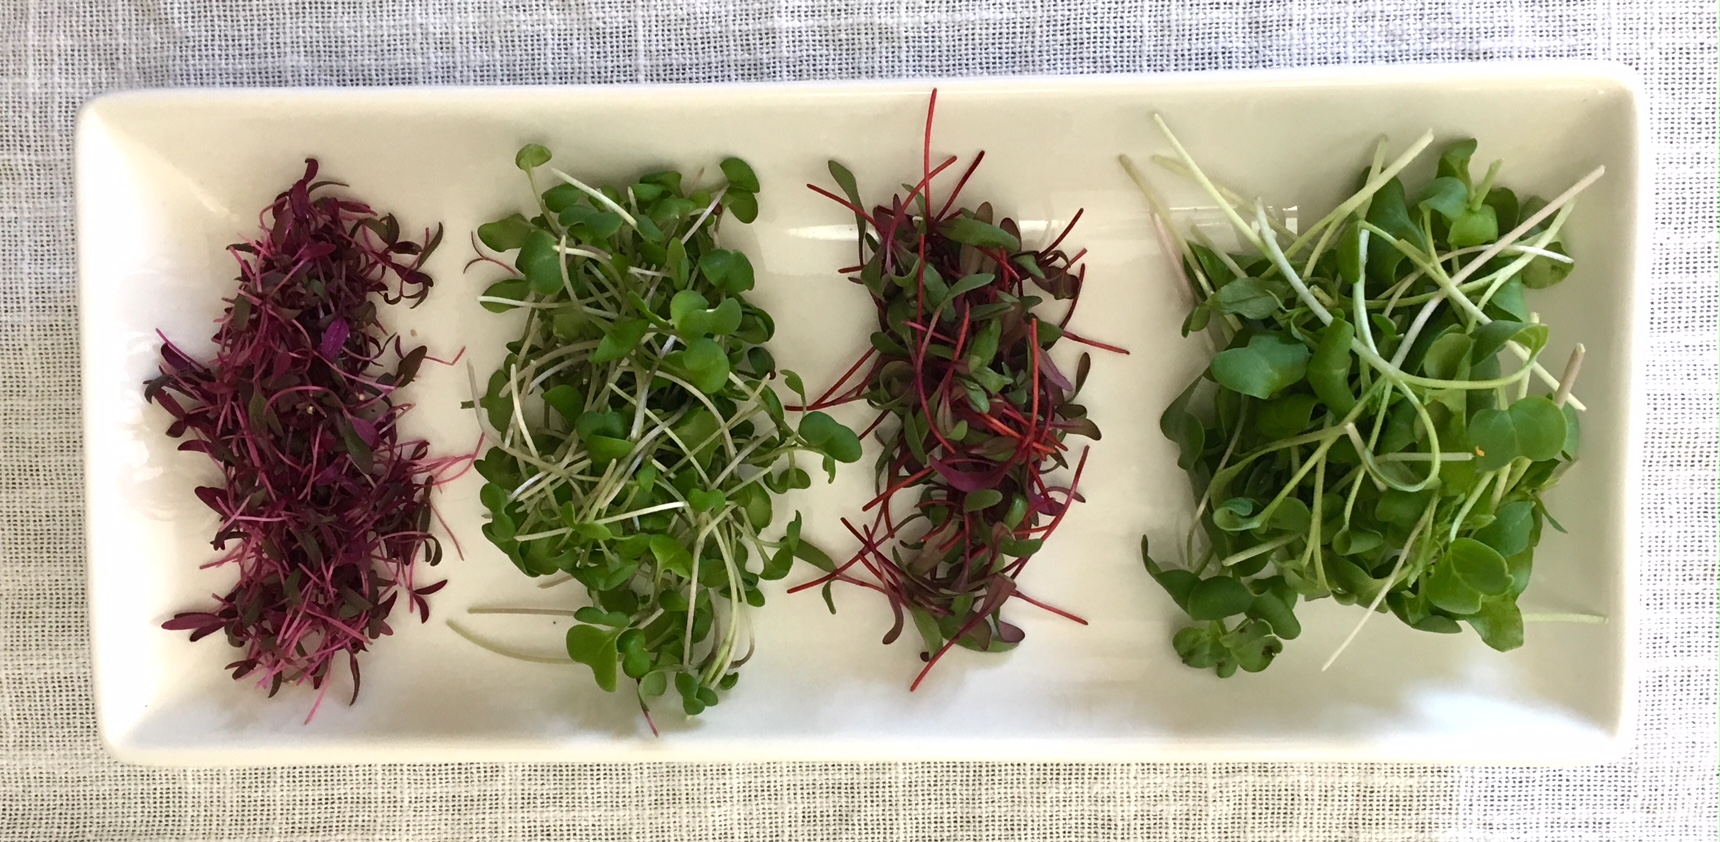
3. You can grow your own microgreens.
During periods that we don’t have our DIY grow light system filled to maximum capacity, we like to grow microgreens.
Microgreens add loads of highly concentrated nutrition and flavor to a meal, and they also provide beautiful garnishes that can turn an ordinary-looking dish into something extraordinary. That’s why gourmet chefs use microgreens.
4. You can grow money… sort of!
If you have a large garden like we do, buying enough garden seedlings to fill out your garden will probably set you back many hundreds of dollars each growing season. (We garden year round, including in the cold months.)
Not to mention, it’s virtually impossible for us to find organically grown seedlings locally, whereas we use organic seed starting mix, organic fertilizer, and no pesticides on our own seedlings. All of our seed trays and cells are reusable (except when we use biodegradable cells) and the fluorescent lights will last for years.
That means the upfront investment of a few hundred dollars into a grow light system can easily pay for itself after a single growing season and save you hundreds or thousands of dollars the longer you use it!

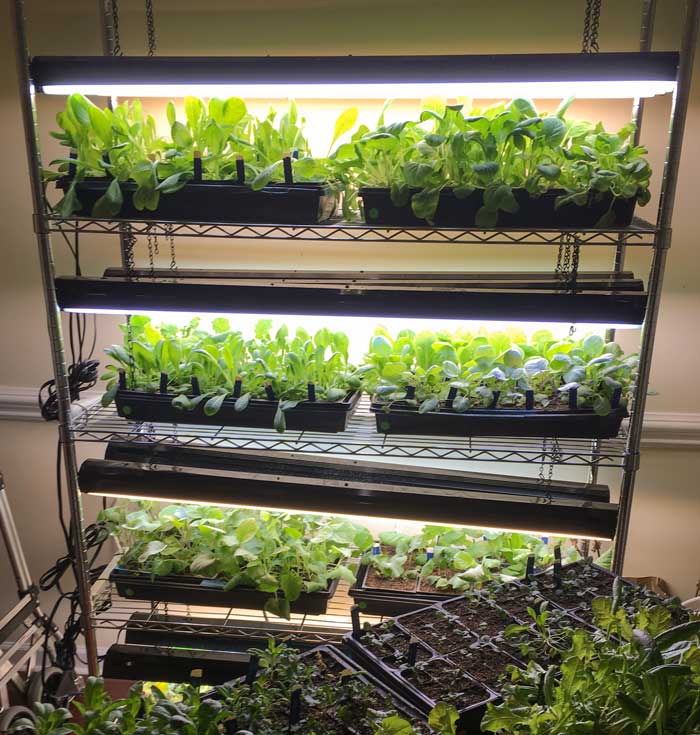
How to build your own indoor DIY grow light system
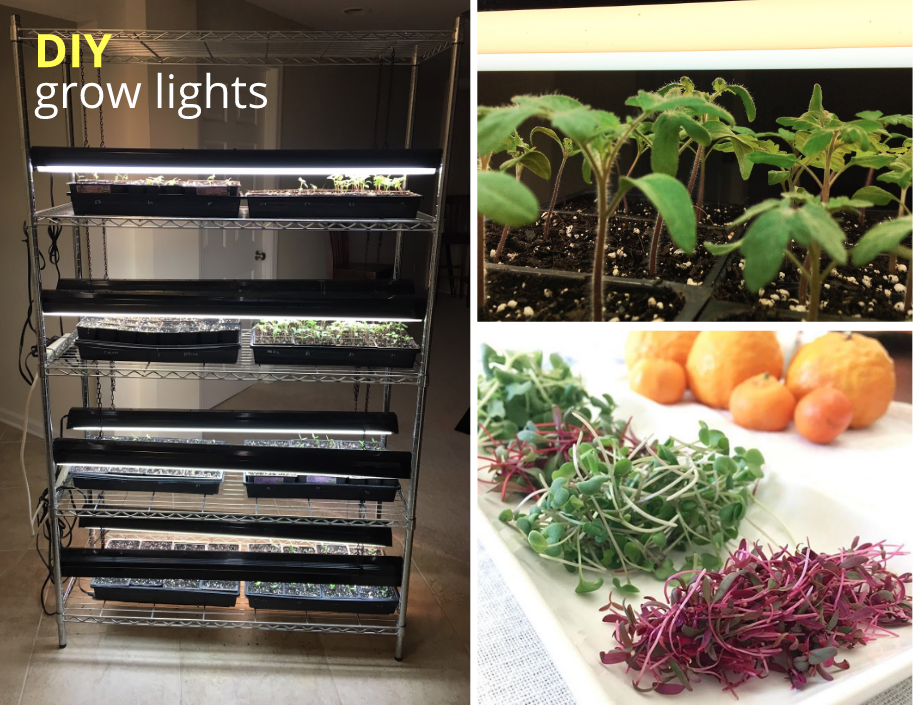
We use a five shelf grow light system (74″ high x 48″ wide x 18″ deep). If you want to set up your own DIY grow light system like the one we’ve used successfully for many years, use the materials list below to get exactly what you need.
Materials/supplies you’ll need for DIY grow light system
Total price: About $350 depending on current pricing on Amazon
Shelves, supports, electrical supplies
- 48″ Multi-Tier Steel Shelving Unit (48″L x 18″W x 82″H)/ there are a few product options you can choose from here:
- Two 6-Outlet Power Strips – quantity needed: 1 (because it’s a 2-pack)
- 20 x 1 Ft Weldless Chains (various color finishes) – quantity needed: 1 ft strips x 20 total strips (whole roll, 50′) If you get LED lights or some of the fluorescent shop light options that come with their own chain and s-hooks, you won’t need to buy a separate chain and s-hooks.
- 20 S-hooks (various color finishes) – quantity needed: 20 hooks so you only need one pack
- Zip Ties – quantity needed: we used 10-12 but they come in a bag of 100 (you can never have too many zip ties around!)
Lighting supplies:
Choose EITHER LED OR Fluorescent Lights. LEDs may be a touch more expensive up-front, but their costs are quickly coming down and the benefit of having healthier plants may outweigh the expense.
Option 1: LED Lights – These options assume 1 LED light strip per shelf. We’ve included a few options in case one is out of stock:
- 48″ 64W Full Spectrum LED Light Strip – quantity needed: 5
- 48″ 60W Full Spectrum LED Light Strip – quantity needed: 5
- 4 pack – 48″ 40W Full Spectrum LED Light Strips – quantity needed: 1-2
Option 2: Fluorescent Lights – This is what we have used for many years in our grow light system. You will need the housings + bulbs:
- 48″ Fluorescent Shop Light Housing – quantity needed: 10 (*Fluorescent shop light housing units are increasingly hard to come by since LEDs are becoming the standard. Search online or see if your local Lowes or Home Depot carry them.)
- 48″ COOL LIGHT Fluorescent Bulbs – quantity needed: we used 1 cool light bulb in each housing unit, or 10 total cool light bulbs
- 48″ WARM LIGHT Fluorescent Bulbs – quantity: same as above
*It’s very important to use a cool light / warm light fluorescent bulb combo to replicate the full spectrum of sunlight! See why in the FAQs section at the bottom of this article.
How to set up your DIY grow lights:

Step 1: Select indoor grow light location.
Put your shelving units together and into the location of your home where you want them. Ideally, you can put them on a tile or vinyl floor rather than wood or carpet in case of water and soil spills.
Step 2: Attach power strips to shelving units.
Zip tie your power strips on to the side of your shelves. The top power strip will plug into the lower power strip which will plug into a wall outlet. This allows you to turn all the lights on and off by switching on or off the lower power strip.
Step 3: Assemble grow lights.
Depending on the lights you purchase:
Option 1: For fluorescent lighting:
- Put the bulbs into the light housing units, alternating cool and warm bulbs. Each shelf should have two fluorescent bulb housing units, with alternating cool-warm bulbs. (Cool-warm-cool-warm or warm-cool-warm-cool.)
- Use the chains and s-hooks to hang the lights from the shelf above them. You’ll probably need pliers to pry open and close the s-hooks and to modify the length of each piece of chain. You can easily adjust the chains without cutting them by attaching the s-hooks into the chain links, so the lights hang at varying heights as your plants grow.
Option 2: For LED lighting:
- Hang lights on each shelf as follows: 24-28″ overhead for young sprouts and seedlings; 18-24″ overhead once plants are about 4 weeks old; 12-18″ if you have flowering or fruiting plants.
Step 4: Turn on grow light unit and make sure all bulbs working.
Plug your light housing units into the power strips and use zip ties to bind up excess electrical lines. Turn the entire unit on using the switch on the lower power strip to make sure all the bulbs work.
Step 5: Start growing!
Place seed trays or seedlings under grow lights.
DIY grow lights frequently asked questions
We’ve gotten a lot of questions about using our grow light system over the years, so here’s a list of frequently asked questions and answers to help you:
Question: Do I need to keep my grow lights on before the seeds germinate?
Answer: You typically don’t need to turn your grow lights on until AFTER your seeds have germinated. However, here are some reasons we’ll turn our grow lights on prior to seed germination:
- If we’re starting a lot of warm weather seeds indoors (tomatoes, peppers, eggplants, etc) that will sprout faster in warmer soil, we’ll turn our lights on and put the seed trays ON TOP of the light housing units. The lights run about 80°F, which is like having a seed starting heat mat – the perfect temperature for heat-loving seeds to sprout.
- If you’re growing “light-dependent” seeds that have to be surface sown and require light to germinate, your grow lights will need to be turned on prior to seed germination.
- If you’re worried about mold forming on the soil surface. Good air circulation and not overwatering is usually all that’s needed to keep mold from forming on top of the soil surface in the cells. However, UV light can help too. If you have unusual seeds that take a long time to germinate (1 or more weeks) and/or your grow light system is not in a room with good air circulation, it might be a good idea to keep them on even before the seeds have germinated.
Question: Do seedlings need a simulated night and day? How long do I leave my grow lights on once the seeds have sprouted?
Answer: Yes, plants need to “sleep,” just like people do, so simulating a day-night cycle is important to grow healthy seedlings. You can either turn your grow lights on when you wake and turn them off before you go to sleep OR get an automatic timer and set it to turn your system on/off at specific times.
Question: How far above the top of the plants do my grow lights need to be positioned?
Answer: We keep our fluorescent bulbs no more than 1-2″ above the top of our plants. If the bulbs are directly touching the plant, the leaves may get sunburned and wilt.
As mentioned above, LEDs are a little more nuanced:
- 24-28″ overhead for young sprouts and seedlings;
- 18-24″ overhead once plants are about 4 weeks old;
- 12-18″ if you have flowering or fruiting plants.
Using LEDs may mean that you’ll need to space your shelves further apart and have fewer shelves in your setup in order to get ideal distance between seedlings and LED bulbs.
Question: Can I immediately transplant my seedlings outdoors after starting them under grow lights or do I need to “harden them off” first?
Answer: The intensity and UV index of the sun is much greater than your indoor grow lights. That’s why you’ll need to “harden off” your seedlings for about 7-10 days before you transplant them outdoors – assuming you haven’t already been bringing your seed trays in and out as weather allows.
Hardening off your seedlings allows them to acclimate to the intensity of natural sunlight and allows toughens their stems and leaves to wind.
Question: Do I need to harden off my grow light seedlings before putting them in full sun?
Answer: Yes, seedlings grown under grow lights need to be gradually transitioned to full outdoor sunlight or they can get burned or killed. Here’s how to harden off your seedlings:
- Days 1-3: 3 hours of direct sunlight (or put your seedlings in a shady spot).
- Days 4-6: 3-5 hours of direct sunlight (or put your seedlings in a part shade spot).
- Days 7-10: 5-8 hours of direct sunlight.
- *If your plants start looking wilted or sunburned, move them back out of direct sunlight asap and give them 2-3 days to recover in a shady location. Also, keep in mind that your trays will dry out faster outdoors on warm, sunny days than they will indoors under grow lights, so keep an eye on their water needs.
Question: How long do fluorescent bulbs last?
Answer: It depends on how many hours you use them. We use our fluorescent bulbs during each season and they’ve lasted for multiple years, producing healthy plants each season. Every type of fluorescent bulb is different, so there are no absolute answers here (the packaging should give you estimated life expectancy of your bulbs).
If you’ve been using the same bulbs for a while and your seedlings seem weak and leggy, swap your bulbs out asap.
Question: Why do you use cool and warm light fluorescent bulbs in your grow light system?
Answer: Sunlight contains the full ROYGBIV light spectrum that plants need to grow. The two most essential light spectrums are RED and BLUE.
- Red spectrum light = plant growth and flowering.
- Blue light = proper plant size, density, and proportions.
By using offsetting cool and warm fluorescent bulbs in your light housing units, you ensure that your plants get a wide range of light that approximates the sun’s full spectrum, thereby allowing you to grow healthy seedlings and microgreens:
- “Cool white” fluorescent bulbs – yellow, green, blue spectrum with a kelvin range between 5000 – 6000K.
- “Warm white” fluorescent bulbs – orange, red spectrum light with a kelvin range between 2700 – 3500K.
We hope the information in our DIY indoor grow light guide helps you take your gardening game to the next level! Have other questions about making or using your own DIY grow lights? Ask us in the comments!
KIGI,

As I’ve said before your website and links are great.
I’m an a apartment gardener. I use a very similar setup to you though I have a 6ft east facing window and only use two shelves of my rack.
For the most part I grow salad greens.
As I’ve pointed out the expenses of growing under lights my question to you was does a mirror nano tech reflector make sense?
They are not cheap but the seller claims your plants get more light.
I’m not looking to save money on salad greens but I don’t want to waste money either.
Hi Roger! We’ve never used reflectors and don’t intend to since we’re only growing seedlings up to the point of transplant (no more than 6-8 weeks). If you’re aiming to grow salad greens all the way to maturity, you might get more efficient/faster production and healthier plants with reflectors, but we can’t provide any personal opinion given that we haven’t done our own A-B test on both options (plants with and without reflectors). I also wonder if you couldn’t do a DIY reflector setup to cut costs, assuming there is a benefit. But if you’re already getting good results with your current setup, don’t fix what isn’t broken!
Though Clarie’s question is old it hasn’t been answered. And it needs answering.
As Aaron has told me it just depends, lol.
So we have to make some assumptions.
Let’s say your using two shop lights with 40 watt tubes. That”s 160 watts. Let”s say you run your lights 16 hours a day. That’s 2560 watts. Let’s say your actual electric cost is 20 cents a kwh. That works to a bit over 50 cents a day. Or over $15 a month. If your using high out put tubes add another third.
To find your real electric cost divided your kw usage by your total bill. Don’t go by what they say they charge.
Great minds seem to think alike. I was amazed at how similar seed starting set up as to mine. Everything from the shelving to the chains, s hooks and even using zip ties to attach the photo strips.
But we depart at this point. I’m an apartment gardener with an easy facing window so use only two shelves. A single 1020 flat will produce all the transplants I can use. Most of what I grow under lights is “seed to table”. Mostly salad greens.
Nice! We currently use a combination of LED and our older fluorescent grow lights. We like both systems, but it’s getting harder to find fluorescent lighting supplies now that LED systems have gotten so much less expensive than they used to be. Kudos to you for producing your own salad greens under your grow lights.
Your articles are great. And the links are even better. Didn’t know Amazon sold many of the items or that they even existed.
My main lighting consistent of some very over priced fluorescent fixtures from Johnny’s. But they claim a good reflector can double a lights usable output. What do you think?
Thank you and glad to hear the information and links we provided are helpful for you! Ok, regarding reflectors with your grow lights, our answer is: it depends. (Don’t you love the clarity of that answer?) What type of grow lights are you using? What type and size of plants are you growing? How long do you intend to grow the plants – to seedling transplant stage or to maturity?
The reason we don’t use reflectors in our indoor grow light system is because we’re only growing seedlings indoors for about 6-8 weeks and we also put the seedlings out in natural sunlight any day where the weather/temperatures permit. If we were growing larger plants and/or plants to maturity, then it might make sense to use reflectors. However, with some full reflector systems you then create conditions of inadequate airflow so you have to buy more stuff (blowers, temperature controls, etc). We like to KISS and use the least amount of equipment possible to get the desired results. We also subscribe to the Warren Buffet axiom of “don’t ask the barber if you need a haircut.” The barber is always going to recommend a haircut just as a garden supply company is always going to recommend you buy more equipment. If you’re just growing garden seedlings, you most likely don’t need to buy reflectors to achieve your desired results.
Hi Aaron! I have a question about the led lights, according to the led lights that you have indicated, all of them are full-spectrum, however, the photos show it as white color, is that the same led light? I’m planning to use led lights in my project and I was wondering use 4000k white led strips. Can I use it?
Hi Aaron, how about running cost, power bills, have you found its been expensive?
Have they developed any LED lights that are suitable for growing?
Yes, there are plenty of good LED grow lights out there, they just tend to be a good bit more expensive than the florescent setup we have here. On the flip side, our setup wouldn’t work for growing larger plants, it’s designed for growing small plants and (primarily) seedlings. If you’re growing larger plants indoors, LEDs work well.
Thanks