
Pumpkin champagne? No, this recipe is not made from grapes from the Champagne region in France and it’s not produced under the rules of the appellation.
In fact, as the title indicates, it’s not even made from vinifera grapes, it’s made from pumpkins. Not just any pumpkins, mind you. This recipe is made using a deliciously sweet heirloom pumpkin with its own pedigree, heritage, and family story to tell…
The Williamson Pumpkin
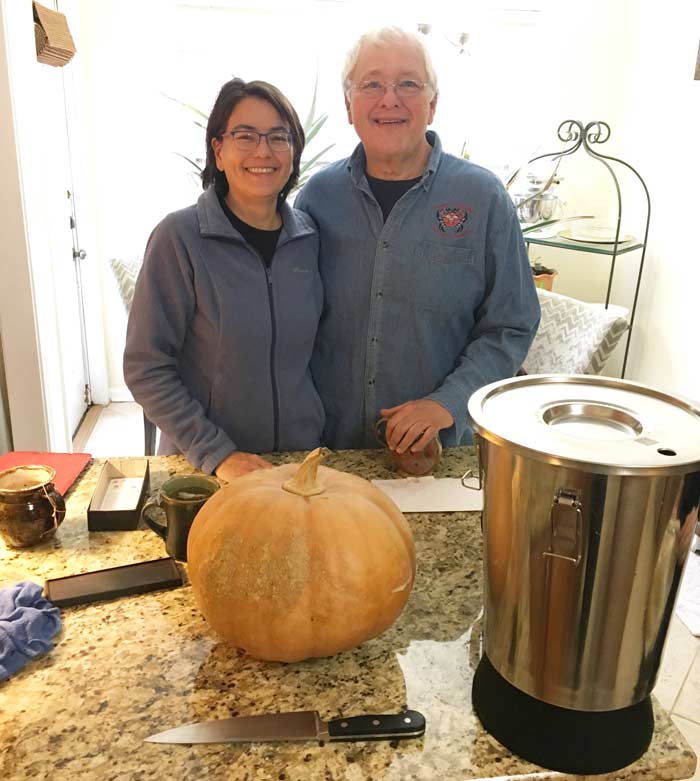
Andrea Deyrup and Tony Williamson in front of a Williamson pumpkin that’s about to be made into champagne.
A longtime friend of ours is Dr. Andrea Deyrup, a pathologist who used to live in Greenville, SC, and work at Greenville Hospital System (now Prisma Health). Among many things we’re thankful to Andrea for is introducing us to ducks.
Then Andrea met and fell in love with a gentleman by the name of Tony Williamson, who happens to be a world renowned mandolin player. Next thing we knew, she was moving up to his North Carolina homestead, getting hitched, and teaching at Duke University.
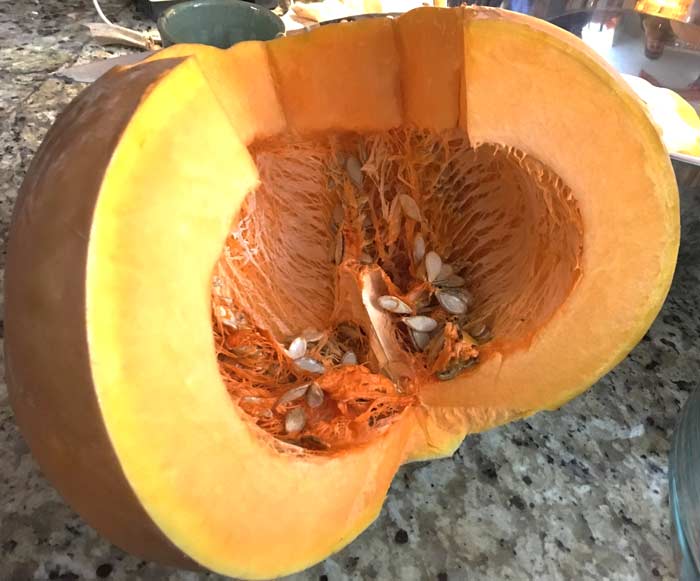
Tony’s family has lived in Chatham County, North Carolina, for generations. Hundreds of years ago, a Native American tribal chief in the area gifted the Williamson family some pumpkin seeds. The variety’s characteristics:
- 10-20 lb fruits (can grow as large as 35 pounds in rich soil + irrigation),
- high yields on each plant,
- incredibly sweet with bright orange flesh,
- strong resistance to pests.
Andrea describes the Williamson pumpkin as having a nearly cantaloupe-like flavor. We agree. In fact, I enjoyed eating small slices of the pumpkin raw.
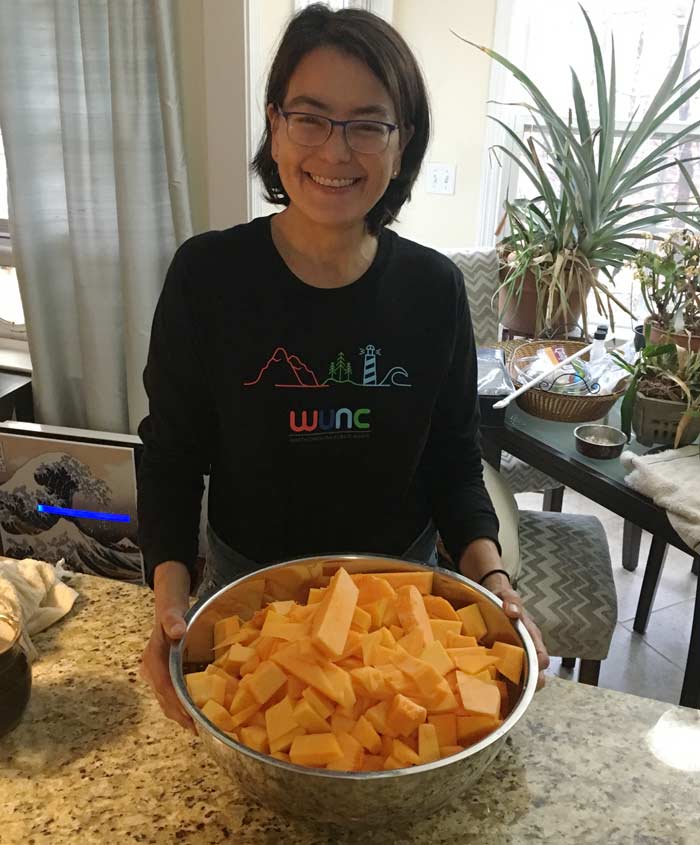
Andrea showing off a bowl of freshly chopped Williamson pumpkin (prior to grating) that we’re using to make pumpkin champagne.
Williamson pumpkin seeds were passed down from generation to generation, but were nearly lost in the late 20th century during a time period in which nobody in the family gardened or farmed. Today, Tony and Andrea produce lots of food on their homestead, including growing the treasured ‘Williamson Pumpkin,’ a pumpkin that is “never sold, but only given freely,” as they say. They seed share as much as possible to keep the strain alive.
If seeds could talk, these Williamson pumpkin seeds would have quite a story to tell. Pumpkins were one of the world’s first domesticated crops and different varieties were common throughout the Americas by the time of European contact. Archaeologists have found domesticated pumpkin seeds in Central Mexico that date back 10,000 years.
Tony’s parents were teetotalers who used the Williamson pumpkin purely for food — and we can certainly attest to it being an amazing pie pumpkin. However, Tony and Andrea are wine aficionados who can talk more about a bottle of wine from their favorite region in France than most people can talk about their own children.
Thus, they’re constantly experimenting with homemade meads made from honey they produce, fermented flower cordials, and wines. Given her well-developed nose and palate, when Andrea told us about how good their pumpkin champagne was, our interest was piqued.
For you purists out there, yes, we should probably call this recipe a “sparkling pumpkin wine” rather than a “champagne,” but we’ll stick with the name Andrea and Tony used since it’s their pumpkin and their recipe. If you find the terminology offensive, please summon a more acceptable nomenclature in your mind when you read the word “champagne” in this article.
Do you have to have a Williamson pumpkin to make this pumpkin champagne recipe?
No! Assuming you’re not one of the lucky handful of people in the world with access to the Williamson pumpkin, you can substitute other varieties. Just make sure they’re very sweet-fleshed for best results.
For instance, one of the sweetest pumpkins we’ve ever grown is the Japanese ‘Black Futsu.’ You can also use a less sweet pumpkin/winter squash variety and just add more sugar at the outset to compensate.
An experience to remember: making pumpkin champagne with Tony and Andrea
In late February, Tony and Andrea came down for a visit. Delicious food was made (we won’t list all the goodies made but will note that a chunky Williamson pumpkin pie was served for dessert, which you’ll see in our recipe section soon).
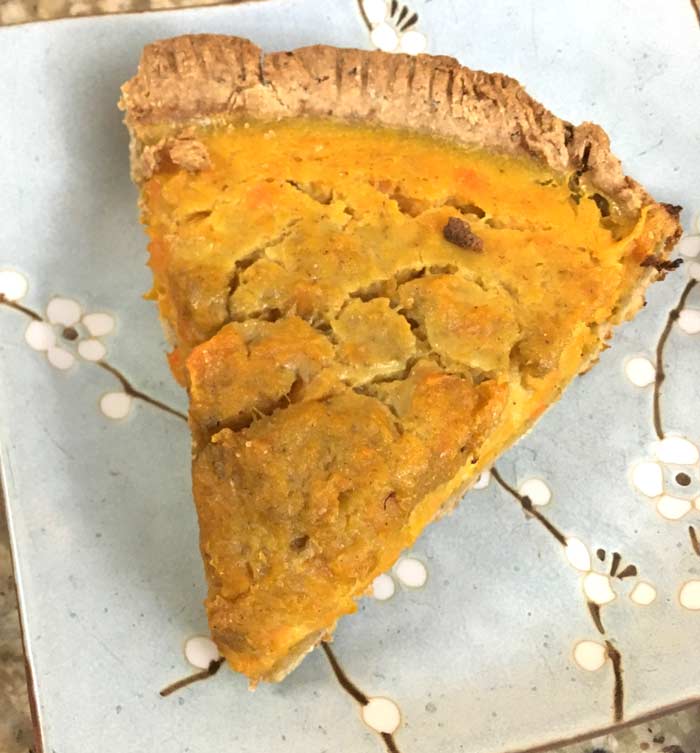
A “chunky” pumpkin pie made with roasted Williamson pumpkins. This was sooo good! The pumpkin meat wasn’t pureed after roasting, just mushed with a fork. Many people don’t realize that electric food processors weren’t invented until 1,500 BCE. (Just kidding.)
Wonderful conversations were had, including discussions about love, marriage, gardening, traveling, overcoming grief and depression, the latest Native American archaeology findings (Tony and I especially share a love of this subject), and other topics.
Now, when there’s a world-class musician staying in our home, you’d better bet your donkey we’d ask him if he’d like to perform. Tony was happy to oblige. In fact, not a single day passes when he doesn’t play and he seems most himself with a mandolin in his hands.
So we gathered around him and watched in awe as he merged with his instrument in our living room:
How to make Tony and Andrea’s pumpkin champagne recipe
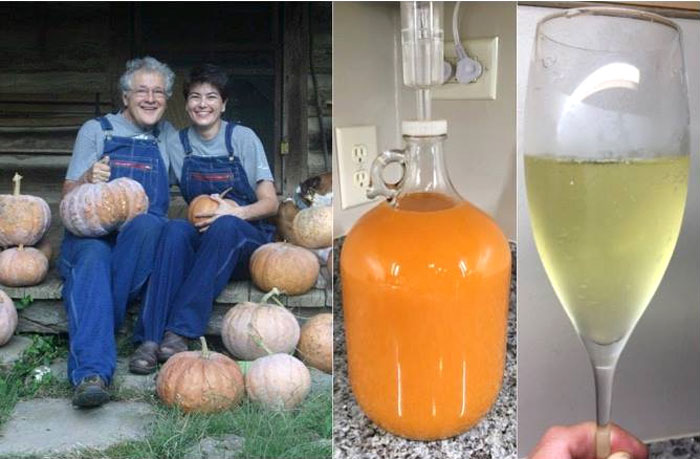
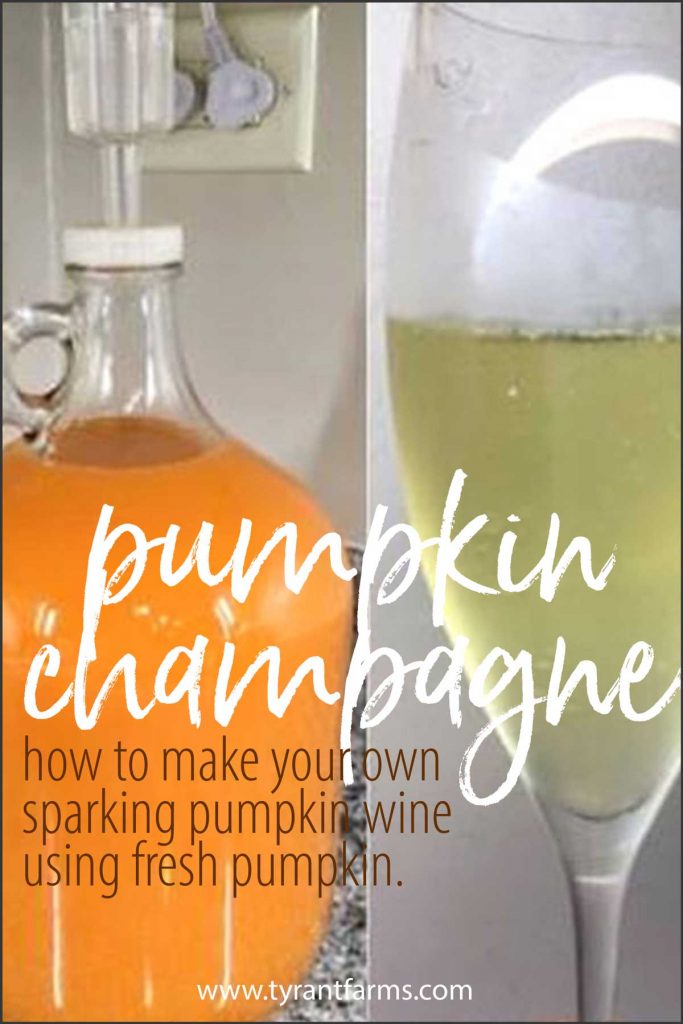
This picture that Andrea sent makes us happy. From pumpkin to carboy to glass, you can see the pumpkin’s transition to champagne. Andrea notes: “You can’t see the nice bubbles in the champagne because of the condensation on the glass.”
Of course, in between music, food, and conversation, Tony and Andrea helped us start our own batch of Williamson pumpkin champagne.
Below are the ingredients used, plus step-by-step instructions. Below the recipe, we have additional process photos you can reference when making your own pumpkin champagne!
WARNING: We’ll state this multiple times, you MUST use champagne bottles when making sparkling wine/champagne. Regular wine bottles, caps, and corks will not stand up to the enormous pressure created by champagne/sparkling wine and will explode, potentially causing property damage and injury. Please do NOT attempt to make this recipe unless you have the proper bottles and equipment.

Pumpkin champagne
A delightful, bright, and flavorful sparkling wine/champagne made from sweet pumpkins.
Ingredients
- 10 lbs grated sweet pumpkin
- 14 cups water
- 5 lbs organic cane sugar
- 3 tsp fermax yeast/wine nutrient
- 1/4 tsp tannin
- 1/2 tsp pectinase
- 3 tsp acid blend
- 1 campden tablet used before starting fermentation
- 2 packets Lavlin KIV-1116 yeast 1 packet to initiate ferment, 1 packet when bottling
Instructions
-
All implements and containers should be sterilized at each step, preferably using StarSan. All materials and ingredients we use are linked in the section below this recipe card. We used a 3.5 gallon Ss Brewtech stainless steel fermenter for this recipe. Regardless of what you use, we recommend not using plastic (including food grade plastic) due to potential leaching from the plastic in an acidic, microbially active environment.
-
Grate 10 pounds fresh pumpkin (we used a food processor w/ a grater attachment, but a cheese grater works too) and put grated pumpkin in your primary fermenter.
-
Warm 14 cups water on the stove and add 5 pounds organic cane sugar, stirring until it is just dissolved, then let it cool.
-
Add pectinase, yeast NUTRIENT, acid blend, and tannin to sugar water mix. Do NOT add the yeast at this point.
-
Add water to fermenter until it reaches the 3 gallon mark. (You'll lose some liquid each time you rack and you'll want to get at least 7 bottles of champagne out of this recipe.)
-
The specific gravity should be about 1.100 which will give a final ABV of about 14.5%. Crush 1 Campden tablet and add to mixture. Let sit for 24 hours with a thin towel on top so the mixture can breathe. This is important so the sulfur dioxide from the Campden tablets can gas off.
-
After 24 hours, remove 1 cup liquid and pour into a sterilized jar. Add 1 packet of wine yeast, stir, cover with thin towel, and let sit for 1-2 hours until the yeast is proofed (very active).
-
Add yeast/liquid mixture to main pumpkin mixture, stir and cover with thin towel for 2 days, stirring at least twice each day (morning and evening). Be sure to sterilize your spoon! In this instance, you’re leaving the mixture free to mix with air since the rapidly dividing yeast needs more oxygen than it can access through an airlock.
-
On the third day, put a solid, non-breathable lid on the primary fermenter with an airlock. Continue to stir twice a day for 5 to 6 more days. The air lock should no longer be bubbling vigorously by the end.
-
Racking. Specific gravity reading upon racking our mixtures was 1.020. Strain the pumpkin from the mixture and siphon from the primary fermenter to a glass carboy/jug with an air lock. (*Note: You can also rack off by siphoning to a temporary container, dispose of the lees, then put the mixture back in your primary fermenter. We put ours into a glass carboy because we wanted to start a new elderberry wine in our wide-topped Ss stainless steel fermenter.) Put the carboy in a cool, dark place for a month.
-
After one month, rack off the lees into a sterilized stock pot, clean out the carboy to remove lees, and siphon from the stock pot back into the carboy. Rack up to two more times to remove any remaining sediment/lees before bottling. This may take a couple months as the small particles slowly descend and settle on the bottom of the carboy.
-
Bottling is the tricky and potentially dangerous part, so please read carefully: Your yeast should have broken down nearly all the sugar in your ferment, so to get a final bubbly end product you'll need to either: Option 1) bottle as-is and use a DrinkMate before drinking to add bubbles (safest option, but smaller bubbles); Option 2) Andrea's method of adding more sugar & yeast when bottling (riskier than Option 1 but great results).
-
Instructions for Option 1: Ferment to zero residual sugar, bottle in sterilized bottles, and let mature for at least 3 months. Then chill the bottle until it’s very cold, pour into two DrinkMate bottles and carbonate to add the bubbles. The bubbles are pretty fine – not the large bubbles you get with water and traditional sparkling wines/champagnes.
-
Instructions for Option 2: Done while NOT using champagne bottles + champagne corks/tie downs (which are specifically designed to withstand enormous pressure), this method can result in "bottle bombs." Yes, that means exploding bottles of liquid and flying glass. USE CHAMPAGNE BOTTLES ONLY or do NOT use this method.
Put 10 grams of sugar in each empty bottle. Then take 1 cup of the wine, add a couple tablespoons of sugar and a packet of Lalvin K1-V1116 yeast. Stir it and wait until sugar is dissolved and yeast is activated. Then, pour it back into the carboy, stir again to mix well. Then bottle into sanitized bottles.
From Andrea: "The nice thing about pumpkin champagne making is this: if the second, in -bottle fermentation fails, the added sugar goes nicely with the fruity notes of the wine. It isn’t overly sweet, but provides the needed “oomph” for a fruit wine. If, on the other hand, the second fermentation works, the bubbles balance the acidity of the wine. It’s a win-win!"
-
After 3 months, you can start enjoying your own homemade pumpkin champagne.
Direct from Andrea: "I also store the bottles upright in a big plastic bin. The reason is that, with in-bottle fermentation, one gets sediment: fluffy yeast clouds. By storing it upright, from fermentation to chilling in the fridge, I keep that sludge in the bottom. I then pour glasses until there’s about an inch left in the bottle (which can be sucked down by a yeast-loving or somewhat alcoholic friend."
-
Remember to chill your pumpkin champagne before serving!
Tools and supplies used in this pumpkin champagne recipe:
- 3.5 gallon stainless steel Ss Brewtech fermenter/brew bucket
- Fermtech auto-siphon with tubing and clamp
- 5 gallon glass carboy *optional – only if transferring from Ss fermenter*
- No 7 Stopper for 5 Gallon Carboy *optional – only if transferring from Ss fermenter*
- Specific gravity hydrometer test kit
- twin bubble airlocks for wine making
- Bundle: wine tannin, pectic enzyme, acid blend
- Fermax yeast/wine nutrient
- Star San (for sanitizing instruments) – you’ll need to dilute this as per product instructions and add it to spray bottle
- Campden tablets (aka Potassium Metabisulfite)
- Yeast – Lalvin K1-V1116
- Champagne stoppers
- Champagne cages
- Champagne bottles (we reused old ones)
Pumpkin champagne process photos
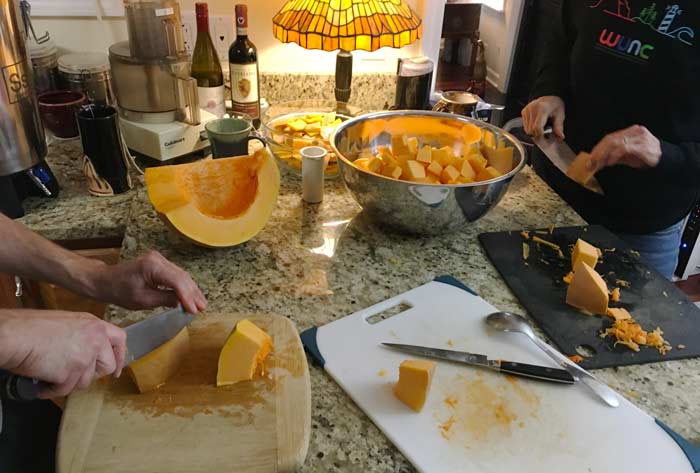
Everybody pitching in on pumpkin chopping. We’re getting these prepped into small enough chunks (with skin removed) to fit into a food processor with a grating attachment.

Grating the chunks of Williamson pumpkin in a food processor.
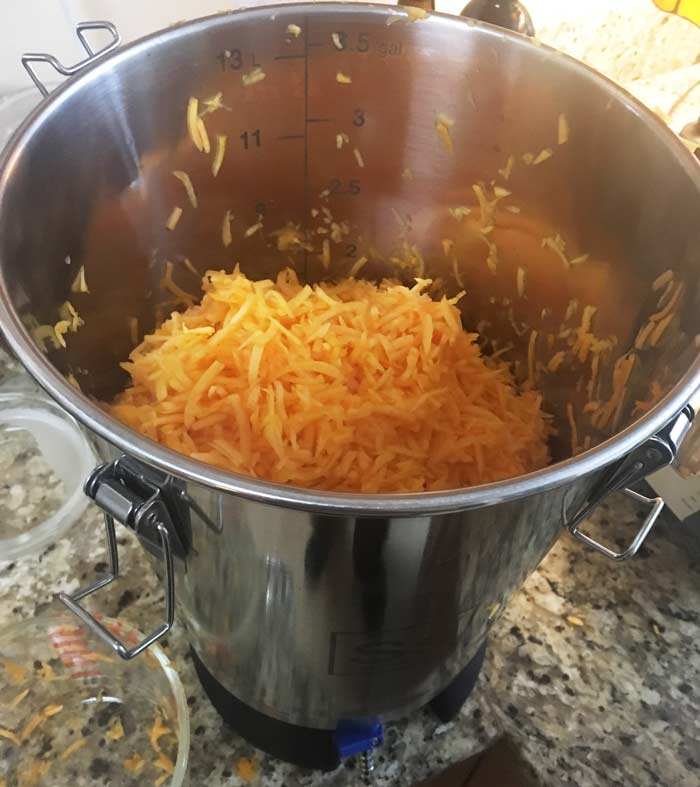
The grated pumpkin in our 3.5 gallon Ss Brewtech stainless steel fermenter. We love this home brewing contraption! We’ve had various fermenting experiments in it non-stop since we broke it in with this pumpkin champagne recipe.
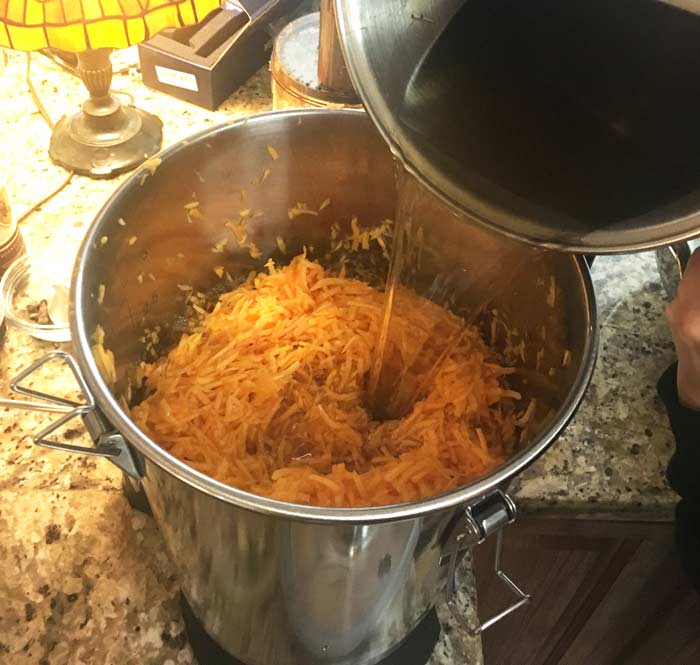
Adding the sugar water – which the yeast (added later) digests and converts to alcohol along with the sugar in the pumpkin. You’ll also be adding a Campden tablet here to kill any unwanted yeast and bacteria.
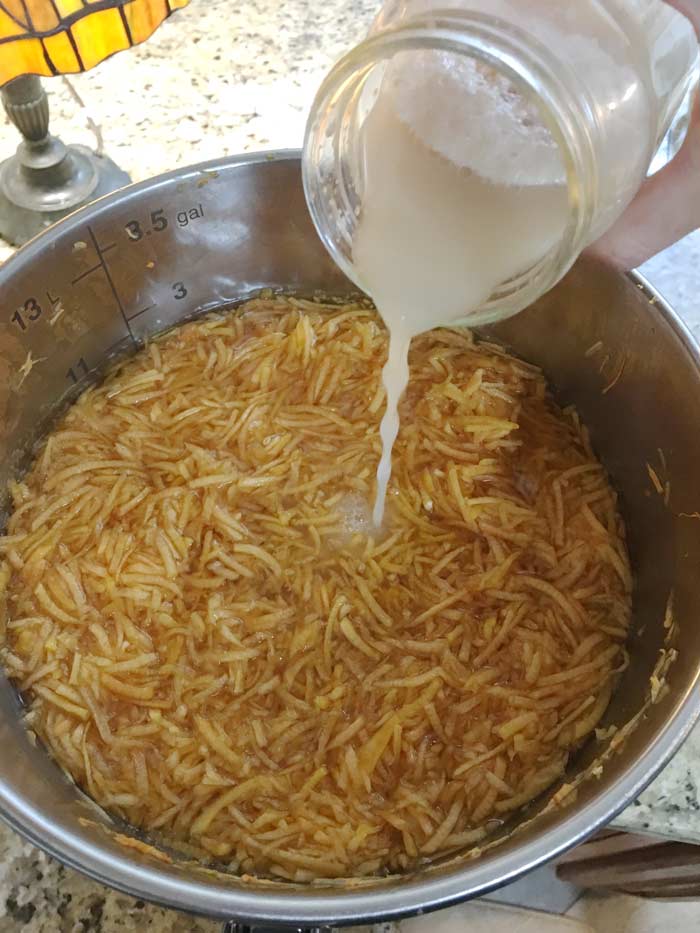
24 hours after the Campden tablet has been added and had a chance to wear off, you’ll be adding your champagne yeast. Also notice how much color has already leached out of the grated pumpkin into the water.
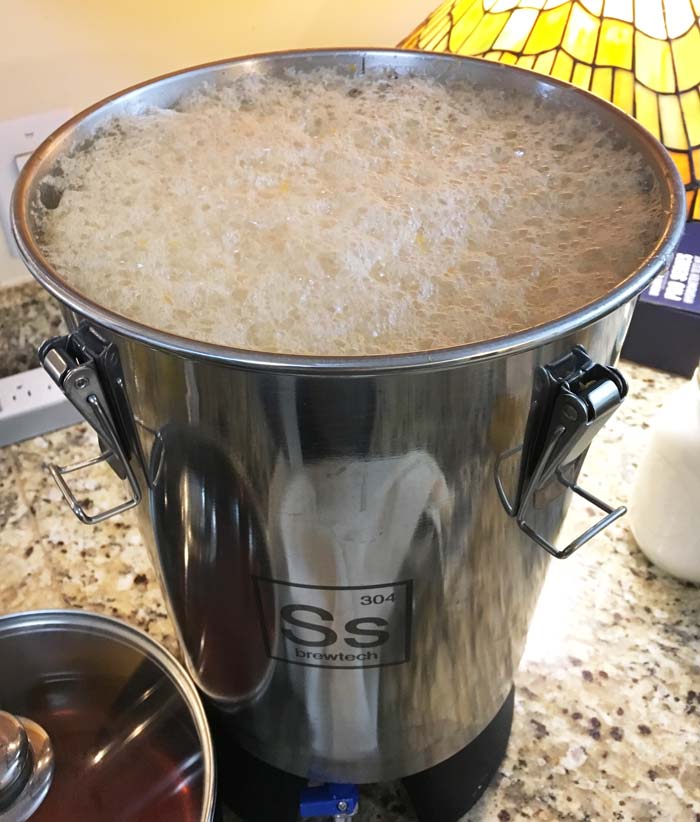
Boom! 24 hours later and the yeast is fermenting away, actively digesting the sugars. The towel covering was removed for this photo – you’ll want to keep a breathable towel/linen over yours to keep things out while letting the ferment breathe. Also, be sure to stir the mix vigorously at least twice a day with a sterilized instrument during this step.
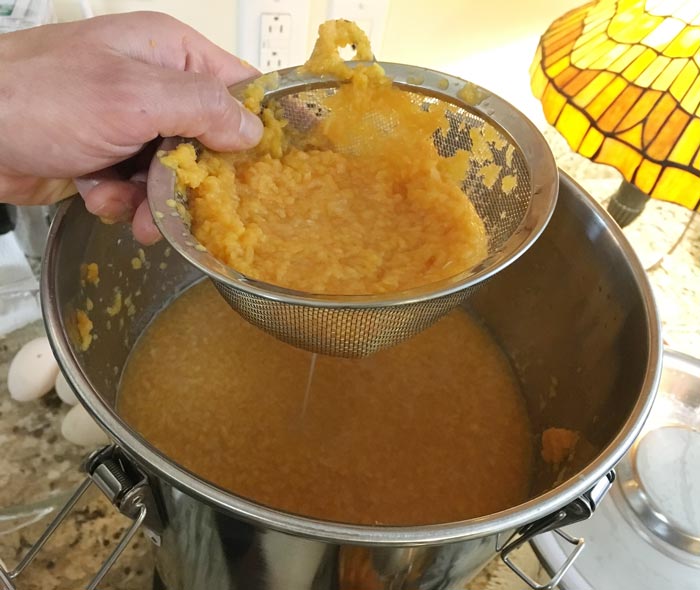
Straining out the pumpkin before racking to a carboy. Once again, be sure that your hands and anything touching the liquid has been thoroughly sanitized so as not to introduce lots of unwanted microbes that could compete with your selected champagne yeast.
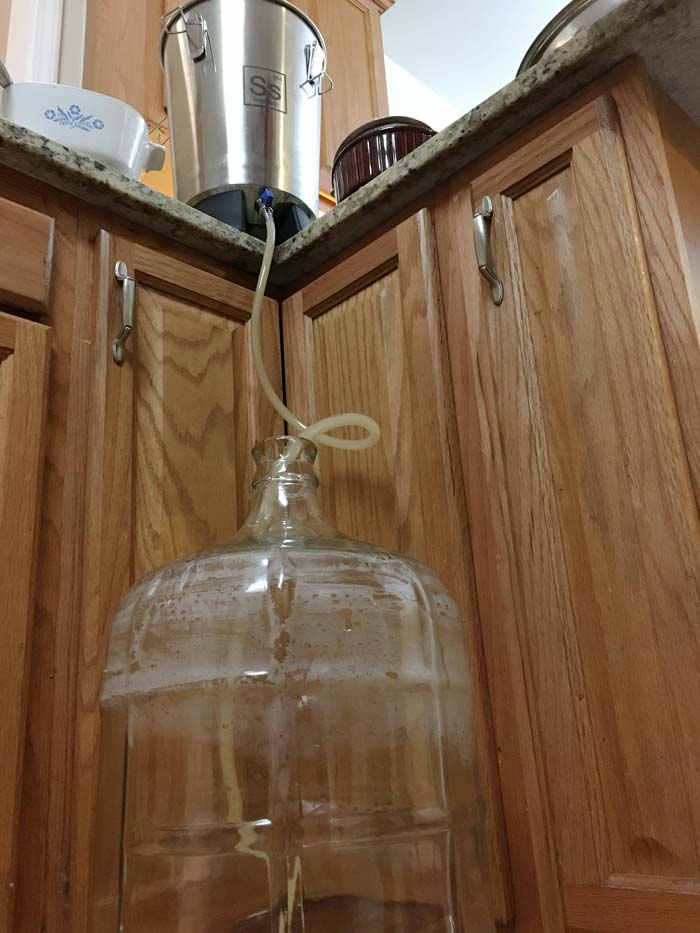
Transferring to carboy. *Note: You can also rack off by siphoning to a temporary container, dispose of the lees/sediment in the bottom of the primary fermenter, then put the mixture back in your primary fermenter. We transferred ours into a glass carboy because we wanted to start a new elderberry wine in our wide-topped Ss stainless steel fermenter. Given the small opening, glass carboys are ideal for long-term fermentation once the solids have been removed from a ferment, but not for starting ferments (it wouldn’t be fun trying to remove chunks of pumpkin from a 2″ opening).

This image shows “lees” at the bottom of our carboy. Lees is the dead yeast and other precipitate that’s heavier than the liquid. You’ll want to rack up your champagne a few more times as it ages and continues fermenting to remove as much lees as possible. If you leave the lees in, you’ll end up with a cloudy champagne, and your friends and family will call you and your champagne bad names. To do this easily (and to bottle easily) you’ll want to use a Fermtech auto-siphon.
How did our pumpkin champagne turn out?
Since The Tyrant is pregnant, we’re currently not drinking alcohol. That means we can’t tell you how our pumpkin champagne has turned out, even though our bottles have aged for the 3 month minimum time in our cool basement.
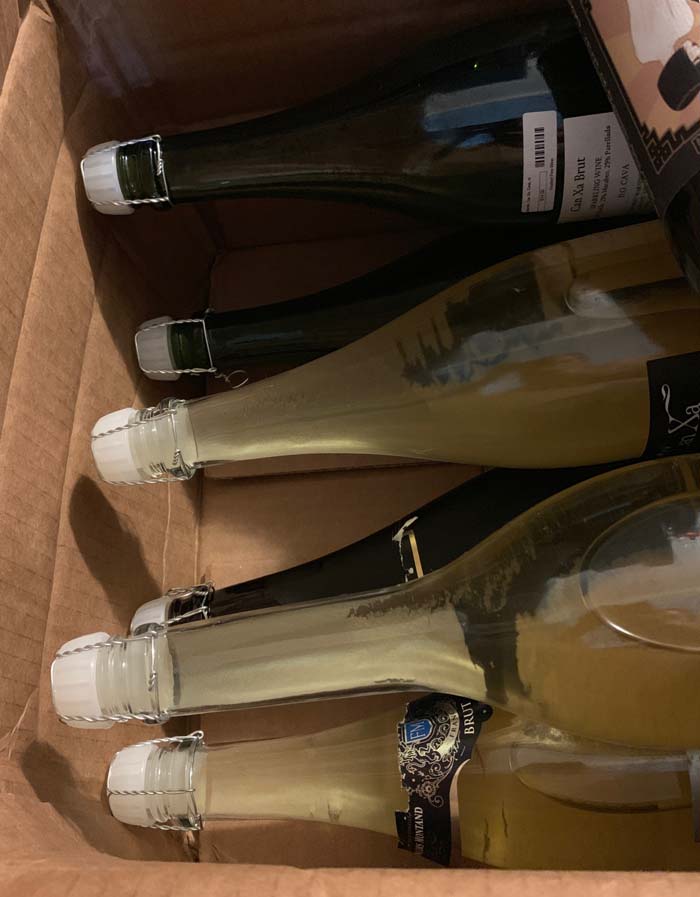
Our bottled pumpkin champagne in a box in our basement waiting for a non-pregnant Tyrant.
Andrea says hers is delicious and only “mildly pumpkiny,” so expect pleasant hints of pumpkin not a slap of pumpkin across your face. We’ll update this article as soon as we’ve had a chance to try our Tony & Andrea Pumpkin Champagne made from Williamson pumpkins!
2021 Update: We’ve enjoyed our pumpkin champagne with multiple groups of people on multiple occasions and we can officially report back that it has been a huge hit! Perfect sparkle/effervescence, complex flavor, and subtle notes of pumpkin on the finish. Even our most wine snobby friends were incredibly impressed!
KIGI,

More pumpkin articles you’ll love from Tyrant Farms:
- The history, origins, and folklore of pumpkins
- How to process and eat your incredible edible pumpkin (including jack-o-lanterns)
- Disappearing whole wheat spiced pumpkin pancakes
- Mom’s pumpkin chili with turkey and black beans
- Fall harvest coffee cake with pumpkins and apples

Like what you're seeing here? Please be sure to subscribe to Tyrant Farms so we can let you know about new articles you'll love.
4 Comments
Ed Warren
October 16, 2020 at 8:31 pmHi! live in Floydada, Tx, self proclaimed pumpkin capital of the world. We grow over 100 varieties of pumpkin and ship them all over the nation. Our pumpkins have been featured at the Dallas arboretum more than once. I would love to have some of the Williamson pumpkin seed. Could you send me a contact for them so I could request some? I am currently venturing into pumpkin wine making and would love to try their recipe. Thanks.
Aaron von Frank
October 17, 2020 at 8:19 amHi Ed! Sure, I’ve got your email and will put you in touch privately in a few minutes.
Anonymous
September 5, 2019 at 8:26 amCongratulations to both you and the Tyrant!
I’d love to try brewing my own alcoholic beverages sometime. I’m grateful you always include links to the equipment you use, whether for gardening/farming, brewing, or animal husbandry. Most people just tell me what they use and I have to put in the “work” to find the equipment (which can be difficult when a simple piece of equipment can be made of different types of metal, have attachments or extra limbs, etc).
Aaron von Frank
May 31, 2020 at 10:36 amThank you! Best of luck starting in on brewing adult beverages at home. We uncorked our first bottle of pumpkin champagne recently and it was outstanding. Maybe you can give this recipe a shot? 🙂